Showing posts with label gardening. Show all posts

Wednesday, March 10, 2021

What to do in the Garden in March - Garden To Do

I want to go out and work in the garden more this year than I have in many years!  The snow has not even melted off my grass or raised beds yet and I am still thinking, I could go out and do this or that.  I have a rule, no visiting the offsite herb garden until April 15.  The day after Tax Day I can go look at the garden and start making my to do list. If I go out there sooner, I will be tempted to just “fix” this or that and walk around in an area that is way too soggy in early spring to resulting in compacting my soil, so I ban myself from my own garden as a result of past missteps! 

However, the home garden is right out the backdoor and nothing can stop me from trekking out there, once I can step off the porch. So I had to ask myself, what can I do in the garden now that would be helpful, not harmful in the coming months.

Then I remembered that the tree service removed all my stepping stones so as not to break them when they were removing the logs from the yard. I have a wonderful March project to work on. I should also fix the uneven stone in the Thyme walkway, but that might be a while if this snow pile is any indication.  You cannot even see that there are thyme plants under there yet.


Stepping stones in the lawn and garden can become unstable due to excessive rains or heaving, caused by alternating periods of freezing and thawing. So they too should be stabilized and leveled to make them safe to walk on. To fix, this requires that you actually lift the stones and add soil or gravel beneath them. Use a level to verify that they are even with the ground.

Repair a Dry Stacked-Stone Wall

I am also considering replacing the now fully decomposed wood sides to my herb bed with a dry-stacked stone wall.  This is also a great time for you to repair an existing dry stack wall. A dry-stacked stone wall means that they're not actually mortared in place.  However, they do have a tendency to shift during the winter months. As a result, the border becomes a bit unsightly, not to mention dangerous, especially if kids occasionally walk on the stones.

Late winter to early spring is an ideal time to reposition stones. Sometimes minor adjustments are all that's needed; simply moving the larger stones with smaller ones can stabilize the border. It doesn't take all that much time or effort, and the payoff is worth it in terms of enhanced aesthetics and safety. And with the soil being wet and soft this time of year it makes the task even easier.

Correct Tunnels Made by Garden Pests

Unstable stones aren't the only hazards that can lead to a sprained ankle. There are also tunnels and mounds of dirt created by moles and gophers. They too should be leveled with a metal rake and tamped firmly. The exposed soil can later be reseeded with grass seed or left as-is if your turfgrass is the type that tends to spread.

Spring-Flowering Bulbs

It's not unusual for the foliage of early spring-blooming bulbs to turn brown, especially at the tips, when temperatures drop suddenly. Although the foliage may not look all that great, the bulbs themselves will be just fine and will flower pretty much on schedule.

Now is a good time to do a quick sketch of where your bulbs are. This will help when the foliage fades later in the year and you begin planting annuals and perennials in the same bed. You'll have a map of where the bulbs are and avoid destroying them as you dig.

source: Getty Images/istockphoto

Touch Up Mulch

You may need to wait until the snow is gone to do this, but my mulched beds tend to lose snow first, making this an ideal time of year to inspect your mulch, particularly its depth. Chances are organic mulches, especially those made from shredded or chipped wood, have decomposed somewhat or have been washed away by heavy rains.

With a metal rake, fluff your mulch a bit and try to level it out over your garden beds. Along the way, use a ruler to determine the average depth of the mulch. Ideally, you want at least a 2-inch layer, and 3 to 4 inches is OK, especially for southern gardeners.

Winter Pruning Trick

If you haven't already completed pruning your deciduous trees and shrubs, there's still time. Especially if the heavy snow damaged the shrubs in the last big snow.

First, stare at the tree or shrub in question with an eye toward its desired shape. Stare at it from several different perspectives from a distance at various angles, from just a few feet away, and even looking up into its canopy.

Now, rather than doing any pruning, tie some colored ribbon or twine around each limb or branch you think you want to prune. Over the course of several days, each time you walk by the tree or shrub, at different angles and various distances, try to imagine what it will ultimately look like if you were to remove the selected limbs.

Feel free to change your mind. If you're not sure about one of the limbs you've selected, remove the ribbon or move it to another limb. Then re-evaluate your selection. Within a few days, you'll get a better feel for where you should make your pruning cuts and greatly increase your chances of success when you finally make those cuts for real.

Clean your Tools & Pots

If you did not have time during fall cleanup to clean your gardening tools, now is a great time.  Wait for a warm day bring out a bucket and a scrub brush and clean up and sharpen your tools.  I get a set of cheap grill cleaning brushes and use those to scrape and clean my shovels, rakes and hoes.  I use a stone to sharpen my hand trowels to a cutting edge so they can easily slice through the earth.  I like to do this in spring so I can also remove any rust that has formed.

I grow many herbs and flowers in pots so now is the season for me to clean them and get them ready for new plants.  A mixture of 1 part household bleach and 9 parts water is the way to disinfect clay, ceramic and plastic pots.  I clean and remove residue from the inside and then soak them for at least 10 minutes in the disinfecting solution, then spread them out in the sun to dry.  If they need new paint, this is when I spray paint them. 

I like a terra cotta look to all my pots.  It gives my garden a cohesive look.  However real terra cotta is heavy and dries out very quickly, so many of my pots are plastic.  I spray paint them all a terra cotta color so you cannot tell the real from the plastic.

Tarragon and lemon balm
For a bit Later in March

I leave the seed-filled branches up for the birds and animals in winter, but when the grass starts to green, those branches become unsightly. So I will trim down my perennial grasses to about 6 inches tall and tall browned branches on other fall-blooming perennials to ground level.  Tarragon and lemon balm die back in winter, so I want to remove the dead tops once I start to see the new sprouts. Refrain from trimming your lavender, no matter how bad it looks, in March or even April.  It is slow to return and if you trim it too soon it will not bloom in the spring, so take a wait-and-see attitude with lavender.

  • Scrub clay pots.
  • Clean tools.
  • Remove leaves from the bottom of ponds or other water features.


Wednesday, October 25, 2017

Fall Garden Clean-up

How much do you hate cleaning up your garden in the fall?

I used to.  When I looked out my kitchen door and saw more brown than green, I would grimace and think, “…next weekend.”  Inevitably, clean up kept getting pushed back by other, more pleasing events.  But there comes a moment when I cannot put off the inevitable; I have to clean up the garden and put it to bed for the winter. Preferable before the heavy rains set in. But I like brisk weather and a clear brisk fall day is perfect to clean out the garden beds and I know I’ll be glad I did in the spring!


Garden Clean Up Tips
Anyone who has gardened for a few years has come up with their own tips and tricks for making garden clean up a bit easier.  I have discovered a few things that might make life easier for any organic gardener.

Be prepared.  When I go out to clean up, I always bring the tools I’ll need to make it easier.  So my tool chest contains:
1.      1. Scissors – the knots you used to tie up tomatoes will be real tight after a summer of rain and heat.  Trying to pull them off just frustrates.
2.      2. Pruners – if you try to cut back blackberries or blueberries without them, the chances are you’ll do more damage than good.  These small, sharp sheers can cut through up to an inch of stalk or wood.
3.      3. Shovel – I sometimes need to coax some of the plants from the ground.  Eggplant and tomatoes get stems more than an inch in diameter and their roots can extend up to 10 feet from the base of the plant.  So, a bit of shovel power comes in handy.
4.      Rake – I prefer the good, old-fashioned garden rake because it’s heavier than a leaf rake and the tines won’t work against me as I rake up fallen tomatoes and peppers.
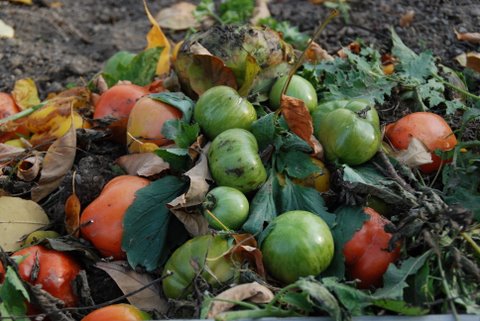
5.      Bucket – I use an empty kitty litter container and I use it to pick up all the tomatoes that hit the ground at the end of the season.
6.      Garden gloves – I also coat my hands in lotion and scrape a bar of soap under my nails to make the cleaning up of me afterward a bit easier.

Clearing the Ground
I actually find this the most motivating.  Pulling off tomato cages, cutting vines out of my trellis and fence and tearing up the roots of the dying plants gives order back to my space and lets me see the promise of next year.  All annual vegetable and herbs plants need to be removed and moved to the compost bin.  The perennials like asparagus, blackberries and most herbs can be thinned, mulched and trimmed one last time.  Save your trimmings of the herbs to use for dinner tonight! If the flowers I use for pest control (and to jazz up the greenery), like marigolds, zinnia, nasturtiums and petunias, are still blooming, I leave them alone.  If they’re finished, they get tossed, too.

One last task remains before you can move from clearing to covering.  If you grew tomatoes, grab a bucket and pick up all of the fallen tomatoes off the ground.  If you don’t you will have a whole lot of baby tomatoes to pull up next year.  This is a gooey task but well worth the effort.  The same is true if you have a large squash or pumpkin patch.  They will send more volunteers than you want to weed out in the spring.

Once the ground is cleared, it’s time to cover it.

Blanketing the Garden
The last step in garden clean up is to lay down ground cover.  In my garden, that means a recipe of cardboard, newspaper, leaves and grass clippings (only use the grass if you do not treat your lawn.)


Cardboard goes down first.  I use it mostly to create a barrier along the edge of my garden where crab grass and creeping Charlie like to lurk, slip under the edges and set up house in my garden.

Once the cardboard is down, I put down a layer of leaves.  The last layer I put down is grass clippings.  Heavier and denser than leaves, they hold them in place.  Both break down nicely, enriching the soil and making it better, every spring, for the seedlings to grow and thrive.

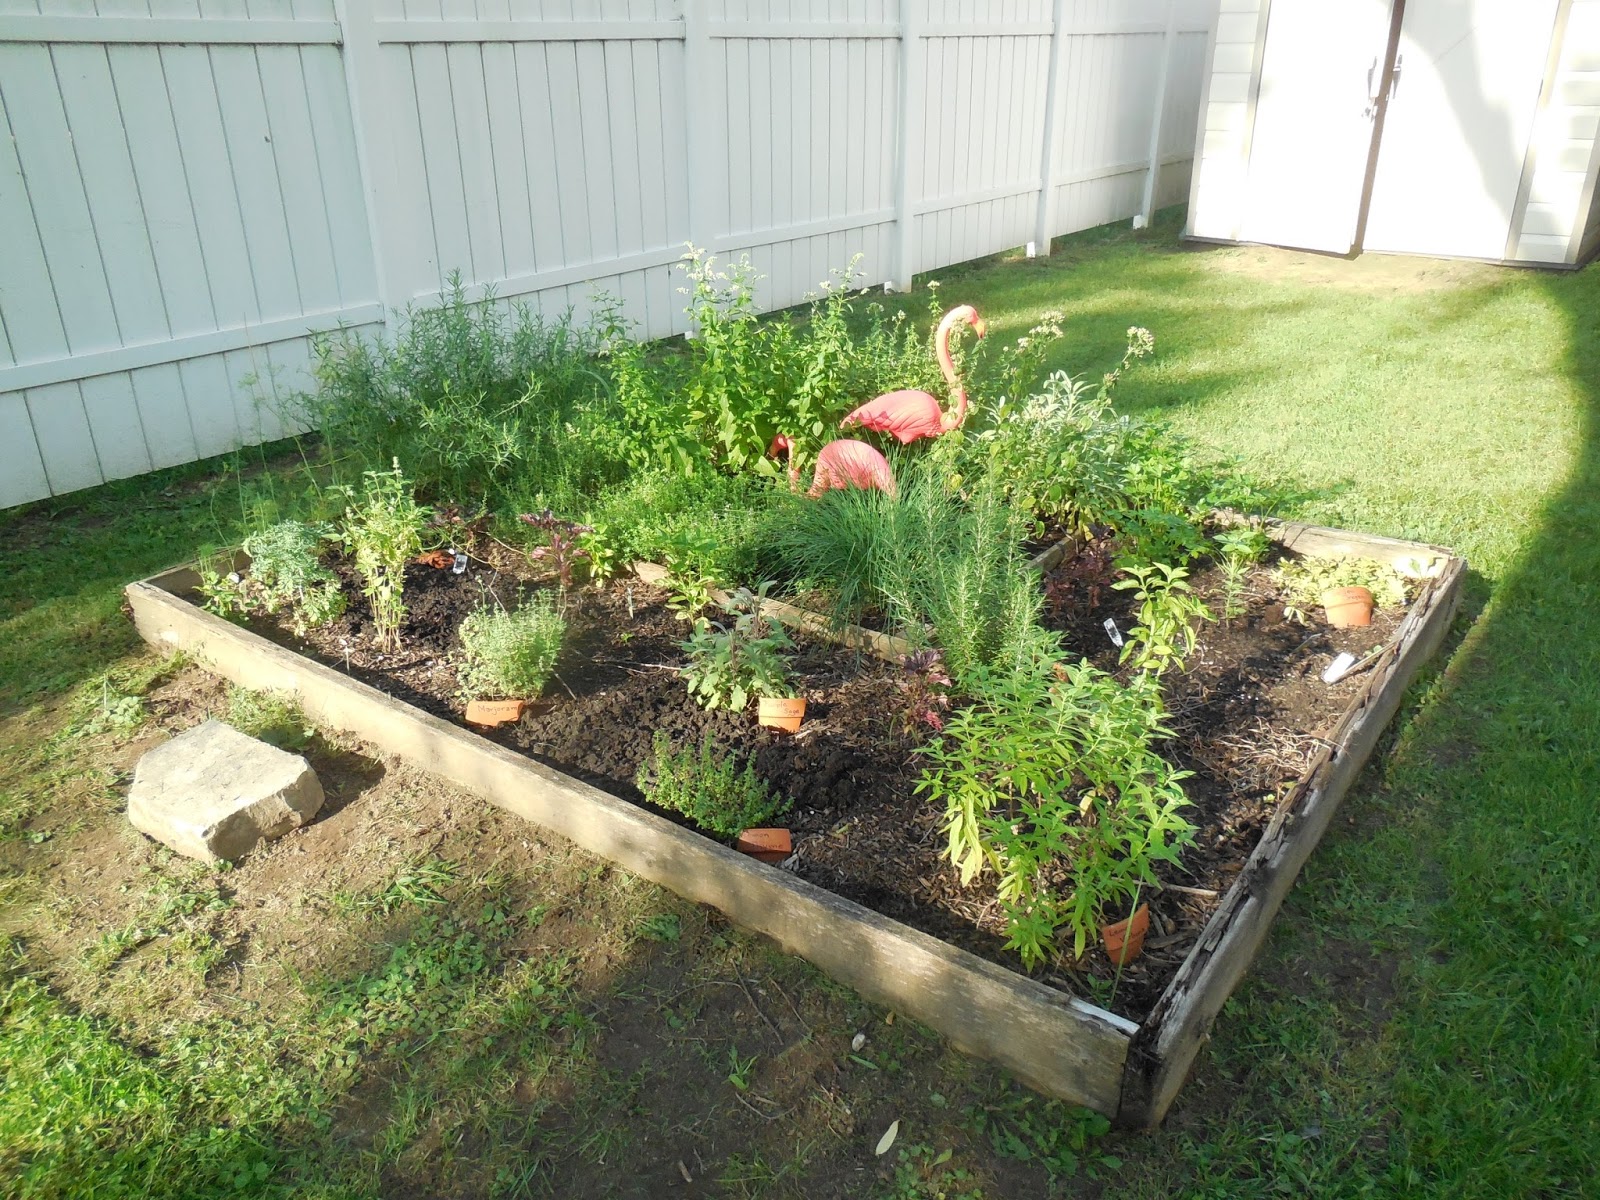
I have raised beds in the yard, but wet winters can cause these to rot so it has been my habit to remove the sides in the fall, use the cardboard to hold the shape in place and replace the beds in spring turning the edges into the middle of the bed and thus turning the soil a bit when I replace the beds. 


Friday, July 21, 2017

Mint Julep Dip - Weekend Recipe

We have a shady area next to the house which is becoming a struggle.  It is hard to get anything to want to grow there.  I have lost more perennials in that garden in just two seasons, than I lost in the flood catastrophe a few years ago.


So one of my solutions was to plant mint there.  Mint will grow anywhere, dry, wet, shade, sun.  But it will not grow as quickly or as well in conditions that are not ideal.  That has always been my way to control mint - put it in a place where it competes with a tree for water, grow it in the shade, etc. That is working in the side yard, but even stunted I am getting a large harvest of mint.  So I decided to create dip with the many surplus mint sprigs I have collected.


Mint Julep Dip

This will remind you of a summer cocktail and go well with warm sweet pastry or plain donuts or muffins.


6 Tbls. sugar
1 Tbls. packed fresh mint leaves (I used Kentucky Colonel and chocolate mint)
6 ounces of cream cheese, softened (1/4 cup)
1/4 cup milk
2 Tbls. bourbon

In a small bowl, combine sugar and mint leaves.  Using a wooden spoon mash the mint and sugar until fragrant.  Should take about 30 to 60 seconds.  In a blender combine sugar mixture, cream cheese, milk and bourbon.  Cover and process until smooth.  Serve immediately.  Make 1 1/4 cups.

NOTE in photo  I was unable to label the mint plants but peppermint is in the lower right corner, pineapple mint is in the center bottom next to the violet with the heart-shaped leaves.  The Kentucky Colonel is along the fence above the chair and the chocolate mint is against the house.


Monday, April 17, 2017

Growing Herbs in Containers - Planting Containers

We have discussed choose the container and designing the layout in previous posts.  Now it is time to talk about the actual planting.

Make sure that if you plant to use your containers outdoors that the plants you include have been hardened off.   “Hardening off” is the process of moving plants outdoors for a portion of the day to gradually introduce them to the direct sunlight, dry air, and cold nights. You start with a few hours in the shade, then a few in sun and shade then longer periods of time outdoors until they can finally tolerate the flexible outdoor temps.  If you spring the outside on them the plant will often die.  So give your plants a fighting chance by hardening them, especially of they came from your grow lights or from a greenhouse nursery.

Step to planting:


Preparing your containers -- Make sure your containers are clean and free of residue.  A mixture of 6 parts water 1 part bleach can be used to sterilize the pots and remove residual bacteria from previous seasons that can harm new plants.  Make drainage holes in the bottom if they do not already exist.  No holes means drowned plants. Cover the holes with broken pottery shards or coffee filters to keep soil from escaping. If planting a large container cover the shards with some bulky material, like recycled foam peanuts, crumbled paper or even torn folded pieces of cardboard.  The bulk will cut down on the weight.

Fill your container with soil mix.  The amount of soil you put in depends on whether you use seeds or seedlings to plant your herb garden. In general, if you are using seeds, fill your container to about 1 inch from the rim so that you will have room to cover your seeds with a little additional soil.
With plants fill 2 to 3 inches in the bottom, place the plants and fill in around the plants.  Make sure the soil  is well firmed down to give roots more hold.  Peat based soil (often times called growing medium) is better suited for growing seed, not large living plants.  It dries out more quickly and lacks much nutrient value.


Mix nutrients into your soil - It took me years to realize that I was starving my plants to death. Use a manure-based compost or a home made compost that you mix into the soil mixture you use in your pots to provide nutrients, then realize that the soil will become depleted over the season and feeding will be required.  You can make a compost tea or purchase a commercial fertilizer.  I water with compost tea once a week when we reach the height of the growing season in late June (see below for a link to a fertilizing post.)

Make your own potting mix by blending:
5 parts top soil; 2 parts cool compost or mixture of compost and peat moss; 1 part course (not play) sand.  The sand increases the oxygen and the compost provides the organic matter.  Later in the season I use a mix of 50% top soil and 50% compost to top off the pots as the soil sinks.  This adds more nutrients and replaces what is lost to watering.

I also found this recipe among my lecture notes.  I have tried both and have no opinion which is better.  I like using coconut coir instead of peat moss because it is more renewable.


Homemade Soil Recipe:
1 part pre-soaked Coir Peat 
1 part course sand / builders sand (or vermiculite)
2 parts sieved Compost / soil
1 Tbls to 1 cup* Worm Castings or Vermicast (humus) 


Mix equal quantities of pre-soaked coir peat and vermiculite (or coarse sand if using) together well in a separate container. Place the sieved compost Preferably home made but a commercial certified organic soil mix is an alternative if you haven’t got your own.  in your larger final mixing container have.  Add the blended coir peat and sand to this compost/soil, then stir in the worm casing/humus. Check the pH with a meter.  Most plants require a pH of between 6.0 and 7.0 but if you are growing veggies, from my experience, they grow best in the range of 6.2 – 6.8 pH. 

*this is an approximate quantity based on making 12 gallons  of potting mix using a 3 gallon (9 liter) brick of coir peat. Feel free to add more if you have it!  If you can’t access vermicast, you can buy worm castings or use some humus from the bottom of your compost pile that is most decomposed or use good quality compost.


Remove your plants from their nursery pots carefully - When I first started gardening, I would grab it by the stem and pull to get it out of its pot. Often I would just pull the top of the plant off sometimes killing it before I even got started. To avoid this, if you have a six pack of plants, that is made of flexible plastic, hold the plant close to the soil surface (I make a v out of my fingers and place them on either side of the stem) and squeeze the plants out of their holder from the bottom. If the plant is in a nursery pot, try pushing it out from the bottom. If it is root bound, you may have tear or cut any roots off that are sticking out the bottom hole of the pot and slide a knife around the inside of the pot, before the plant will slide out. In extreme cases, you may have to break the pot to free the plant.

If your plant is root bound, which is often the case, make sure to break up the plants roots, either by tearing them or cutting them. Some people simply rough up the roots on the outside by rubbing them, but I'm a little more aggressive and often tear or cut a compacted root ball so the roots will be able to grow freely, not in a circular pattern, which can strangle a plant.

Planting - There are two main things to know when actually planting a plant in a container (or anywhere else for that matter). You want to plant it at the same level that it sits in its nursery pot. So in other words, the level of the soil should stay the same and no more or less of the plant's stem or crown should be covered. You also want to make sure there are no air pockets and your plants' roots are surrounded by soil. In a crowded pot, sometimes it is difficult to put soil in between the plants, but you will need to make sure that you do, or the roots will dry out if they are in an air pocket, and your plant can die. Sometimes you just need to feel around a crowded pot and stuff soil into any holes you feel. It's also a good idea to water a pot right after you plant it, which settles the soil. At that point you can go back and fill in any holes or depressions with extra soil.


Give your containers a good watering!


Position pots of sun-loving plants where they will have at least 5 or six hours of strong light every day.  Without that number of hours stay with bay, lemon balm, mint, parsley, thyme and scented geraniums.

Watering - watering of container plants is a daily requirement if they are in the sun.  Twice a day (morning and evening is ideal).  About 1/2 to 2/3 through the growing season the soil will become depleted of nutrients so prepare in advance to have a fertilizer at the ready to add to your watering routine to keep the plants healthy.  For more details on fertilizing containers, check out this blog post from 2013.

Tuesday, March 14, 2017

Planning a garden in Four Squares

Some of my favorite days are spent when it is raining and dingy and I turn on all the lights in my workroom and drag out my favorite garden planning books and start to design gardens.  Sometimes they are gardens for my home, sometimes they are gardens for my patio and sometimes they are gardens for some imaginary house I will own with limitless garden space and someone else who will weed it.

Four Square Garden in Williamsburg
In the process of these imaginings I have come up with several great, reproducible ideas for gardens that I thought I could share.  These may help you with ideas for your own space so do not be afraid to borrow all the ideas you can use.

As will my Cottage Garden Plans there will be several different plans presented over several days so you can see the variety this style provides.  Unlike a Cottage Garden, a Four Square Garden is an organized and symmetrical plan.

This Four  Square garden is in Ohio
FOUR SQUARE

My husband and I believe the perfect home will be a four square style bungalow and we have been searching for one for years without much success.  However, in sympathy to this I created a garden space consisting of four even squares joined at the center with a decoration.  Although some days that center changes from a pain path into an elaborate container structure or a three dimensional abstract sculpture. Each of the Squares is its own individual theme garden. I like this design because I could call it my "Backyard Patches."


The squares each measure 9 feet by 9 feet this allows for easy reaching for 3 feet in from each side.  I run a path diagonally through each square to give access the to center spaces.  In one design of this garden I made a each square a different use for the herbs: Bath herbs, Tea herbs, Culinary herbs and Medicinal herbs.

Although many herbs cross over from one category to the other I was still able to fill each space with unique herbs.  And I could choose more unusual medicinal or tea herbs when the basic herbs seemed to end up in the culinary patch.  Here were the plants by section:

Culinary                                                               Tea
   Mustard                                                                     bergamot
   Cilantro                                                                      lemon balm
   Dill                                                                             lemon grass
   Nasturtiums                                                                lemon verbena
   Fennel                                                                        anise hyssop
   Chives                                                                        chamomile
   Marjoram                                                                   hyssop
   Oregano                                                                     mints              
   Parsley                                                                       scented geraniums
   Savory                                                                        catnip
   Tarragon                                                                     Meadowsweet
   Thyme                                                                        marigold, scented
   caraway
   lovage

Bath                                                                     Medicinal

   Comfrey                                                                      comfrey
   Chickweed                                                                  feverfew
   Nettles                                                                         penny royal
   Lavender                                                                     sage
   Rosemary                                                                    southernwood
   Sage                                                                            thyme
   Marjoram                                                                     borage
   Chamomile                                                                  valerian
   Roses                                                                           betony
   Aloe                                                                            marsh mallow
   Witch hazel                                                                 sage
   Lady’s mantle                                                             ginger
   Peppermint                                                                  St. John’s Wort
   Lemon balm                                                                Echinacea
   Calendula                                                                    primrose
   Clary sage                                                                   catnip
   Thyme                                                                         eyebright
   Yarrow                                                                        sweet cicely


The numbers match the layout in the photo above.

Another Four Square pattern I crafted was the single plant version.  This one has smaller squares within the squares each one containing multiple varieties of a single species, like Basil, Mint, Lemon, and Thyme (I'll use any excuse to plant a variety of thyme species.)

Here is the Plant arrangement list for the drawing above:

Lemon Herbs
Lemon basil
Sorrel
Lemon balm
Lemon thyme
Bergamot

Basils
tulsi basil (holy)
sweet basil spicy globe basil
purple basil
purple ruffled basil
lemon basil
lime basil
basil genovese

Garlic and Onion
onion chives
garlic chives
shallots

Sages
Common sage
Bergarten Sage
tri-color sage
purple sage
golden sage
pineapple sage (focal)
mint

Thyme varieties
lemon thyme
common thyme
silver thyme
golden thyme
wedgewood thyme
french thyme
english thyme

Mints
peppermint
spearmint
apple mint
variegated apple mint
pennyroyal
pineapple mint
curly mint
Corsican mint


Flowering Herbs
Although most herbs flower, as a dedicated herb grower I usually clip the flower heads off as soon as they arrive, but there are some herbs that you actually grow for the flowers.

Scented Marigold
Mexican mint marigold
bergamot
calendula (Pot marigod)
pineapple sage
Hyssop and anise hyssop

My favorite by far and the one that took me the most time to complete a design for was a color four square garden.  This one was designed with four complimentary colors and a color matching path.  Rather than put a path down the middle of of each square I made the squares only 6 by 6 feet so you could reach all the plants from the outside path.  Notice However that the colors were not placed in squares but in triangles to get the most attractive contrast when viewed from a distance or from above.

Silver
Peruvian sage
common sage
Bergarten sage
lavender
silver thyme / wedgewood thyme

Dark green to purple
peppermint
winter savory
purple sage
purple basil

Bright green
lemon balm
lemon basil
pineapple mint
lemon grass
variegated thyme
variegated mint

Golden
golden sage
golden thyme
calendula
lemon scented marigolds

With this garden I also planned a center diamond to accent the colors with a tiered raised bed
the bottom tier was dark green with rosemary and creeping thyme, the second tier silver with dusty miller and the third tier was purple and green with purple ruffled basil and red flowering thyme

Friday, September 16, 2016

Backyard Garden Update September

All we have been doing this month is harvesting more vegetables.  My tomatoes, herbs and cucumbers all won blue ribbons at the end of August, so I was pleased.  I expect to have more tomatoes to enter and some flowers this month.  Trying to decide which herbs to submit this time.  I have Rue, golden oregano and rosemary that all look spectacular right now.

the cats gave me the cat art for my birthday


The side yard is actually beginning to look like a garden area.  We acquired some perennial plants for shade in August and they are doing well.  I expect they will look wonderful next year.  I got a wooden chair from someone's curbside that adds just the right touch against the fence and this week I am making cement path steps.  I will post a HOW to on that.

The acorn squash is producing well, but how can it not with no competition in the bed now that the corn is gone.

Tomatoes are still prolific, much salsa and sauce has been made.  Salsa was canned, sauce was frozen.

salsa
herb garden rosemary at center left; golden oregano on right

Making my "next year" list -- So far it includes:

Melon/musk melon or cantaloupe
One plant of baking pumpkins
Spaghetti Squash (Hubby loves it with homemade sauce)
No early girl tomatoes next year, try a dwarf tomato instead I think

Another herb bed, this one is full!


Tuesday, July 26, 2016

Backyard Garden Update July

July was a whole lot of let it grow.

These are some of the plants in bloom


 Mabel Grey Scented Geranium

 
 Calendula just before it began to bloom.
 Nasturtiums
 Swamp Milkweed


 Gazania
 Anise Hyssop

 Yarrow

 Artemesia

The back yard enjoying growth and decoration.  We added a third trellis back by the fence for Hyacinth Bean.  I got some seed from the Garden Club and planted them along the bottom.  The trellis is to keep Chas from trimming them down before they get big enough to grow on the trellis.  Hyacinth bean can grow inches in a day, so although an annual it can cover the trellis by the end of the season with no problem.


 The peas have taken over the string.  I am not sure what to do now that they are higher than the posts.


 Scented geraniums by the back door.


 The vegetable garden is getting tall and full with much potential by the end of the month.


The herbs seemed to be growing more slowly than I expected so I started a program of adding compost tea and new rich soil and compost to the garden in 2 week intervals to see if there is improvement.  By month end they are beginning to get better.


 The rain garden in mid summer


 By month end the calendula and Nasturtiums joined the rest of the flowers in bloom!


Related Posts Plugin for WordPress, Blogger...