Showing posts with label fall. Show all posts

Friday, September 22, 2023

Pumpkin Spice Harvest Collection

We have been making a special spice blend for the fall and winter season since about 2001. It contains cinnamon, cloves, nutmeg, ginger, and my secret ingredient lemon peel -- which makes it perfect for pies, mixed drinks, and baking. I have called it many things in the past (Spicy Dessert Blend, Cinnful Dessert Blend, and Pumpkin Spice Blend.)  We are currently using Pumpkin Spice Blend because folks tend to know what that means when they see it. This is a great substitute for Apple Pie Spice or Pumpkin Pie Spice in your seasonal baking with much less bitterness.  


Pumpkin Spice Blend with Happy Pumpkin Spice Season wall plaque

The exciting thing to me about this blend is its versatility.  You can use it to make cinnamon toast, sprinkle it in your latte for that seasonal spice flavor, or you can use it in baking recipes.

In fact, we created an entire selection of baking products using this blend as the main flavor.  We have scones, muffins, pancake mix, oatmeal cookies and even an instant latte.  To make them easier to shop we collected them all with our fall teas and cider seasonings into a collection- Pumpkin Spice Harvest Collection and you get all the details on our website: www.backyardpatch.com


In the mean time here are a few great recipes you can try with our Pumpkin Spice Blend.  Although the flavor won't be nearly as fun, you can substitute ground cinnamon until your Backyard Patch Pumpkin Spice Blend arrives.

Perfect Cinnamon Toast

Blend together, then use as a sprinkle on rice pudding, unbaked muffins, and especially on buttered toast.


Outdoor Party Punch

Add spice mixture and sugar to cider and juice.  Simmer for 20 minutes, stirring occasionally.  Add fruit slices and raisins (if used) and simmer slowly for 30 minutes.  Strain.  Serve in mugs steaming hot.  For added fun provide cinnamon stick stirs.

SOFT SPICE BARS

In a mixing bowl, combine butter, 1 cup sugar and molasses.  Beat in egg until smooth.  Combine flour, baking soda, BYP Pumpkin Spice Blend and salt in another bowl.  Stir into molasses mixture  Spread into greased 15"x10"x1" baking pan.  Sprinkle with remaining sugar and bake at 375 degrees or until lightly browned.  Do not over bake. Cool on wire rack.  Yield 2 1/2 doz. bars. 


And if you still cannot get enough, check out our previous recipes shared on this blog using Pumpkin Spice Blend when it was called -- Cinnful Dessert Blend


Wednesday, October 25, 2017

Fall Garden Clean-up

How much do you hate cleaning up your garden in the fall?

I used to.  When I looked out my kitchen door and saw more brown than green, I would grimace and think, “…next weekend.”  Inevitably, clean up kept getting pushed back by other, more pleasing events.  But there comes a moment when I cannot put off the inevitable; I have to clean up the garden and put it to bed for the winter. Preferable before the heavy rains set in. But I like brisk weather and a clear brisk fall day is perfect to clean out the garden beds and I know I’ll be glad I did in the spring!


Garden Clean Up Tips
Anyone who has gardened for a few years has come up with their own tips and tricks for making garden clean up a bit easier.  I have discovered a few things that might make life easier for any organic gardener.

Be prepared.  When I go out to clean up, I always bring the tools I’ll need to make it easier.  So my tool chest contains:
1.      1. Scissors – the knots you used to tie up tomatoes will be real tight after a summer of rain and heat.  Trying to pull them off just frustrates.
2.      2. Pruners – if you try to cut back blackberries or blueberries without them, the chances are you’ll do more damage than good.  These small, sharp sheers can cut through up to an inch of stalk or wood.
3.      3. Shovel – I sometimes need to coax some of the plants from the ground.  Eggplant and tomatoes get stems more than an inch in diameter and their roots can extend up to 10 feet from the base of the plant.  So, a bit of shovel power comes in handy.
4.      Rake – I prefer the good, old-fashioned garden rake because it’s heavier than a leaf rake and the tines won’t work against me as I rake up fallen tomatoes and peppers.
5.      Bucket – I use an empty kitty litter container and I use it to pick up all the tomatoes that hit the ground at the end of the season.
6.      Garden gloves – I also coat my hands in lotion and scrape a bar of soap under my nails to make the cleaning up of me afterward a bit easier.

Clearing the Ground
I actually find this the most motivating.  Pulling off tomato cages, cutting vines out of my trellis and fence and tearing up the roots of the dying plants gives order back to my space and lets me see the promise of next year.  All annual vegetable and herbs plants need to be removed and moved to the compost bin.  The perennials like asparagus, blackberries and most herbs can be thinned, mulched and trimmed one last time.  Save your trimmings of the herbs to use for dinner tonight! If the flowers I use for pest control (and to jazz up the greenery), like marigolds, zinnia, nasturtiums and petunias, are still blooming, I leave them alone.  If they’re finished, they get tossed, too.

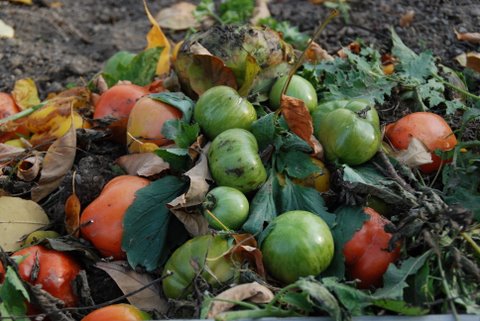
One last task remains before you can move from clearing to covering.  If you grew tomatoes, grab a bucket and pick up all of the fallen tomatoes off the ground.  If you don’t you will have a whole lot of baby tomatoes to pull up next year.  This is a gooey task but well worth the effort.  The same is true if you have a large squash or pumpkin patch.  They will send more volunteers than you want to weed out in the spring.

Once the ground is cleared, it’s time to cover it.

Blanketing the Garden
The last step in garden clean up is to lay down ground cover.  In my garden, that means a recipe of cardboard, newspaper, leaves and grass clippings (only use the grass if you do not treat your lawn.)


Cardboard goes down first.  I use it mostly to create a barrier along the edge of my garden where crab grass and creeping Charlie like to lurk, slip under the edges and set up house in my garden.

Once the cardboard is down, I put down a layer of leaves.  The last layer I put down is grass clippings.  Heavier and denser than leaves, they hold them in place.  Both break down nicely, enriching the soil and making it better, every spring, for the seedlings to grow and thrive.

I have raised beds in the yard, but wet winters can cause these to rot so it has been my habit to remove the sides in the fall, use the cardboard to hold the shape in place and replace the beds in spring turning the edges into the middle of the bed and thus turning the soil a bit when I replace the beds. 


Monday, October 6, 2014

Fall Herbal teas

In the Fall I begin thinking about making new tea blends.  I do not know why the fall affects me that way, but as soon as the evenings cool, not only am I making tea, but I am crafting new tea blends in my head.  It could be the abundance of dried material that I have available come fall or it could be a reaction to the gathering of scents from the garden that I have absorbed during the growing season.  Either way I start formulating blends. 

Some of this mental formulating I  turn into blends to try and each Fall I make two tea blends that are only available only until January that i market to Backyard Patch customers.. This year they are:

Silver and Gold
An all herb blend of silver sage with calendula petals and chamomile for gold along with a touch of cinnamon and the robust flavor of marjoram make this a flavorful and relaxing blend for evening drinking around the warm fire.
 
2013 Tea blend "Comfort & Joy"

Holly and Ivy
I crafted a wonderful red and green blend this year.  Rooibos (Honey Bush) with Green Tea mixed with a bit of hibiscus and rose hips and a touch of lemon balm make this refreshing tea perfect for Christmas morning.
To get you in a tea mood I also have some ideas for making your own tea at home. Try out one of these recipes, or let them inspire you to explore your pantry and whip up some tasty brews with whatever ingredients you have on hand.

Seasonal Spices --

Star Anise, Allspice, and Orange
In a small pot, combine 2 whole star anise, 2 dried organic orange peels, and 5 allspice berries. Add 2 cups of water and bring to a boil, then turn off the heat and steep for 5 minutes, covered. Strain and drink.


Apple and Cinnamon
In a small pot, combine ½ cup dried apples and 1 cinnamon stick. Add 2 cups of water and bring to a boil, then turn off the heat and steep for 5 minutes, covered. Pour the tea into a mug and drink, and then munch on the soft, warm apple slices at the bottom! You can reuse the cinnamon stick several times.

Seasonal Healing --

Ginger, Thyme, Cayenne, Lemon
Combine 1 teaspoon dried ginger and 1 teaspoon thyme in a small pot. Add 2 cups of water and bring to a boil, then turn off the heat and steep for 5 minutes, covered. Strain the tea into a mug and add a pinch of cayenne powder and a dash of fresh lemon juice. This brew will help boost immunity in cold and flu season. Plus the cayenne adds a bit of clearing for better breathing.


Mint, Lemon and Fennel Seed
Combine 1 tsp any kind of mint with 1 tsp. lemon peel or lemon herbs (like lemon balm, lemon thyme or lemon grass) in a tea pot.  Pour over 2 cups of boiling water and allow to steep for 5 minutes.  Add a few seeds of fennel just before you strain into cups. This will sweeten and give it a licorice kick.  You can add a bit of lemon and more sweetness with honey if you want.  The lemon and mint will soothe sore throats and make breathing easier.


What are some of your favorite fall tea combinations?

Thursday, October 18, 2012

Drying Your Herbs

I've chatted on this subject before, but I find that it helps to repeat this as new folks who have never worked with herbs may not realize how simple it is to dry herbs for winter use.


Ways to dry:

  1. Hang Drying – this is ideal for any long-stemmed herbs, tarragon, lavender, sage, rosemary, mints, lemon balm, etc.

Take stems and bundle together, tying them or holding them with a rubber band.  Depending on the size of the stem 10 to 12 stems is a good size bundle.  Choose a hanging location that has good air circulation, minimal light, especially sunlight, and dust.  In my first home I suspended a rack from the ceiling in the basement, draped a white bed sheet over the top to collect the dust and had plenty of air circulation under and around the herbs.  The average drying time is 1 to 2 weeks.  In humid places, like Illinois, running a dehumidifier during the muggy months can help.

Once they are dry, and you know they are completely dry when they crumble in your hand, you can crumble them into jars for long-term storage.  Or you can leave them on the stem for longer storage by placing them stem and all in a zip lock bag.  Herbs left on the stem will keep their flavor several months longer than those crumbled and a year longer than those ground or powdered.

  1. Screen drying – smaller leaf or stem herbs, flowers and other petite plants are perfect for screen drying.

Place herbs on a window screen.  You can also use cheese cloth stretched over a frame or even lay them out on paper towel on corrugated cardboard.  What you want is good air circulation again and minimal sunlight.  The herbs will dry in a week or less, but you may need to turn them over depending on your air conditions. 

I purchased scratch and dent window screens from a build supply store all the same size and shape.  For this we then crafted a frame where the screens could slide in and out to make access easier once during loading and unloading.


  1. Oven drying – can be used for any herbs, but is best for those that do not do well with longer methods, especially Basil.  You do have to be careful with sage that has a very volatile oil.

Remove the fresh leaves from the stalk and place them on an oven tray.  You can layer the tray with parchment to make it easy to remove.  There are two ways to use the oven, the short method and the long method.  The short method you place the tray in a warm oven (350 to 400 degrees) for only 5 to 9 minutes until the herbs are dry and brittle.  Do not walk away and leave them or you can end up with scorched herbs.  If you have picked the herbs previously (up to 24 hours ahead) you can reduce the oven temp to 250 to 300 degrees. 

The long method is easier because you can set it and forget it.  With the long method you set the over to 350 degrees and allow it to pre-heat.  Then take the tray of herbs and set in the oven after you turn it off.  Leaving the oven door open to allow moisture to escape and allow a couple of hours or overnight for the herbs to dry.  If you have a gas oven with a pilot light, you can use this method without turning the oven on.  It may take 6 to 8 hours to dry the herbs this way.

  1. Refrigeration method – this is perfect for herbs with small leaves, thyme, rosemary, marjoram, or savory.

Place the small leaved herbs on a plate or a square of cardboard laid with paper towel and place in the refrigerator.  You can also do this with basil leaves but the paper towel is required.  You can also place the herbs inside of a paper bag, fold the tip closed and set them in the back of the refrigerator for a few days.  In both cases check them frequently and stir them around to avoid wilting and ensure even drying.  The drying time varies depending on the herb.  Thyme is much faster, while basil may take more time.  Once they are dry place them in containers.

The down side of this method is you need extra space in refrigerator and you can have flavor transfer.  Strong foods stored in the fridge may flavor the herbs and some foods may pick up the flavor of the herbs. My husband loves when I do this becasue I clean the refrigerator before I place the herbs.

Do you have a favorite drying technique?  Which one gives you the most success?  Leave a comment and let’s chat about it.

Wednesday, October 12, 2011

Making a Fall Harvest Stew

Harvest Vegetable Stew

A perfect recipe you can make with vegetables in your garden.  The Olive Oil Dipping Sauce gives this a great hint of garlic.  Serve with crusty bread.  I usually add blanched carrots to this as well.

6 tomatoes, cored and quarters
4 potatoes, peel and cut into large chunks
1 green bell pepper, core and cut in large junks
3 medium zucchini, peeled and cut into 1 1/2 inch rounds cut in half
1 medium onion, peel and cut in half, cut the halves into petals
1/4 tsp. black pepper
1 tsp. salt
1 tsp. red pepper
2 cups water

Prepare all the vegetables, then put into a large pot and simmer until all vegetables are cooked, about 60 to 90 minutes.  If you don't like tomato skins you may pull them out as the tomatoes cook.
Related Posts Plugin for WordPress, Blogger...