Showing posts with label container gardening. Show all posts

Sunday, May 8, 2022

Introducing Herbs into your Garden with a Container

Happy Mother’s Day!  At least once a year I go back to my roots and remind myself why I cannot seem to exist without herbs.  I do not mean why I am a gardener.  That is genetic inheritance.  My grandparents on my mother’s side were farmers.  My grandfather on my father’s side was a flower gardener.  My father’s mother is the one who helped me to plant my first garden with pansies, bleeding hearts, columbine and coral bells among other plants.  So the gardening part was well ingrained before I was 10.  As a result Mother’s Day which is close to the frost free day for my area -- when outdoor gardening risks diminish, is a weekend I love to garden.


Herb gardening is uniquely mine in my family.  I really like to look at flower gardens, but except for a few old fashioned perennials I never grew many flowers.  Instead I prefer greenery, so I think that is why the herbs work so well for me.  And I find it fun to experiment with the vast flavors that herbs provide.  That keeps the scientist hidden inside me happy too!

When you cook with herbs it is not really just about adding fresh or dried chopped herbs to a dish.  It is much more subtle to make an herbal vinegar with fresh herbs and use it to craft a salad dressing or a marinade.  Or produce an herbal butter that you dot over plain steamed vegetables to bring out their true nature.

All of these suggestions can be done with a few herbs in pots on the patio.  So let’s discuss container gardening with herbs!


The most important thing to keep in mind when container gardening is that  this type of herb garden needs some attention in watering and timely pruning. And remember when placing plants in a container is to choose those with similar needs.  Herbs like marjoram, oregano, sage and thyme  all love lots of sun and need good drainage can all be placed together.  Any type of lettuce can be grown with others, but basil does best with other basil.
Herbs can be cross-planted, so let basil and oregano share a pot.  Cilantro and dill with their light leaves look good together. When planting dill or cilantro, sew seed rather than purchasing plants.  In the hot months these will bolt (go to seed) so you can preserve a summer harvest by dropping a few new seed into the pot every two weeks.

If you like to combine herbs in containers, remember to place taller growers in the center and lower growers on the outside edges.  Thyme is a great companion in the pot to Basil, Dill and Tarragon.  Tarragon which can get 3 feet tall in the ground will be a much smaller grower in a pot, so remember to plan accordingly.  When choosing perennials for the container, try dwarf varieties or hybrids which generally have all the flavor and scent of the original cultivar, but often have a more decorative leaf and generally a smaller growing habit.

Planting your Containers


After deciding what herbs you would like to plant, you want to go and get the following supplies:

  • Containers
  • Potting Mix / Soil Mix
  • Herb Seeds and/or herb seedlings
  • Spade
  • Watering can
  • Base filler

A soil mix in the pots high in organic matter is a must.  I create my own blend rather than buying something that may not last the season.  5 parts top soil; 2 parts cool compost or peat moss; 1 part course (not play) sand.  The sand increases the oxygen and the compost provides the organic matter.  Later in the season I use a mix of 50% top soil and 50% compost to top off the pots as the soil sinks.  This adds more nutrients and replaces what is lost to erosion.

Select pots with holes in the bottom or sides, so excess water can escape.

Choose large pots, such as 12- to 24-inch-diameter planters. Choose plastic or composition planters instead of clay, which allow less water to evaporate from the soil.

If you are just starting out, you might want to use herb seedlings as they require less work than growing your herbs from seeds.

Once you have gathered all your supplies together, it's time to start creating your container herb garden!

Place a base filler in the bottom of the pot to aid drainage.  You can use Styrofoam peanuts, crushed aluminum cans, broken clay pots, or anything similar.  About an inch or so in the bottom is great.  Then fill your container with soil mix.  The amount of soil you put in depends on whether you use seeds or seedling to plant your herb garden. In general, if you are using seeds, fill your container to about 1 inch from the rim so that you will have room to cover your seeds with a little additional soil.

Always check the instructions on the seed packet as they will usually give you more detail on how best to plant your seeds. If you are using seedlings on the other hand, you want to cover the base of your container with only a few inches of soil so that you can fit the seedlings in. When you have arranged all your seedlings in the container you can fill the spaces around them with more soil.


As with seeds, you also want to follow the instructions that accompany your seedlings. If your seedlings to do come supplies with instructions, you can try looking up the information on the internet. These instructions are important for telling you the best growing conditions for your herbs. You might need to move your containers around to give them access to sufficient sunlight to help them grow.

Finally when you are done, give your containers a good watering! And of course do not forget to water your herb garden over the coming days.

Follow these steps and it shouldn’t be long before you have a beautiful and bountiful container herb garden just brimming with delicious fresh herbs!

Using the Herbs

There are simple ways to start using herbs.  Like individual sprigs of rosemary over broiled lamb chops;  Or adding ribbons of basil to your completed spaghetti to give it a burse of bright flavor.  Or mixing chopped fresh chives into butter whipped with sour cream for a topping on any kind of potatoes that makes them a special treat.  These can make using herbs simple, fast and give you a new taste on the palette. 

If your window or patio herbs start to get tall, cut them.  Fresh herbs will keep in the refrigerator for several days with the stems wrapped in a damp paper towel and popped into a zip seal bag.  If longer storage is needed, chopped them and place the herbs in an ice cube tray, cover them with water and freeze.  When you cook soup, stews, chili or sauces, just drop in a cube.  If you like many, pop dinner into the crock-pot, remember herbs lose flavor during long cooking times, so just drop in a few cubes when you get home and by the time you are ready to eat the fresh dynamic of the herbs will be released  just by reaching into the freezer.

Just a few last tips:

  1. Chose containers with trays or get trays and fill them with pebbles.  Herbs do not like to have wet feet, but they also like to have a bit of water to draw on in the heat of the day.  Placing the pot in a tray will keep you from watering twice during the hot days of summer.
  2. Don't let your herbs flower, unless you want to look at rather than eat them.  Herb flavors change when they create flowers, so cut those flower heads off to preserve the best flavors for cooking and tea.
  3. Throughout the growing season pinch back the ends of the branches to promote more branching and the production of more leaves to harvest.  Check daily for dryness and water when t he soil is dry about 1" depth.  Do not overwater and provide good drainage.
  4. To test soil for dryness, poke your finger into the soil: If it feels dry to a depth of one inch in a 12 inch pot and two inches in a 24 or larger pot, water.


My Mini Herb Garden 2018

Friday, April 9, 2021

Garden Planning for Containers

I worked the election this week as an election judge.  My reward was to go plant shopping the next day. You can see my haul below.  This trip was a few herbs and mostly annuals for my hanging baskets.  I tend to landscape in shades of green.  As an herb grower, you get into that, as flowers are something you cut off, not encourage, but I love the bright shades of flowers so I grow zinna and sunflowers from seed and put out annual hanging baskets.  Our garden club normally has a plant sale where I buy my baskets, but this year no sale, no baskets.  But if you are looking for native plants, the club will get 10% if you SHOP HERE.

As a result, I need to make my own hanging baskets.  I have plenty of planters, so I went to Redbud Creek Farm in Sheridan, IL.  It is about an hour from me, but worth the drive.  They have herbs, vegetables, annuals and perennials.  The layout is wonderful to wander through. And I will have to go back later in the year to see the herb and vegetable garden during the growing season.


We also stopped at Shady Hill Gardens in Elburn to pick up my scented geraniums - and some lemon thyme which was too aromatic to pass up!


Hanging Basket Design

Designing a hanging basket is about the same as designing a small pot spiller, filler, thriller.  But one does not need a tall exceptional center plant as much as one needs more spiller.  Most hanging baskets hang above eye level so you need the plants to flow over the edge.  That means finding plants that low grow and spread or are viney. My favorite for this is portulaca - a variety of purslane, an edible weedy herb, that will grow well in-ground and spread nicely and in pots, it will cascade.  It is covered with colorful blossoms throughout the summer.

English ivy is a good choice, Sweet potato vine with its unusually shaped leaves and lovely shades of green to dark purple allow you to find versions to suit your design.  Another great spiller is Dichondra.  This version is "Silver Falls." 


Trumpet vine and bougainvillea are popular hanging basket items, but they tend to be grown alone.  Because of their own showy appearance, no extras are needed.

For the thiller I like annual flowers. Bright, colorful, sun-loving annuals that will grow fast and fill the pot to overflowing is the best. For one I chose portulaca in 5 different colors. I love yellow and my husband does to, so we got some yellow and orange ----  to hang in the front yard.  Since I am still working from home, my home desk will overlook it everyday.

As filler I got these pretty white flowers -- 


I think I will have to get a few more. 

I wintered over two ivy.  One variegated with wide leaves and one a more traditional ivy.  The traditional ivy died back terribly due to the lack of humidity in our house, but the other ivy flourished.  The cats will be glad it is no longer growing into their lounging space in the bedroom.


Once we are free of the threat of frost I will put these containers together and take photos of the final versions.  


Sunday, March 14, 2021

Container Gardens - Garden Planning pt 2

I am formal gardener, even if I don’t seem to be.  I like my plants to stay in their own space.  I grow them next to each other, then trim them back to create a border between plants.  I suspect that reflects on my personality in some way. 

I have always leaned toward placing one plant in a container and then grouping the containers in my garden.  I have learned to break this rule to make floral containers to decorate my shade gardens and love it.  Here is my formerly shaded book nook where I could read or play my psaltry and enjoy my garden views with several multi-color flower combos.

That big tree to the left is gone now so the book nook will be full sun this year.  With my red hair, I cannot read in full sun, so I will have to move the reading nook, meaning I can make this into a new garden area.  I have been experimenting in designing containers to go into this area which is planted with Creeping Jenny and Ajuga to give me the opportunity to experiment with what will grow there and how it will look.  After this season, I will make decisions on what I want to plant in that area and hubby will create raised beds for this space for next year!

So here I am sharing a few designs for containers for this corner.  Each of these containers has multiple plants to provide texture and interest in the corner as well as get me used to planting where the plants will crowd one another.  I am learning two things at the same time, and you can too!

If you are into vegetable pots I found some great container ideas with Black Gold soils - Black Gold Spring Salad Pots For Quick, Easy, Fresh Eating

Mediterranean Herb Pots

First is a series of 12-inch pots planted with Mediterranean Herbs.  I think three pots will be perfect to tuck in around larger pots.


                                       2- English Lavender, purple sage, Greek or golden oregano

1- Sweet basil, Lettuce leaf Basil and Red Rubin Basil          3- Thyme, Pineapple Sage, Rosemary

These groupings are about water needs.  Basil needs more water, but the other herbs do not, so they can be allowed to hang out together.

Round Mocktail Container

Next, I created a round container plan that I will use in my wrought iron basket (the one above with the inpatients.)  It is 40” in diameter, which makes it perfect for a mocktail container. I am going to use the method detailed by Ben Futo of the Allen Centennial Garden in Madison, Wisconsin in his great PBS digital series called “Let’s Grow Stuff” which is geared toward beginners.  The episode is “Planting a Container.” You can find the entire 2020 season here: Let's Grow Stuff - PBS Wisconsin.

He talks about Thriller, Spiller, and Filler method of creating a container and used several herbs and edible flowers, suggesting they make good cocktails.  That got me thinking about a great way to create a mocktail planter so I adjusted his plan a bit.


Last year I discovered some beautiful yellow and black/purple striped petunias that my husband actually loved, so I knew I was going to have to grow them again.  I had planted them with lantana so Ben’s first two suggestions caught my attention. Then I thought Lavender (1), Lemon Verbena (1), Bronze Fennel (2), thyme, common or lemon(2-3), and a scented geranium (1) would give me lots of different textures and abilities to make different mocktails.  Then for the Filler I will use Chamomile and Yellow Calendula to fill in the spaces between plants.

This design would also work well in a half barrel or large in-ground round bed if you are so inclined.

Rectangular Planter

I also have a rectangular planter so I thought I could put Hardy Herbs in it, then if they work out, I can just transplant them.  Almost all of these herbs are hardy to -20 degrees F, so they can winter over in the container.  If I choose to leave them in the planter I will just put a new two inches of compost in the container at the beginning of the next growing season.


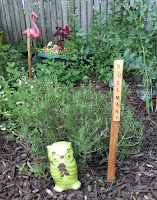
The Sorrel will be Rosemary I have decided, but Rosemary will need to be removed or left to die as it is not hardy over an Illinois winter, but the rest should be.  Being located next to the fence they will be sheltered and should be okay over the winter.  Because I took the photo before I put the measurements on it, the planter is 36 inches across the front and 24 to 30” deep. 

Any of these designs will look good at your house, so why not try them?

If you have a suggestion for a new container combo I would love to hear about it.

Monday, February 15, 2021

Winter Garden Planning part 1

I have decided to spend some time in the next few weeks talking about Garden Planning. I am going to start with why you want to do it now and then how to do it over the next few weeks.  I will show you how and why to keep a garden journal and how to read a seed catalog and more. 

No space—inside or out—should be designed until you figure out what you absolutely have to have and what you'd like to have if budget, time, and space were not limits. The same is true with your landscape: Create a list and design your own backyard, figuring out how much of your landscape should be devoted to each item. Do you gather often with family? Then a large dining and entertaining space might serve you well. Are flowers your thing? Do you crave space to grow your own food? Then a mix of flower and vegetable beds might be a good solution.

For those who mourn the slowing down of the gardening season, here’s some good news: Plants may go dormant in winter, but people don’t have to. With fewer attention-grabbing chores, winter is the perfect time to revisit existing designs and reconsider plant palettes. Certain landscaping projects are actually better suited to the off months and there are definite advantages to getting an early start in winter.

ADVANTAGES TO PLANNING IN WINTER

Winter Garden
Here is the back and front yards respectively so I can see the space, the vista, and get a feel for the perennial plants already in my landscape.  We took down a tree this winter, so I was also looking at the kind of sun the yard will now get.
Winter garden

See clearly:

The bones of the garden are exposed in winter, allowing you to easily see what’s out of balance and where you might want to add in structure or visual texture, whether in the form of plants or hardscaping. Sightlines are also exposed when plants and trees have lost their leaves. One can see which sightlines to keep clear, which views to incorporate or borrow, and which ones to block.

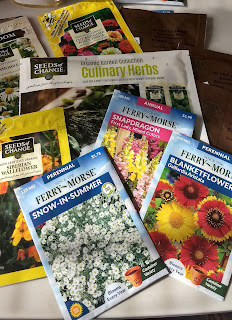
Seed packets

Beat the rush:

Get orders started for long lead-time items, such as outdoor kitchen appliances or specialty plants. Don’t let long delivery times in spring push your project off track; order early and keep your project running on time.

Read up:

Cold winter days are the perfect time to catch up on gardening and design books and magazines. There are so many sources for new ideas, but one of my favorites is the Instagram and websites of seed companies. They have gotten very good and giving context for the plants they sell, not just pretty plant pictures to make you drool.


My new flower choices and repeat loved herbs have already arrived!

Catch up:

Get caught up on all the latest trends in garden design. Get inspired to try something new—add edible plants to your landscape, make your garden more sustainable, design a garden getaway—whatever catches your eye.

I suggest these great websites for ideas:

https://www.provenwinners.com/container-gardening/ideabooks

https://www.countryliving.com/gardening/garden-ideas/advice/g746/garden-plans/

https://www.plantedwell.com/gardening-designs/

And if you want to see previous Garden design posts I've written, here is a search of them all:

Backyard Patch Herbal Blog: Search results for garden planning

So next time I will talk about prepping your garden journal and ordering your seeds.  If this year matches last year with the number of gardeners increasing, you will want to order your seed sooner than later!

Garden Journal

Monday, March 2, 2020

Seven Herbs for a Cocktail Garden

Whether you are a gardener who enjoys a cocktail now and then or a mixologist tired of spending money on ingredients with an all-too-short shelf life, growing your own herbs to use in your favorite mixed drinks is fun and easy. 

I crafted a program on using herbs for cocktails (called Crafting Herbal Mocktails) and as a result have experimented with ways to incorporate fresh and dried herbs into mixed drinks or alcohol-free cocktails.  And you too can make your own herb enhanced drinks with just a few herbs.  If you grow in just a couple of planter boxes, a hodge podge of pots of varying sizes or in a garden patch or raised bed you can add a few herbs and start experimenting.

Realize you are not distilling your own spirits, but crafting flavorings and infusing existing spirits with the unique flavor of herbs is easy and fun.  Selecting herbs to grow can transform cocktail hour into an irresistible exercise in gardening as herbs make their way from planter box to martini, collins or rocks glass.

If you are interested in Cocktails or Mocktails I have posted several recipes in the past and you can search the blog or chose the links above.

Here are my picks for the 7 Best herbs to grow for cocktail making:

Mint


Flavor: Cool and refreshing. Depending on what type you grow, some have citrus tones, other are floral or spicy. Kentucky Colonel or Mojito mint are good choices for growing in a cocktail garden.

How to use it: Mint is probably the most commonly used fresh herb for cocktails. Mojitos and juleps are well known for using mint, but this refreshing leaf brightens flavor wherever it is used. Muddled or used as a garnish or infusion, mint is a winning choice for the gardener’s cocktail. And simple syrup can be used to make non-alcoholic ades or to flavor teas.

How to grow it: Mint grows like a weed. Plant in containers or in the yard (if you are prepared to have a lot of it).

To try: Nojito Mint Mojito-Style Mocktail

Rosemary

Flavor: Rosemary looks like clippings from a pine tree with a taste to match.

How to use it: Great as a garnish where just a hint of its flavor pops in to visit. The rich, woody flavor of rosemary can be added whole or muddled as a featured player in gin or vodka or to add pronounced depth to bourbon. Try adding a sprig to your next gin and tonic or whiskey sour. Enjoy it in a punch with sweeter flavor to give a savory hint.  It can also be used to craft a Gin substitute.

How to grow it: Start from cuttings in a pot placed in a sunny spot. Rosemary stands up well in drought conditions, and should be brought in for winter in colder climates.

To try: Rosemary Lemon Vodka

Thyme


Flavor: Can be sweet to savory depending on the variety but for cocktails common garden thyme is a good choice.  It provides a robust earthy flavor with a hint of lemon and mint and a subtle undertone of pepper.

How to use it: A simple syrup made with thyme makes it a great companion to any gin-based drink.  And using the simple syrup to create a fun fizz made with prosecco or a liqueur-based cocktail with Grand Marnier gives your cocktail hour variety.


How to grow it: Great in a rock garden and dry areas, raise from seed or cutting, but if you want to harvest the first year, get yourself a nursery plant to get a head start with this perennial that is slow to get going.

To try: Pear and Thyme Fizz

Basil


Flavor: Currently a fashionable herb in the cocktail scene, different varieties of this complex, aromatic herb can lean sweet, peppery or citrus-y with clove or licorice overtones.

How to use it: Like mint, basil is a great all-purpose herb, adding great flavor to gin, tequila or rum drinks among others. Muddle, use as a garnish or craft a simple syrup to use in cocktails as a change of pace from the same old cocktail. For some great color, use a purple basil.

How to grow it: Make sure basil plants get plenty of water and sunlight. Harvest leaves from the top a few at a time so the plant will have continued healthy growth throughout the summer and beyond. Start from seed or get a jump start with a nursery plant.

To try: Pineapple Basil Gin Cocktail

Lavender


Flavor: Floral and woody with undertones similar to mint and rosemary, lavender is wonderfully distinctive, but a little goes a long way.

How to use it: Perhaps best prepared in a simple syrup, lavender is the taste of springtime in front porch drinks featuring vodka, gin or even lemonade for the non-drinker.  But sprigs make a great garnish, and sugared stems are wonderful stirred into a drink.

How to grow it: A great container plant. Water deeply, but make sure it has good drainage and gets plenty of sunlight. Harvest as blossoms begin to open. It likes a well drained soil.  Hard to grow from seed, so get a plant from the shops or divide an existing plant from a freind.

To Try: Lavender Collins

Lemon Grass


Flavor: light citrus to lemon overtones with a hint of sweet mint combined with an intoxicating lemon scent.

How to use it: Lemon grass is used both for its lemon flavor as well as its amazing aroma it adds great dimension to flavoring vodka, as well as a simple syrup to make lemonade based drinks or complex citrus cocktails with gin, whiskey or sparkling wines.

How to grow it: An annual in cooler climates grow in a container as an accent plant or in the ground as a focal item as it has a tall spreading grass look that fans out.  It needs little care except regular water and well-drained soil. Propagate by seed or root division. 

To try: Mint and Lemongrass Cooler


Sage


Flavor: Earthy, woody and vaguely peppery, sage has a wonderful and distinctive flavor, but should be used sparingly.

How to use it: Muddled, infused into spirits or prepared in a simple syrup, sage adds savory complexity to mixed drinks, but the flavor can be overpowering for some. Try it in tequila or add some sage to your next gin fizz for a summer drink with unmistakable garden taste. A salt infused with sage is great savory glass rim.

How to grow it: Requires little care and is tolerant of different soil types and conditions, but soil should be well-drained.  Can be started from seed, cutting or division of an existing plant.  Keep well trimmed to avoid woodiness.

To try: Tequila Sage Smash from cakenknife.com


Tuesday, April 18, 2017

Growing Herbs in Containers - Tips for success

For the past several posts I have shared how to choose, design and plant containers.  This is a wrap up of tips to successful container gardening.

Tricks for a Successful Container Garden
ü  Don't fill a large container in the wrong place: Ever tried to lift a large container garden filled with dirt and plants? It can be overwhelmingly heavy. When using a large or unwieldy container make sure to place your pot where it will live and then fill it – you’ll save your back! 

ü  Make a large container lighter: If you know you are planting shallow rooted plants in a very large container (for example, herbs, annuals, succulents), you can fill the bottom third with empty plastic bottles and cover them with plastic screening, or create drainage with Styrofoam peanuts. Not only does this make the container lighter, but also less expensive because you won't need as much potting soil.
 Ã¼  Don't Drown Your Plants: To avoid over-watering your container gardens, use containers that have drainage holes – lots of them.  Also, make sure to read the moisture requirements for your plants and then follow them. Before you water, check if your soil is moist. To do this put your finger into the soil up to your second knuckle. If the soil at your fingertip feels dry, water your plant.

If you do over-water, leaves may turn yellow and fall off, or your plants may get limp. If your soil is too wet, move the container to a dry, breezy spot until it dries out. If you have the room, you can also move your container garden into a garage or sheltered spot to dry it out, particularly if the weather is continuing to be wet.

ü  Don't Under-water: Most container gardens need watering at least once a day in the heat of the summer. Many, especially hanging planters or small containers, need watering even more often because there is less soil to hold moisture. When you water, make sure to really soak your plants – if you just give them a sip, the water will only wet the top layer of soil. Water until you see it coming out of the bottom of your pot.  Lots of people use water crystals but they are expensive and some tests have shown that they aren't particularly effective.

If your plants do dry out, don’t despair; even the most pathetic, limp, plant might revive with a good drink. If the container is small enough, submerge the whole thing in a bucket of water until the air bubbles subside. For a large container take a skewer or stick and gently poke holes deep into the soil to allow water to reach the roots. Then water generously.

ü  Awkward plant to pot ratio: Make sure to consider the proportions of your plants to your container. A large container stuffed with short plants can look stunted. If you need a rule of thumb (and remember that rules are meant to be broken) try to have at least one plant that is as tall as the container. Also try plants that will spill over the sides.

 Ã¼  Don't buy weak or sickly plants: Buying plants at a reputable local nursery is a good place to start in your quest for healthy plants. You have a greater chance of getting plants that are disease and pest free and well cared for than at a big box store. At a nursery, you can often get a wealth of information and advice from knowledgeable staff. Don't be afraid to ask someone to help you pick out a good plant.

ü  Fear of pruning / Trim your herbs: To keep your basil bushy, use it often or clip it back - the more you use the more you'll have (of course within reason). Cut back parsley and dill before it flowers. When your container gardens start looking leggy or ragged, don’t be afraid to cut them back. You may want to put them in an out-of-the-way spot until they re-bound, but chances are they’ll come back healthier and happier with a good haircut.

ü  Keep Like with Like: Make sure that all the plants in your container garden share the same sun, soil and water requirements. You can find out this information from your seed packets or plant labels. Or get a book on annuals, perennials and herbs from the library.

ü  Feed your Containers: Most potting mix has very few of the nutrients that plants require to grow and be healthy so you will need to add those nutrients to the soil. There are many fertilizers to choose from and flowering plants have different needs than vegetables and herbs. In container gardening what nutrients there are in your potting soil are either quickly used by the plants or are washed out with repeated watering. Fertilizing container gardens with flowers regularly is a key to their success. Add a diluted, liquid fertilizer, such as fish emulsion, every couple of weeks. Don't use too much fertilizer with herbs, it can effect the taste of the herbs.

ü  Know when it its okay to say goodbye: After you’ve tried everything, short of mouth-to-mouth resuscitation and your plant still looks dreadful, cut your losses and toss it on the compost pile or in the trash. If only one plant in your container garden is icky, just pull out that plant and replace it.

ü  Don't have unrealistic expectations: Before you make your container gardens, evaluate how you live. Do you travel a lot during the summer? If so, either get self-watering containers, an automatic drip irrigation system, enlist some help to keep your plants healthy and alive while you’re gone or get plants that don't need a lot of water.

ü  Garden how you live. Are you casual or formal? I take a relaxed approach to gardening because it fits well with my personality. I like big overflowing containers with riotous colors and luxuriant blossoms. Some people like neat, well-planned, formal containers.

ü  Give plants protection and environment they need.  Many plants don’t like being whipped by the wind. Big, broad leaves can easily get battered or act like a sail and pull even a big pot right over. Some plants with heavy flowers or fruit, can bend or break delicate stems in a stiff breeze. Conversely, a protected area can act like an oven, retaining heat and cooking plants that don’t like the heat. So choose the location and the plant combination to fit the location your plants will occupy.

Just a few last herb container tips:
1.   Chose containers with trays or get trays and fill them with pebbles.  Herbs do not like to have wet feet, but they also like to have a bit of water to draw on in the heat of the day.  Placing the pot in a tray will keep you from watering twice during the hot days of summer.
2.   Don't let your herbs flower, unless you want to look at rather than eat them.  Herb flavors change when they create flowers, so cut those flower heads off to preserve the best flavors for cooking and tea.
3.   Throughout the growing season pinch back the ends of the branches to promote more branching and the production of more leaves to harvest. 

4.   Check daily for dryness and water when the soil is dry about 1" depth.  Do not overwater and provide good drainage.  To test soil for dryness, poke your finger into the soil: If it feels dry to a depth of one-inch in a 12 inch pot and two inches in a 24” or larger pot, water it.


Monday, April 17, 2017

Growing Herbs in Containers - Planting Containers

We have discussed choose the container and designing the layout in previous posts.  Now it is time to talk about the actual planting.

Make sure that if you plant to use your containers outdoors that the plants you include have been hardened off.   Hardening off” is the process of moving plants outdoors for a portion of the day to gradually introduce them to the direct sunlight, dry air, and cold nights. You start with a few hours in the shade, then a few in sun and shade then longer periods of time outdoors until they can finally tolerate the flexible outdoor temps.  If you spring the outside on them the plant will often die.  So give your plants a fighting chance by hardening them, especially of they came from your grow lights or from a greenhouse nursery.

Step to planting:


Preparing your containers -- Make sure your containers are clean and free of residue.  A mixture of 6 parts water 1 part bleach can be used to sterilize the pots and remove residual bacteria from previous seasons that can harm new plants.  Make drainage holes in the bottom if they do not already exist.  No holes means drowned plants. Cover the holes with broken pottery shards or coffee filters to keep soil from escaping. If planting a large container cover the shards with some bulky material, like recycled foam peanuts, crumbled paper or even torn folded pieces of cardboard.  The bulk will cut down on the weight.

Fill your container with soil mix.  The amount of soil you put in depends on whether you use seeds or seedlings to plant your herb garden. In general, if you are using seeds, fill your container to about 1 inch from the rim so that you will have room to cover your seeds with a little additional soil.
With plants fill 2 to 3 inches in the bottom, place the plants and fill in around the plants.  Make sure the soil  is well firmed down to give roots more hold.  Peat based soil (often times called growing medium) is better suited for growing seed, not large living plants.  It dries out more quickly and lacks much nutrient value.


Mix nutrients into your soil - It took me years to realize that I was starving my plants to death. Use a manure-based compost or a home made compost that you mix into the soil mixture you use in your pots to provide nutrients, then realize that the soil will become depleted over the season and feeding will be required.  You can make a compost tea or purchase a commercial fertilizer.  I water with compost tea once a week when we reach the height of the growing season in late June (see below for a link to a fertilizing post.)

Make your own potting mix by blending:
5 parts top soil; 2 parts cool compost or mixture of compost and peat moss; 1 part course (not play) sand.  The sand increases the oxygen and the compost provides the organic matter.  Later in the season I use a mix of 50% top soil and 50% compost to top off the pots as the soil sinks.  This adds more nutrients and replaces what is lost to watering.

I also found this recipe among my lecture notes.  I have tried both and have no opinion which is better.  I like using coconut coir instead of peat moss because it is more renewable.


Homemade Soil Recipe:
1 part pre-soaked Coir Peat 
1 part course sand / builders sand (or vermiculite)
2 parts sieved Compost / soil
1 Tbls to 1 cup* Worm Castings or Vermicast (humus) 


Mix equal quantities of pre-soaked coir peat and vermiculite (or coarse sand if using) together well in a separate container. Place the sieved compost Preferably home made but a commercial certified organic soil mix is an alternative if you haven’t got your own.  in your larger final mixing container have.  Add the blended coir peat and sand to this compost/soil, then stir in the worm casing/humus. Check the pH with a meter.  Most plants require a pH of between 6.0 and 7.0 but if you are growing veggies, from my experience, they grow best in the range of 6.2 – 6.8 pH. 

*this is an approximate quantity based on making 12 gallons  of potting mix using a 3 gallon (9 liter) brick of coir peat. Feel free to add more if you have it!  If you can’t access vermicast, you can buy worm castings or use some humus from the bottom of your compost pile that is most decomposed or use good quality compost.


Remove your plants from their nursery pots carefully - When I first started gardening, I would grab it by the stem and pull to get it out of its pot. Often I would just pull the top of the plant off sometimes killing it before I even got started. To avoid this, if you have a six pack of plants, that is made of flexible plastic, hold the plant close to the soil surface (I make a v out of my fingers and place them on either side of the stem) and squeeze the plants out of their holder from the bottom. If the plant is in a nursery pot, try pushing it out from the bottom. If it is root bound, you may have tear or cut any roots off that are sticking out the bottom hole of the pot and slide a knife around the inside of the pot, before the plant will slide out. In extreme cases, you may have to break the pot to free the plant.

If your plant is root bound, which is often the case, make sure to break up the plants roots, either by tearing them or cutting them. Some people simply rough up the roots on the outside by rubbing them, but I'm a little more aggressive and often tear or cut a compacted root ball so the roots will be able to grow freely, not in a circular pattern, which can strangle a plant.

Planting - There are two main things to know when actually planting a plant in a container (or anywhere else for that matter). You want to plant it at the same level that it sits in its nursery pot. So in other words, the level of the soil should stay the same and no more or less of the plant's stem or crown should be covered. You also want to make sure there are no air pockets and your plants' roots are surrounded by soil. In a crowded pot, sometimes it is difficult to put soil in between the plants, but you will need to make sure that you do, or the roots will dry out if they are in an air pocket, and your plant can die. Sometimes you just need to feel around a crowded pot and stuff soil into any holes you feel. It's also a good idea to water a pot right after you plant it, which settles the soil. At that point you can go back and fill in any holes or depressions with extra soil.


Give your containers a good watering!


Position pots of sun-loving plants where they will have at least 5 or six hours of strong light every day.  Without that number of hours stay with bay, lemon balm, mint, parsley, thyme and scented geraniums.

Watering - watering of container plants is a daily requirement if they are in the sun.  Twice a day (morning and evening is ideal).  About 1/2 to 2/3 through the growing season the soil will become depleted of nutrients so prepare in advance to have a fertilizer at the ready to add to your watering routine to keep the plants healthy.  For more details on fertilizing containers, check out this blog post from 2013.

Related Posts Plugin for WordPress, Blogger...