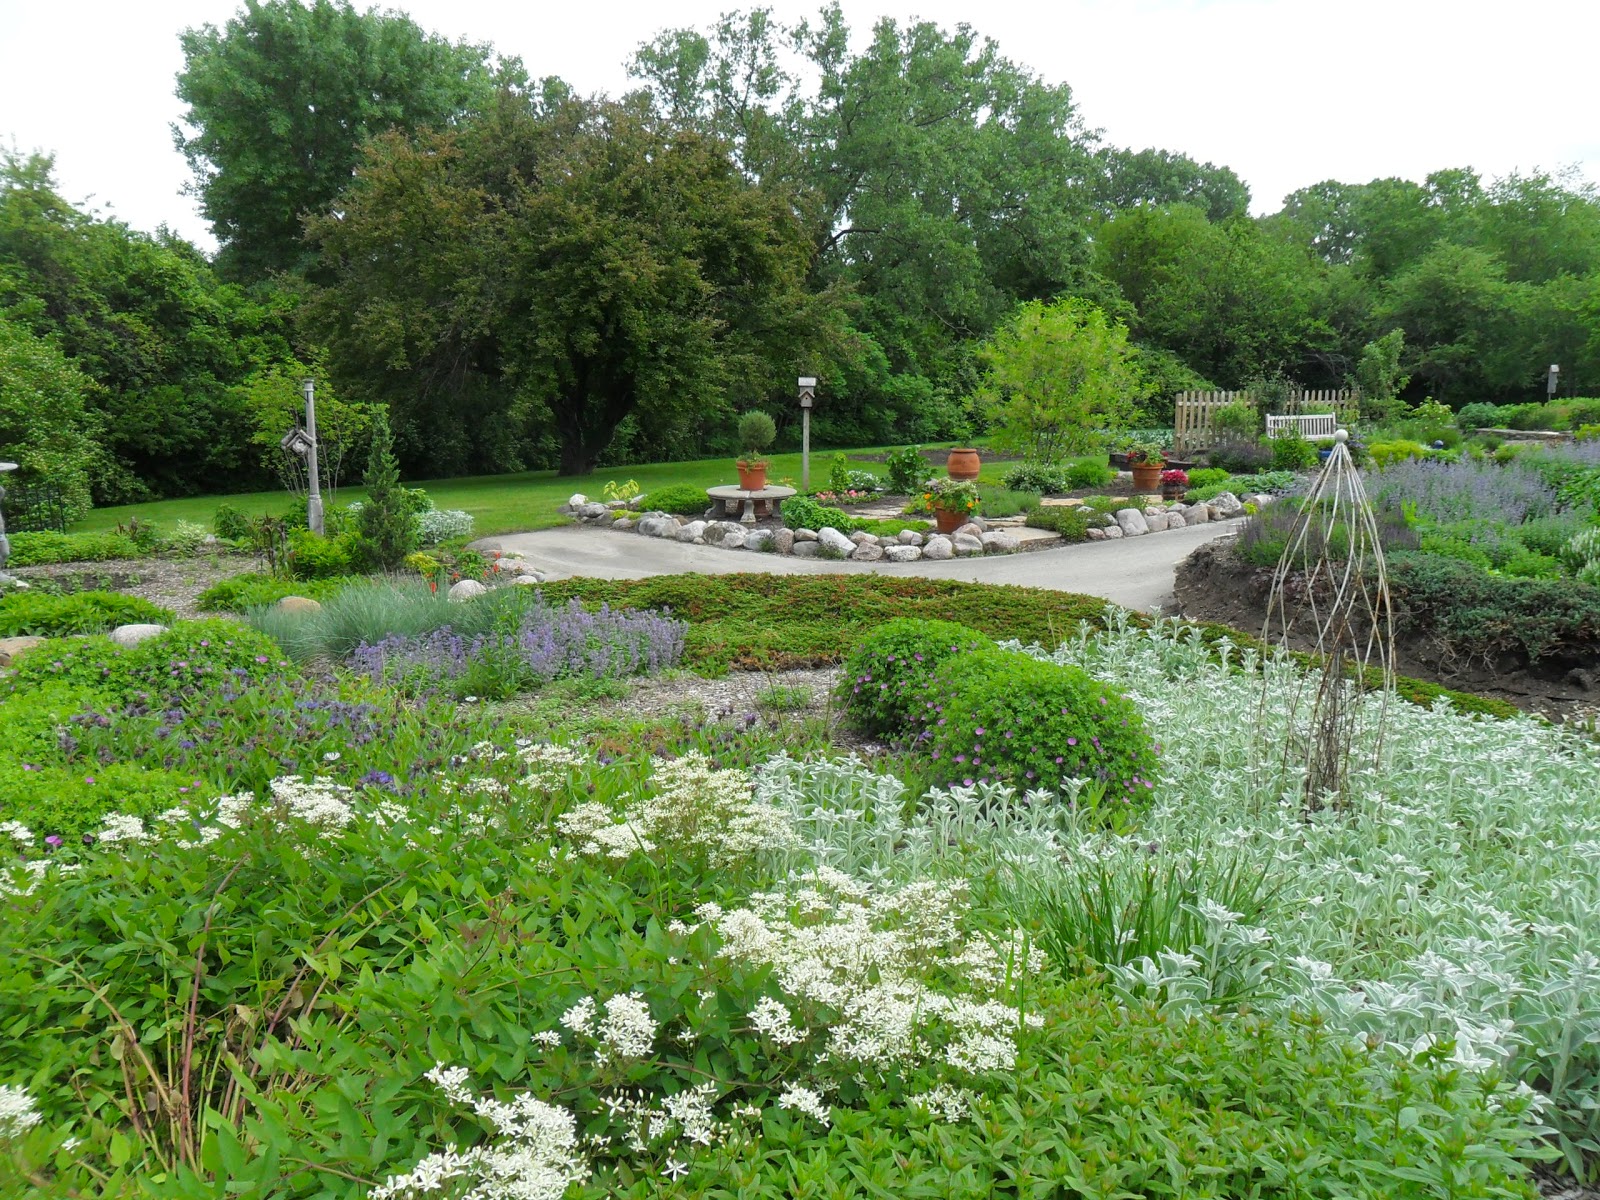
Showing posts with label garden design. Show all posts

Tuesday, May 12, 2026

Create a Scent Garden

Aromatic garden plants is the best benefit of an herb garden.  And you can grow an herb garden just for this purpose, never planning to harvest anything, but rather to sit and enjoy the glorious smells.


Karen Creel of GardenChick.com, gave a great list of aroatic plants in an article in The Essential Herbal Magazine.  That article got me thinking about a theme garden based on this idea.  Rather than worrying about what to do with this or that plant, just grow a garden that asks you to rest, take a seat with a good book, and enjoy the fragrance.


alternative garden - scented container with oregano, lavender, catmint, aromatic mint, geranium (in the back), rosemary, mini petunia 

What is Needed

You always need six hours of direct sunlight for an herbs garden, as well as well-drained soil that you amend with rich compost to give the herbs what they need to get lush and fragrant.  Always choose plants for your hardiness zone.  A smaller number can do well, but larger number zones will struggle in cooler weather or harsh winters.  Always plant taller varieties in the back and give the plants proper space to get larger over time.  Place the invasive plants, like lemon balm, mints or woodruff in a container to stop the spread.

Design Ideas

The Border

Create a deep border (8–12 ft deep) along a fence, path, or lawn edge.

Back Layer (Tall Structure)

  • Climbing rose
  • Lilac
  • Bee Balm
  • Pineapple sage
  • Lemon verbena

Middle Layer (Color + Fragrance)

  • Lavender
  • Calendula
  • Scented geraniums
  • Lemon balm
  • Chamomile
  • Catmint

Front Edge (Touch & Scent Zone)

  • Corsican mint
  • Sweet woodruff
  • Lemon thyme
  • Chocolate mint
  • Spearmint (contained!)

The Circle Garden

Divide garden into four beds around a center feature (bench, sundial, birdbath).

Center Feature

  • Rosemary shrub or lavender mound

Bed 1 — Mediterranean Herbs

  • Rosemary
  • Lavender
  • Lemon thyme
  • Curry leaf (container if needed)

Bed 2 — Tea & Lemon Garden

  • Lemon balm
  • Lemon verbena
  • Chamomile
  • Sweet cicely

Bed 3 — Mint Collection

  • Chocolate mint
  • Spearmint
  • Corsican mint
    (sink pots to control spread)

Bed 4 — Flowering Pollinator Herbs

  • Bee balm
  • Calendula
  • Catmint
  • Pineapple sage
The Wandering Path

Create a curving walking path with herbs brushed as people pass.

Along Path Edges

  • Corsican mint
  • Sweet woodruff
  • Lemon thyme

Waist Height

  • Scented geraniums
  • Lavender
  • Catmint
  • Chamomile

Fragrance Stations

  • Chocolate mint corner
  • Lemon garden (lemon balm + verbena)
  • Pineapple sage surprise scent

Vertical Moments

  • Climbing rose archway
  • Lilac anchor shrub

Plant List

Here is a list of fragrant herbs to include in your plans:

  • Bee Balm
  • Cinnamon basil
  • Calendula
  • Chamomile
  • Chocolate Mint
  • Catmint
  • Corsican mint
  • Curry leaf
  • Lavender
  • Lemon balm
  • Lemon thyme
  • Lemon Verbena
  • Lemon Balm
  • Lilac
  • Patchouli
  • Pineapple sage
  • Rose, climbing
  • Rosemary
  • Scented geraniums
  • Spearmint
  • Sweet Cicely 
  • Sweet woodruff


Sunday, May 8, 2022

Introducing Herbs into your Garden with a Container

Happy Mother’s Day!  At least once a year I go back to my roots and remind myself why I cannot seem to exist without herbs.  I do not mean why I am a gardener.  That is genetic inheritance.  My grandparents on my mother’s side were farmers.  My grandfather on my father’s side was a flower gardener.  My father’s mother is the one who helped me to plant my first garden with pansies, bleeding hearts, columbine and coral bells among other plants.  So the gardening part was well ingrained before I was 10.  As a result Mother’s Day which is close to the frost free day for my area -- when outdoor gardening risks diminish, is a weekend I love to garden.


Herb gardening is uniquely mine in my family.  I really like to look at flower gardens, but except for a few old fashioned perennials I never grew many flowers.  Instead I prefer greenery, so I think that is why the herbs work so well for me.  And I find it fun to experiment with the vast flavors that herbs provide.  That keeps the scientist hidden inside me happy too!

When you cook with herbs it is not really just about adding fresh or dried chopped herbs to a dish.  It is much more subtle to make an herbal vinegar with fresh herbs and use it to craft a salad dressing or a marinade.  Or produce an herbal butter that you dot over plain steamed vegetables to bring out their true nature.

All of these suggestions can be done with a few herbs in pots on the patio.  So let’s discuss container gardening with herbs!


The most important thing to keep in mind when container gardening is that  this type of herb garden needs some attention in watering and timely pruning. And remember when placing plants in a container is to choose those with similar needs.  Herbs like marjoram, oregano, sage and thyme  all love lots of sun and need good drainage can all be placed together.  Any type of lettuce can be grown with others, but basil does best with other basil.
Herbs can be cross-planted, so let basil and oregano share a pot.  Cilantro and dill with their light leaves look good together. When planting dill or cilantro, sew seed rather than purchasing plants.  In the hot months these will bolt (go to seed) so you can preserve a summer harvest by dropping a few new seed into the pot every two weeks.

If you like to combine herbs in containers, remember to place taller growers in the center and lower growers on the outside edges.  Thyme is a great companion in the pot to Basil, Dill and Tarragon.  Tarragon which can get 3 feet tall in the ground will be a much smaller grower in a pot, so remember to plan accordingly.  When choosing perennials for the container, try dwarf varieties or hybrids which generally have all the flavor and scent of the original cultivar, but often have a more decorative leaf and generally a smaller growing habit.

Planting your Containers


After deciding what herbs you would like to plant, you want to go and get the following supplies:

  • Containers
  • Potting Mix / Soil Mix
  • Herb Seeds and/or herb seedlings
  • Spade
  • Watering can
  • Base filler

A soil mix in the pots high in organic matter is a must.  I create my own blend rather than buying something that may not last the season.  5 parts top soil; 2 parts cool compost or peat moss; 1 part course (not play) sand.  The sand increases the oxygen and the compost provides the organic matter.  Later in the season I use a mix of 50% top soil and 50% compost to top off the pots as the soil sinks.  This adds more nutrients and replaces what is lost to erosion.

Select pots with holes in the bottom or sides, so excess water can escape.

Choose large pots, such as 12- to 24-inch-diameter planters. Choose plastic or composition planters instead of clay, which allow less water to evaporate from the soil.

If you are just starting out, you might want to use herb seedlings as they require less work than growing your herbs from seeds.

Once you have gathered all your supplies together, it's time to start creating your container herb garden!

Place a base filler in the bottom of the pot to aid drainage.  You can use Styrofoam peanuts, crushed aluminum cans, broken clay pots, or anything similar.  About an inch or so in the bottom is great.  Then fill your container with soil mix.  The amount of soil you put in depends on whether you use seeds or seedling to plant your herb garden. In general, if you are using seeds, fill your container to about 1 inch from the rim so that you will have room to cover your seeds with a little additional soil.

Always check the instructions on the seed packet as they will usually give you more detail on how best to plant your seeds. If you are using seedlings on the other hand, you want to cover the base of your container with only a few inches of soil so that you can fit the seedlings in. When you have arranged all your seedlings in the container you can fill the spaces around them with more soil.


As with seeds, you also want to follow the instructions that accompany your seedlings. If your seedlings to do come supplies with instructions, you can try looking up the information on the internet. These instructions are important for telling you the best growing conditions for your herbs. You might need to move your containers around to give them access to sufficient sunlight to help them grow.

Finally when you are done, give your containers a good watering! And of course do not forget to water your herb garden over the coming days.

Follow these steps and it shouldn’t be long before you have a beautiful and bountiful container herb garden just brimming with delicious fresh herbs!

Using the Herbs

There are simple ways to start using herbs.  Like individual sprigs of rosemary over broiled lamb chops;  Or adding ribbons of basil to your completed spaghetti to give it a burse of bright flavor.  Or mixing chopped fresh chives into butter whipped with sour cream for a topping on any kind of potatoes that makes them a special treat.  These can make using herbs simple, fast and give you a new taste on the palette. 

If your window or patio herbs start to get tall, cut them.  Fresh herbs will keep in the refrigerator for several days with the stems wrapped in a damp paper towel and popped into a zip seal bag.  If longer storage is needed, chopped them and place the herbs in an ice cube tray, cover them with water and freeze.  When you cook soup, stews, chili or sauces, just drop in a cube.  If you like many, pop dinner into the crock-pot, remember herbs lose flavor during long cooking times, so just drop in a few cubes when you get home and by the time you are ready to eat the fresh dynamic of the herbs will be released  just by reaching into the freezer.

Just a few last tips:

  1. Chose containers with trays or get trays and fill them with pebbles.  Herbs do not like to have wet feet, but they also like to have a bit of water to draw on in the heat of the day.  Placing the pot in a tray will keep you from watering twice during the hot days of summer.
  2. Don't let your herbs flower, unless you want to look at rather than eat them.  Herb flavors change when they create flowers, so cut those flower heads off to preserve the best flavors for cooking and tea.
  3. Throughout the growing season pinch back the ends of the branches to promote more branching and the production of more leaves to harvest.  Check daily for dryness and water when t he soil is dry about 1" depth.  Do not overwater and provide good drainage.
  4. To test soil for dryness, poke your finger into the soil: If it feels dry to a depth of one inch in a 12 inch pot and two inches in a 24 or larger pot, water.


My Mini Herb Garden 2018

Wednesday, March 10, 2021

What to do in the Garden in March - Garden To Do

I want to go out and work in the garden more this year than I have in many years!  The snow has not even melted off my grass or raised beds yet and I am still thinking, I could go out and do this or that.  I have a rule, no visiting the offsite herb garden until April 15.  The day after Tax Day I can go look at the garden and start making my to do list. If I go out there sooner, I will be tempted to just “fix” this or that and walk around in an area that is way too soggy in early spring to resulting in compacting my soil, so I ban myself from my own garden as a result of past missteps! 

However, the home garden is right out the backdoor and nothing can stop me from trekking out there, once I can step off the porch. So I had to ask myself, what can I do in the garden now that would be helpful, not harmful in the coming months.

Then I remembered that the tree service removed all my stepping stones so as not to break them when they were removing the logs from the yard. I have a wonderful March project to work on. I should also fix the uneven stone in the Thyme walkway, but that might be a while if this snow pile is any indication.  You cannot even see that there are thyme plants under there yet.


Stepping stones in the lawn and garden can become unstable due to excessive rains or heaving, caused by alternating periods of freezing and thawing. So they too should be stabilized and leveled to make them safe to walk on. To fix, this requires that you actually lift the stones and add soil or gravel beneath them. Use a level to verify that they are even with the ground.

Repair a Dry Stacked-Stone Wall

I am also considering replacing the now fully decomposed wood sides to my herb bed with a dry-stacked stone wall.  This is also a great time for you to repair an existing dry stack wall. A dry-stacked stone wall means that they're not actually mortared in place.  However, they do have a tendency to shift during the winter months. As a result, the border becomes a bit unsightly, not to mention dangerous, especially if kids occasionally walk on the stones.

Late winter to early spring is an ideal time to reposition stones. Sometimes minor adjustments are all that's needed; simply moving the larger stones with smaller ones can stabilize the border. It doesn't take all that much time or effort, and the payoff is worth it in terms of enhanced aesthetics and safety. And with the soil being wet and soft this time of year it makes the task even easier.

Correct Tunnels Made by Garden Pests

Unstable stones aren't the only hazards that can lead to a sprained ankle. There are also tunnels and mounds of dirt created by moles and gophers. They too should be leveled with a metal rake and tamped firmly. The exposed soil can later be reseeded with grass seed or left as-is if your turfgrass is the type that tends to spread.

Spring-Flowering Bulbs

It's not unusual for the foliage of early spring-blooming bulbs to turn brown, especially at the tips, when temperatures drop suddenly. Although the foliage may not look all that great, the bulbs themselves will be just fine and will flower pretty much on schedule.

Now is a good time to do a quick sketch of where your bulbs are. This will help when the foliage fades later in the year and you begin planting annuals and perennials in the same bed. You'll have a map of where the bulbs are and avoid destroying them as you dig.

source: Getty Images/istockphoto

Touch Up Mulch

You may need to wait until the snow is gone to do this, but my mulched beds tend to lose snow first, making this an ideal time of year to inspect your mulch, particularly its depth. Chances are organic mulches, especially those made from shredded or chipped wood, have decomposed somewhat or have been washed away by heavy rains.

With a metal rake, fluff your mulch a bit and try to level it out over your garden beds. Along the way, use a ruler to determine the average depth of the mulch. Ideally, you want at least a 2-inch layer, and 3 to 4 inches is OK, especially for southern gardeners.

Winter Pruning Trick

If you haven't already completed pruning your deciduous trees and shrubs, there's still time. Especially if the heavy snow damaged the shrubs in the last big snow.

First, stare at the tree or shrub in question with an eye toward its desired shape. Stare at it from several different perspectives from a distance at various angles, from just a few feet away, and even looking up into its canopy.

Now, rather than doing any pruning, tie some colored ribbon or twine around each limb or branch you think you want to prune. Over the course of several days, each time you walk by the tree or shrub, at different angles and various distances, try to imagine what it will ultimately look like if you were to remove the selected limbs.

Feel free to change your mind. If you're not sure about one of the limbs you've selected, remove the ribbon or move it to another limb. Then re-evaluate your selection. Within a few days, you'll get a better feel for where you should make your pruning cuts and greatly increase your chances of success when you finally make those cuts for real.

Clean your Tools & Pots

If you did not have time during fall cleanup to clean your gardening tools, now is a great time.  Wait for a warm day bring out a bucket and a scrub brush and clean up and sharpen your tools.  I get a set of cheap grill cleaning brushes and use those to scrape and clean my shovels, rakes and hoes.  I use a stone to sharpen my hand trowels to a cutting edge so they can easily slice through the earth.  I like to do this in spring so I can also remove any rust that has formed.

I grow many herbs and flowers in pots so now is the season for me to clean them and get them ready for new plants.  A mixture of 1 part household bleach and 9 parts water is the way to disinfect clay, ceramic and plastic pots.  I clean and remove residue from the inside and then soak them for at least 10 minutes in the disinfecting solution, then spread them out in the sun to dry.  If they need new paint, this is when I spray paint them. 

I like a terra cotta look to all my pots.  It gives my garden a cohesive look.  However real terra cotta is heavy and dries out very quickly, so many of my pots are plastic.  I spray paint them all a terra cotta color so you cannot tell the real from the plastic.

Tarragon and lemon balm
For a bit Later in March

I leave the seed-filled branches up for the birds and animals in winter, but when the grass starts to green, those branches become unsightly. So I will trim down my perennial grasses to about 6 inches tall and tall browned branches on other fall-blooming perennials to ground level.  Tarragon and lemon balm die back in winter, so I want to remove the dead tops once I start to see the new sprouts. Refrain from trimming your lavender, no matter how bad it looks, in March or even April.  It is slow to return and if you trim it too soon it will not bloom in the spring, so take a wait-and-see attitude with lavender.

  • Scrub clay pots.
  • Clean tools.
  • Remove leaves from the bottom of ponds or other water features.


Thursday, April 25, 2019

LaSalle County Historical Society and Illinois Valley Herb Guild Garden - National Garden Month

It is rare to find a public garden that is only there to be an herb garden. I find one every now and then but most gardens we visit have herb gardens as part of a larger garden, rather than the main focus of the experience.  The garden I am focusing on today is just an herb garden.  It focuses on many useful aspects of herbs but it is only an herb garden.

taken March 2015, the garden is still asleep
Located near the one room school house of the LaSalle County (Illinois)Historical Society I have visited this garden many times starting in 2015.  I took photos of it when it was still dormant and cold in March, another time in June during early growth in a rain storm and finally in 2016 when it was the end of the season in October.


This garden is maintained by volunteers so sometimes when I visit it is overgrown and untrimmed, but it is obviously well cared for by the Illinois Valley Herb Guild

taken 6-25-15
The Guilds’ herb garden is planted in a traditional homesteading style in four beds defined by the major uses for which the plants were grown in the 1800s. Dyes, Culinary, Medicine and Fragrance are the themes used in the garden.  I like the four-square design and plants included.  I think all the plants used in the garden have roots in the 1800s, but I think not all would be found on the 'frontier.'  But I am not certain what definition of frontier they are using, so I could be wrong. 

Since this garden is only about 12 by 24 feet, constructed with a center X path dividing the plot into 4 rectangular beds.  There is no need for a tour, so instead I thought I would show some of the variety of plants they have in the garden.  

Taken 10-28-16 
This garden was planted probably around 2010 and as a result has some age and many of the plants have reached some spread and have taken hold in their locations and flourished.  It is a joy to walk through and see the plants and touch the scented leaves.  A booklet was published detailing many of the plants in the garden back in 2011 and you can get it from the LaSalle County Historical Society in Utica, Illinois.

I love the groupings and the way the plants are labeled.  I think someone made the labels by hand.


There were several plants I had never grown before in the beds which allowed me to see the mature look of the plant as you rarely can in a nursery setting.  Lady's Bed Straw and Germander are historically interesting plants and to see them in a garden bed was a joy, especially since I have never grown them myself..

Flowering Lady's Bed Straw in June
Lady's Bed Straw is named so because it is thought to be the plant used in the Manger for the Baby Jesus. In the Galium family it is a cousin of Sweet Woodruff, and is another European introduced plant that grows well in Northern Illinois. When in flower they are highly fragrant and hold their scent while dry.  There is a chemical in Lay's Bed Straw that will curdle milk causing it to be used as an ingredient in the making of cheese.  The flowers can be used for making yellow dye and was used to color butter.  It is an all purpose herb which is perfect for a frontier garden.

Germander just getting serious in June.
Germander is used these days as a scented ornamental wreath plant, but traditionally it was used as a treatment for gout.  It is an Mediterranean plant and would have been brought to the US by European settlers. This is probably the creeping versus upright variety due to the short stature and it works as a lawn substitute and grows well in shade and with drought conditions.  I am thinking of adding it to my side yard which is both shaded and dry.  It flowers purple in summer.

Flowering from June to frost, this was enjoying the summer when I snapped this photo

Thread leaf tickseed was popular in 19th century ornamental gardens, but although you can use it as a dye in certain circumstances I think it was less a frontier herb as a landscape plant in more urban areas, especially along the east coast in the 1900s.  I love to grow this, but it is a serious self-seeder, so I put it in pots rather than in the ground to keep the seeds contained.

Clary Sage
I got the best picture of Clary Sage I have ever taken while at this garden.  Even the one in my own garden never looked as nice as this one. Clary Sage is an old plant.  Used by the Quakers in PA, it is a perfect frontier plant.  The aromatherapy benefits include reduction of stress and anxiety.  It is also an anti-inflammatory herb and an antibacterial.

Winter Savory in flower in June
Winter Savory is always a good edge plant and this garden placed on the edge.  I suspect someone came by and trimmed it up shortly after I took this photo.  Winter savory takes on a nice shape if kept trimmed.  And being a perennial it only gets better with time.

St John's Wort flowers look bright even on a cloudy rainy day.
This plant flowers around the Summer solstice in June, (near St. John's Day on the 24th) which is how it gets the name St. John's Wort.  The flowers make a great herbal tincture that is red in color rather than yellow as the flowers might suggest.  The infused alcohol can then be used to treat various ailments, including anxiety and depression.   Historically it was believed to be a panacea that could cure almost anything.
Sorrel going strong in October
French Sorrel is an herb I have never grown.  Considered one of the bitter herbs, it was used by the Egyptians and the Romans to impart a bitterness or acidity to foods, much like we do with lemon juice today.  It can be eaten as a green, with a taste similar to a sour green apple it is in nice counter part to other sweeter foods. 

Flax in October, not tall enough to harvest
Flax is also part of the garden, but my guess is this plant would not have been in the garden as much as it would have been in a field nearby.  Flax was grown extensively in Illinois as a crop for making linen fabric.  To process flax you need a good flowing water source.  This garden is right along a canal which makes it a great place to grow flax but more abundance would give you the flax you needed to weave into cloth.  The process for making fiber from flax to create linen is very harsh and hard on people and the environment, so once cotton was more easily available Flax was abandoned as a cash crop.
taken 10-26-16
After my second visit we stopped in the nearby museum and I picked up a little booklet called "The LaSalle County Historical Society's Settler's Herb Garden" which details photographically many of the plants in the garden with a short one or two sentence description of the use of the plant.  The only thing the book is missing is a bit of information on why they chose the plants they did for the garden, as I am curious.

This garden is near Seneca, Illinois, where my husband and I intend to retire and raise herbs in the next few years, so I will be visiting this garden again, and I recommend you do as well if you are ever along the I&M canal or the Illinois River near Starved Rock.  The address of the museum is 101 E Canal Street, North Utica, Illinois and the garden is east of the parking area beside the one-room school house building.

Thursday, April 18, 2019

Visiting the Klehm Botanic Garden - National Garden Month Series

Just so you don't think I have only visited gardens in Indiana I thought today I would explain a garden I visited back in 2013 right here in my home state of Illinois.

I was using my first digital camera that had useful pixels that actually took photos that look good posted anywhere.  Before that the images are so grainy from my 3 or 5 pixel cameras, that I am embarrassed to share most of them.


This is the Klehm Arboretum and Botanic Garden located in Rockford, Illinois.  We stopped by on an early June day back in 2013 when the weather was balmy and sunny and the plants were just hitting their late spring flush. We were out on a road trip to enjoy the lovely day and stopped by when we saw the sign.

I was fascinated with the Children's garden that is dotted with fun interactive ideas and bright colors. I think A to Z gardens are such fun, you often find them in Children's gardens, but as an adult I love the organization of them and the choices the gardeners use for each letter often takes me on fun adventures.

I took way too many photos of the A to Z garden, so I will just share the end of the alphabet with my favorite flower - Zinnia!  If you want to see the details, check out my post from 2013.


A tower in the Children's garden area allowed us to get a bird's eye view of all the fun. They also had a human sized sundial which worked perfectly on that sunny day to tell the correct time of 10:00 AM.


We also enjoyed strolling the Rhododendron and Azalea Dell


and visiting the Demonstration Gardens gave me lovely landscaping ideas.


There was a maze -- love a good maze.


A number of flowering and ornamental trees were also part of the experiences in the arboretum.  Here is hubby pointing at -- I have no idea.


We were there on bring your dog to the arboretum day and we got a lot of comments from visitors asking where our dog was and joked with a couple about being the only folks there without one on that day.
The entrance to the Arboretum with the fountains is really striking and a great wedding venue.  The admission is reasonable and they do have a reciprocal program if you are a member of another arboretum.


fountain 03garden
This photo courtesy of the Klehm Arboretum and Garden

We just had a wonderful experience walking through the place and catching all the lovely touches they have included in the landscape. Like these edible flowers!


So if you are traveling though northern Illinois, visit the Klehm Arboretum and Garden located at 2715 S. Main Street in Rockford, Illinois.

The next garden in the National Garden Month post is here.

Tuesday, May 2, 2017

Edibles in your Garden Landscape


Most gardens today are solely ornamental and many of the ones that are edible are tucked into hidden corners of back yards, valued solely for their contribution to the pantry. Before herb gardens and vegetable gardens were relegated to their own spaces, kitchen gardens, cottage gardens, and landscapes around homes were filled plants that were as beautiful as they were useful.

Fortunately, edible landscaping is making a comeback, with more home gardeners choosing to plant attractive edibles that are easy on the eye as well as the dinner plate. A productive, functional and beautiful landscape can be grown on any scale and is especially useful when gardening in a limited space. 

Consider adding a few edibles to your garden from the Garden Club of Villa Park Plant Sale (May 12 & 13, 2017 -  320 E Wildwood, Villa Park, IL)  You can get details and pre-order forms on their website: www.homegardening.org. 

Here are a few basic ideas to get your edibles mixed into your garden landscape:

Height and Depth: pairing together edibles of varying heights in one bed or area creates an interesting look similar to wilder-inclined flower beds. Most vegetables prefer a full day of sun, but some can tolerate 4 to 6 hours of sun.  Any greens and cool-weather loving edibles enjoy the relief of some shade in the hottest parts of the year, so consider interplanting them with taller sun-loving vegetables and edible flowers or herbs. For example, the handsome Spotted Trout Lettuce can be planted under Ping Pong Tomatoes for contrasting colors, depth, height, and a one-stop salad harvest. African Crackerjack Marigolds (a very tall variety) can serve as a backdrop for a row of alternating Red Russian Kale and Purple Vienna Kolhrabi, with Arugula or Spinach interplanted between the brassicas – for a rich landscape of orange, red, purple, and deep green.

In extra cramped quarters, the same effects can be achieved within one pot. For example, Nasturtiums (edible flowers with a peppery kick) can serve as a “groundcover,” draping over the side of a tall container, with one Rainbow Chard and Tom Thumb Pea plant growing up from the center of the pot.


Succession sowing is also a useful tool both for food production and for growing an edible landscape. For example, radishes – a quickly maturing crop -- can be interplanted with Red Express Cabbage – a pretty, petite cabbage that matures quickly, for a cabbage. Sunflowers can be added to complete the trio, which will eventually grow tall enough to shade out the entire area, but not before the radishes and cabbages are ready to be harvested.  You can also use succession planting to give a continuous crop for herbs like dill or cilantro which can form seed rather quickly eliminating the ability to harvest the tasty leaves.

Colorful Contrast: Simply planting your go-to vegetables in a new formation creates a beautiful, new landscape. Planting Purple Peacock Broccoli and Cauliflower in one block will make for a snow white and rich purple/green checkerboard. Grouping a variety of colorful flowers and vegetables in a cluster instead of a row will automatically bring aesthetic interest to a corner of your garden.


The easiest way to create colorful contrast is to let some of your edible plantings go to seed! Not only will you end season with your very own seed bank, but ordinary plants will assume beautiful, new forms: lettuces, for example, will grow tall and bloom like clusters of tiny dandelions; leeks will shoot out one long stalk with a giant, lavender-hued, globe-shaped blossom.

Choose unusual varieties of usual vegetables in the interest of color, nutrition, and flavor. Merlot Lettuce is merlot colored, Lemon Cucumbers are lemon colored, and Rainbow Chard, yes – also true to its name – comes with stalks in varying colors.
 
purple basil in the center pot,
 edible and color coordinated

Substitute: Another helpful way to think about edible landscapes is to substitute edible varieties for each role you want a plant to serve in the garden. Want a vine to climb up the back fence? How about peas, followed by pole beans: they have beautiful flowers and foliage and also produce delicious pods. Looking for a petite tuft of grass to edge your pathway? How about chives instead – a hardy, perennial with great flavor and attractive magenta blooms. Thyme works great not only as an indispensable seasoning, but as a groundcover too, especially in between a stone pathway. Purple Basil can substitute for a coleus and has the same burgundy foliage.  Adding edible flowers to the flower garden can give you double duty. Chamomile and feverfew look like small daisies; Borage, bachelor Buttons, Love-in-a-Mist can all be eaten; Nasturtiums are well known for the peppery flavor of the leaves and the flowers. And pansies and calendula are also edible.

Related Posts Plugin for WordPress, Blogger...