Showing posts with label backyard garden. Show all posts

Thursday, May 1, 2025

Seven Herbal Gift Ideas for Mom - to make and buy

There are many gift ideas for Mom that incorporate herbs. Here are a few perfect examples, several of which you can make yourself:

1. Herbal Tea Set: Give your mom a collection of her favorite herbal teas, along with a beautiful teapot and a set of tea cups. This gift is perfect for mothers who love to relax with a cup of tea after a long day. Teapot Gifts and Tea Gifts.


2. Herbal Bath Salts: Herbal bath salts are a great way to provide relaxation and rejuvenation. You can make your own bath salts using dried herbs such as lavender, rose petals, and chamomile, or you can purchase pre-made herbal bath salts.

We shared this recipe on the blog back in May 2023, but here is a quick blend of salts to pamper skin.

Pampering Bath Salts

  • 1 1/2 cups Epsom salts
  •  3/4 cup baking soda
  • 3/4 cup herbs (finely ground)

Combine everything in a jar and shake well.  Add 2 to 4 Tablespoons directly to the bath or place in a mesh or organza bag and swish to dissolve the salts.

3. Herbal Soaps: Another great gift for mom is herbal soaps. Especially soaps made from natural ingredients and infused with essential oils and dried herbs, providing a pleasant aroma and gentle cleansing.  I get my herbal soaps from Soapy Roads here in Lombard and you can order online too!


4. Herbal Body Oils
: Herbal body oils are a great way to nourish the skin and provide a relaxing massage. You can make your own body oils by infusing carrier oils with dried herbs such as lavender, rose petals, and chamomile or you can just use essential oils in a carrier oil.

Essential oils like lavender, lemon, and eucalyptus come with benefits. But other oils—like black pepper, clove, and peppermint—can irritate the skin, so choose carefully. To make a safe, DIY bath oil blend five to 20 drops of an essential oil with one tablespoon of a carrier oil (like grapeseed, jojoba, almond, or argan oil). Add the oil right before you're about to get into the bath to keep it from evaporating.


5. Herbal Sachets:
Herbal sachets are small bags filled with dried herbs, which can be placed in drawers or closets to provide a pleasant aroma and natural pest control. You can make your own sachets using herbs such as lavender, rose petals, and chamomile. RECipe

Romantic Evening Dreams

  • 1/2 cup rose petals
  • 1/2 cup rosemary
  • 1/4 cup lavender flowers
  • 2 lemon verbena leaves, crushed
  • 1 teaspoon mint
  • 4 whole cloves
  • 1 small piece of cinnamon stick, 1 inch long, broken up

Directions:

Combine all ingredients in a large jar with a tight-fitting lid and shake to combine.  Allow to meld for at least 2 days before placing in a sachet.

For a simple pillow, fill a 3- to 5-inch drawstring bag with 1/4 to 1/2 cup of chosen herbs; draw strings and tie closed.

TO USE: place the sachet inside the pillowcase or under the pillow and inhale deeply as you fall asleep.  Enjoy the dreams!

6. Herb Garden: Giving an herb garden can be a great gift for a mom who likes gardening, cooking or both. You can give her a small indoor herb garden or a larger outdoor one.  Try these seed papers or these plant seedlings.


7. Herbal Candles
: Herbal candles are a great way to provide a pleasant aroma and relaxation. You can make your own candles using beeswax and essential oils, or purchase pre-made herbal candles or those with pressed flowers.

All these gifts are thoughtful and can be personalized to your mom's preferences and interests, and can be a great way to show her how much you care.

Wednesday, March 10, 2021

What to do in the Garden in March - Garden To Do

I want to go out and work in the garden more this year than I have in many years!  The snow has not even melted off my grass or raised beds yet and I am still thinking, I could go out and do this or that.  I have a rule, no visiting the offsite herb garden until April 15.  The day after Tax Day I can go look at the garden and start making my to do list. If I go out there sooner, I will be tempted to just “fix” this or that and walk around in an area that is way too soggy in early spring to resulting in compacting my soil, so I ban myself from my own garden as a result of past missteps! 

However, the home garden is right out the backdoor and nothing can stop me from trekking out there, once I can step off the porch. So I had to ask myself, what can I do in the garden now that would be helpful, not harmful in the coming months.

Then I remembered that the tree service removed all my stepping stones so as not to break them when they were removing the logs from the yard. I have a wonderful March project to work on. I should also fix the uneven stone in the Thyme walkway, but that might be a while if this snow pile is any indication.  You cannot even see that there are thyme plants under there yet.


Stepping stones in the lawn and garden can become unstable due to excessive rains or heaving, caused by alternating periods of freezing and thawing. So they too should be stabilized and leveled to make them safe to walk on. To fix, this requires that you actually lift the stones and add soil or gravel beneath them. Use a level to verify that they are even with the ground.

Repair a Dry Stacked-Stone Wall

I am also considering replacing the now fully decomposed wood sides to my herb bed with a dry-stacked stone wall.  This is also a great time for you to repair an existing dry stack wall. A dry-stacked stone wall means that they're not actually mortared in place.  However, they do have a tendency to shift during the winter months. As a result, the border becomes a bit unsightly, not to mention dangerous, especially if kids occasionally walk on the stones.

Late winter to early spring is an ideal time to reposition stones. Sometimes minor adjustments are all that's needed; simply moving the larger stones with smaller ones can stabilize the border. It doesn't take all that much time or effort, and the payoff is worth it in terms of enhanced aesthetics and safety. And with the soil being wet and soft this time of year it makes the task even easier.

Correct Tunnels Made by Garden Pests

Unstable stones aren't the only hazards that can lead to a sprained ankle. There are also tunnels and mounds of dirt created by moles and gophers. They too should be leveled with a metal rake and tamped firmly. The exposed soil can later be reseeded with grass seed or left as-is if your turfgrass is the type that tends to spread.

Spring-Flowering Bulbs

It's not unusual for the foliage of early spring-blooming bulbs to turn brown, especially at the tips, when temperatures drop suddenly. Although the foliage may not look all that great, the bulbs themselves will be just fine and will flower pretty much on schedule.

Now is a good time to do a quick sketch of where your bulbs are. This will help when the foliage fades later in the year and you begin planting annuals and perennials in the same bed. You'll have a map of where the bulbs are and avoid destroying them as you dig.

source: Getty Images/istockphoto

Touch Up Mulch

You may need to wait until the snow is gone to do this, but my mulched beds tend to lose snow first, making this an ideal time of year to inspect your mulch, particularly its depth. Chances are organic mulches, especially those made from shredded or chipped wood, have decomposed somewhat or have been washed away by heavy rains.

With a metal rake, fluff your mulch a bit and try to level it out over your garden beds. Along the way, use a ruler to determine the average depth of the mulch. Ideally, you want at least a 2-inch layer, and 3 to 4 inches is OK, especially for southern gardeners.

Winter Pruning Trick

If you haven't already completed pruning your deciduous trees and shrubs, there's still time. Especially if the heavy snow damaged the shrubs in the last big snow.

First, stare at the tree or shrub in question with an eye toward its desired shape. Stare at it from several different perspectives from a distance at various angles, from just a few feet away, and even looking up into its canopy.

Now, rather than doing any pruning, tie some colored ribbon or twine around each limb or branch you think you want to prune. Over the course of several days, each time you walk by the tree or shrub, at different angles and various distances, try to imagine what it will ultimately look like if you were to remove the selected limbs.

Feel free to change your mind. If you're not sure about one of the limbs you've selected, remove the ribbon or move it to another limb. Then re-evaluate your selection. Within a few days, you'll get a better feel for where you should make your pruning cuts and greatly increase your chances of success when you finally make those cuts for real.

Clean your Tools & Pots

If you did not have time during fall cleanup to clean your gardening tools, now is a great time.  Wait for a warm day bring out a bucket and a scrub brush and clean up and sharpen your tools.  I get a set of cheap grill cleaning brushes and use those to scrape and clean my shovels, rakes and hoes.  I use a stone to sharpen my hand trowels to a cutting edge so they can easily slice through the earth.  I like to do this in spring so I can also remove any rust that has formed.

I grow many herbs and flowers in pots so now is the season for me to clean them and get them ready for new plants.  A mixture of 1 part household bleach and 9 parts water is the way to disinfect clay, ceramic and plastic pots.  I clean and remove residue from the inside and then soak them for at least 10 minutes in the disinfecting solution, then spread them out in the sun to dry.  If they need new paint, this is when I spray paint them. 

I like a terra cotta look to all my pots.  It gives my garden a cohesive look.  However real terra cotta is heavy and dries out very quickly, so many of my pots are plastic.  I spray paint them all a terra cotta color so you cannot tell the real from the plastic.

Tarragon and lemon balm
For a bit Later in March

I leave the seed-filled branches up for the birds and animals in winter, but when the grass starts to green, those branches become unsightly. So I will trim down my perennial grasses to about 6 inches tall and tall browned branches on other fall-blooming perennials to ground level.  Tarragon and lemon balm die back in winter, so I want to remove the dead tops once I start to see the new sprouts. Refrain from trimming your lavender, no matter how bad it looks, in March or even April.  It is slow to return and if you trim it too soon it will not bloom in the spring, so take a wait-and-see attitude with lavender.

  • Scrub clay pots.
  • Clean tools.
  • Remove leaves from the bottom of ponds or other water features.


Monday, February 15, 2021

Winter Garden Planning part 1

I have decided to spend some time in the next few weeks talking about Garden Planning. I am going to start with why you want to do it now and then how to do it over the next few weeks.  I will show you how and why to keep a garden journal and how to read a seed catalog and more. 

No space—inside or out—should be designed until you figure out what you absolutely have to have and what you'd like to have if budget, time, and space were not limits. The same is true with your landscape: Create a list and design your own backyard, figuring out how much of your landscape should be devoted to each item. Do you gather often with family? Then a large dining and entertaining space might serve you well. Are flowers your thing? Do you crave space to grow your own food? Then a mix of flower and vegetable beds might be a good solution.

For those who mourn the slowing down of the gardening season, here’s some good news: Plants may go dormant in winter, but people don’t have to. With fewer attention-grabbing chores, winter is the perfect time to revisit existing designs and reconsider plant palettes. Certain landscaping projects are actually better suited to the off months and there are definite advantages to getting an early start in winter.

ADVANTAGES TO PLANNING IN WINTER

Winter Garden
Here is the back and front yards respectively so I can see the space, the vista, and get a feel for the perennial plants already in my landscape.  We took down a tree this winter, so I was also looking at the kind of sun the yard will now get.
Winter garden

See clearly:

The bones of the garden are exposed in winter, allowing you to easily see what’s out of balance and where you might want to add in structure or visual texture, whether in the form of plants or hardscaping. Sightlines are also exposed when plants and trees have lost their leaves. One can see which sightlines to keep clear, which views to incorporate or borrow, and which ones to block.

Seed packets

Beat the rush:

Get orders started for long lead-time items, such as outdoor kitchen appliances or specialty plants. Don’t let long delivery times in spring push your project off track; order early and keep your project running on time.

Read up:

Cold winter days are the perfect time to catch up on gardening and design books and magazines. There are so many sources for new ideas, but one of my favorites is the Instagram and websites of seed companies. They have gotten very good and giving context for the plants they sell, not just pretty plant pictures to make you drool.


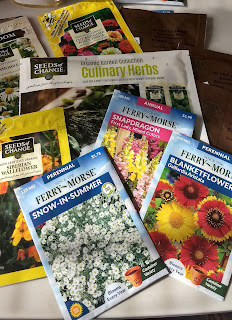
My new flower choices and repeat loved herbs have already arrived!

Catch up:

Get caught up on all the latest trends in garden design. Get inspired to try something new—add edible plants to your landscape, make your garden more sustainable, design a garden getaway—whatever catches your eye.

I suggest these great websites for ideas:

https://www.provenwinners.com/container-gardening/ideabooks

https://www.countryliving.com/gardening/garden-ideas/advice/g746/garden-plans/

https://www.plantedwell.com/gardening-designs/

And if you want to see previous Garden design posts I've written, here is a search of them all:

Backyard Patch Herbal Blog: Search results for garden planning

So next time I will talk about prepping your garden journal and ordering your seeds.  If this year matches last year with the number of gardeners increasing, you will want to order your seed sooner than later!

Garden Journal

Wednesday, October 25, 2017

Fall Garden Clean-up

How much do you hate cleaning up your garden in the fall?

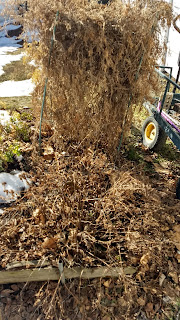
I used to.  When I looked out my kitchen door and saw more brown than green, I would grimace and think, “…next weekend.”  Inevitably, clean up kept getting pushed back by other, more pleasing events.  But there comes a moment when I cannot put off the inevitable; I have to clean up the garden and put it to bed for the winter. Preferable before the heavy rains set in. But I like brisk weather and a clear brisk fall day is perfect to clean out the garden beds and I know I’ll be glad I did in the spring!


Garden Clean Up Tips
Anyone who has gardened for a few years has come up with their own tips and tricks for making garden clean up a bit easier.  I have discovered a few things that might make life easier for any organic gardener.

Be prepared.  When I go out to clean up, I always bring the tools I’ll need to make it easier.  So my tool chest contains:
1.      1. Scissors – the knots you used to tie up tomatoes will be real tight after a summer of rain and heat.  Trying to pull them off just frustrates.
2.      2. Pruners – if you try to cut back blackberries or blueberries without them, the chances are you’ll do more damage than good.  These small, sharp sheers can cut through up to an inch of stalk or wood.
3.      3. Shovel – I sometimes need to coax some of the plants from the ground.  Eggplant and tomatoes get stems more than an inch in diameter and their roots can extend up to 10 feet from the base of the plant.  So, a bit of shovel power comes in handy.
4.      Rake – I prefer the good, old-fashioned garden rake because it’s heavier than a leaf rake and the tines won’t work against me as I rake up fallen tomatoes and peppers.
5.      Bucket – I use an empty kitty litter container and I use it to pick up all the tomatoes that hit the ground at the end of the season.
6.      Garden gloves – I also coat my hands in lotion and scrape a bar of soap under my nails to make the cleaning up of me afterward a bit easier.

Clearing the Ground
I actually find this the most motivating.  Pulling off tomato cages, cutting vines out of my trellis and fence and tearing up the roots of the dying plants gives order back to my space and lets me see the promise of next year.  All annual vegetable and herbs plants need to be removed and moved to the compost bin.  The perennials like asparagus, blackberries and most herbs can be thinned, mulched and trimmed one last time.  Save your trimmings of the herbs to use for dinner tonight! If the flowers I use for pest control (and to jazz up the greenery), like marigolds, zinnia, nasturtiums and petunias, are still blooming, I leave them alone.  If they’re finished, they get tossed, too.

One last task remains before you can move from clearing to covering.  If you grew tomatoes, grab a bucket and pick up all of the fallen tomatoes off the ground.  If you don’t you will have a whole lot of baby tomatoes to pull up next year.  This is a gooey task but well worth the effort.  The same is true if you have a large squash or pumpkin patch.  They will send more volunteers than you want to weed out in the spring.

Once the ground is cleared, it’s time to cover it.

Blanketing the Garden
The last step in garden clean up is to lay down ground cover.  In my garden, that means a recipe of cardboard, newspaper, leaves and grass clippings (only use the grass if you do not treat your lawn.)


Cardboard goes down first.  I use it mostly to create a barrier along the edge of my garden where crab grass and creeping Charlie like to lurk, slip under the edges and set up house in my garden.

Once the cardboard is down, I put down a layer of leaves.  The last layer I put down is grass clippings.  Heavier and denser than leaves, they hold them in place.  Both break down nicely, enriching the soil and making it better, every spring, for the seedlings to grow and thrive.

I have raised beds in the yard, but wet winters can cause these to rot so it has been my habit to remove the sides in the fall, use the cardboard to hold the shape in place and replace the beds in spring turning the edges into the middle of the bed and thus turning the soil a bit when I replace the beds. 


Friday, April 14, 2017

Growing Herbs in Containers - Planning a Container Garden

Planning a container garden


Where garden space is limited, or where your claim to the great outdoors begins and ends at the balcony or window box, you can create a visual and edible feast with herbs grown in pots and other containers.  Herbs such as bay laurel and rosemary are at their most effective when planted in their own in a container and since both can have a nice long life, placing them in a container lets you bring them indoors come winter.  Other herbs can be planted individually or in larger containers in groups.

rosemary being trained
on a copper frame into a
triangle topiary
This design is something you can do in its entirety or you can pick and choose those parts that will fit in the space you have available.

You can be as simple as a clipped bay or topiary rosemary in a large container flanking the door or a strawberry pot holding a wide variety of plants.


Containers can be the more traditional terra cotta or plastic pots to the more creative and textural stones sinks, barrels or half barrels, wheel barrows, olive oil cans, paint cans, steel tomato cans, wooden crates or hand-crafted hypertuffa containers you can make in any shape you want.


Keep these tips in mind when choosing containers:
1. Shallow containers such as stone sinks, and terracotta or hypertuffa troughs are suited for annual herbs such as sweet basil, dill, chervil, and calendula. 
2. Try to keep annuals and perennials in separate containers so you do not disturb the long-term herbs when you plant or discard the annuals.
3. All containers, regardless of style require adequate drainage holes in the base.  
4. If you are filling a large container, place it in the final position before you fill it, as it will be heavy and hard to move.

To Plan -- 

The easiest way to begin to fill a container is to combine three categories of plants: thriller, filler and spiller.

You want to have a bold, upright, architectural plant; that's the thriller.  It should get your attention.

The filler is the plant with medium height in the pot, or the next step down from the thriller.

The spiller tumbles out of the edge of the container and falls toward the ground.


When considering plants to use as your thrillers, fillers and spillers, think about their texture, fragrance and color combinations. Individually, each plant conveys color, texture, shape, and dazzle. Yet when combined in one container or a grouping of pots, examine how the plants interact with each other. Do certain colors in one plant bring out subtle complementary colors in another? How do the various leaf shapes, sizes and textures carry through the container plantings? Is there an underlying theme that connects all the plants together?

You can accomplish this with one container or a set of containers grouped together.

Thriller
So how do you combine form and function into a fabulous container? Start with your focal point, or thriller. This is the plant that provides architectural structure in the pot. "Thrillers are the big, bold element, so look for shapes that are strong and pronounced," says Steve. Good options for thrillers are elephant ears, cannas and ornamental grasses.  You can add a lemon grass, chives and a thick-leaved scented geranium like ‘Mabel Grey’ too.

Filler
Fillers are the plants in the middle that connect the thrillers to the spillers. Fillers are mounding, billowy plants that you put around the thriller. They disguise the base of the thriller and fill up the pot with neat shapes. Consider using plants of moderate size, such as basil, coleus, pentas and lantana. Small leaf filler would include thyme and variegated thyme.

Spiller
Spillers are the final element to consider when designing your pots. They cascade to the ground, softening the edges of the pot and anchoring it in place. They provide a colorful skirt around the combination of thrillers and fillers. Sweet potato vine, million bells (Calibrachoa) and nasturtiums are good examples of trailing plants.


Come back tomorrow for Design and Layout ideas for Containers

Tuesday, July 26, 2016

Backyard Garden Update July

July was a whole lot of let it grow.

These are some of the plants in bloom


 Mabel Grey Scented Geranium

 
 Calendula just before it began to bloom.
 Nasturtiums
 Swamp Milkweed


 Gazania
 Anise Hyssop

 Yarrow

 Artemesia

The back yard enjoying growth and decoration.  We added a third trellis back by the fence for Hyacinth Bean.  I got some seed from the Garden Club and planted them along the bottom.  The trellis is to keep Chas from trimming them down before they get big enough to grow on the trellis.  Hyacinth bean can grow inches in a day, so although an annual it can cover the trellis by the end of the season with no problem.


 The peas have taken over the string.  I am not sure what to do now that they are higher than the posts.


 Scented geraniums by the back door.


 The vegetable garden is getting tall and full with much potential by the end of the month.


The herbs seemed to be growing more slowly than I expected so I started a program of adding compost tea and new rich soil and compost to the garden in 2 week intervals to see if there is improvement.  By month end they are beginning to get better.


 The rain garden in mid summer


 By month end the calendula and Nasturtiums joined the rest of the flowers in bloom!


Tuesday, June 28, 2016

Backyard Garden Update

We crafted the raised beds back in late May and planted them over a couple of weeks.

We started with the two front (closest to camera beds) then added three more behind them.  The former sandbox in the far right was converted to an herb garden last year and added to this year.


The hubby made me two trellises.  One for cucumber (foreground) and one for coreopsis in the background.


Three of the raised beds were given to me by a friend in the garden club.  The two not so weathered are new.  Was going to make them from scratch, but found these at ACE hardware and they matched the others so we were thrilled.                                                                                                                                                                                     We still did not have enough room, so ended up planting extra plants in the "corners" between two raised beds, or at the ends.  May regret this when things start to spread.

Strung string between to posts for the snap peas to grow on.  These are for Chas.... I hate peas!


 Here is the Herb garden.  The larger plants are the ones planted last fall. The L-shape area was prepared with compost and additional soil to be able to take new plants.  The older area I prepped in a hurry last fall and only had enough soil for that small space.  We composted fall leaves and sticks and had more soil by springtime.


 I put in a rosemary and a lemon verbena in the ground.  I have not done that in years.  They grow so much better in the ground, but then you have to dig them up in the fall.

This year someone in the garden club had strawberry plants so I used my strawberry pot!
Related Posts Plugin for WordPress, Blogger...