Showing posts with label winter sowing. Show all posts

Tuesday, September 26, 2017

Spinach and Parsley Growing in Autumn

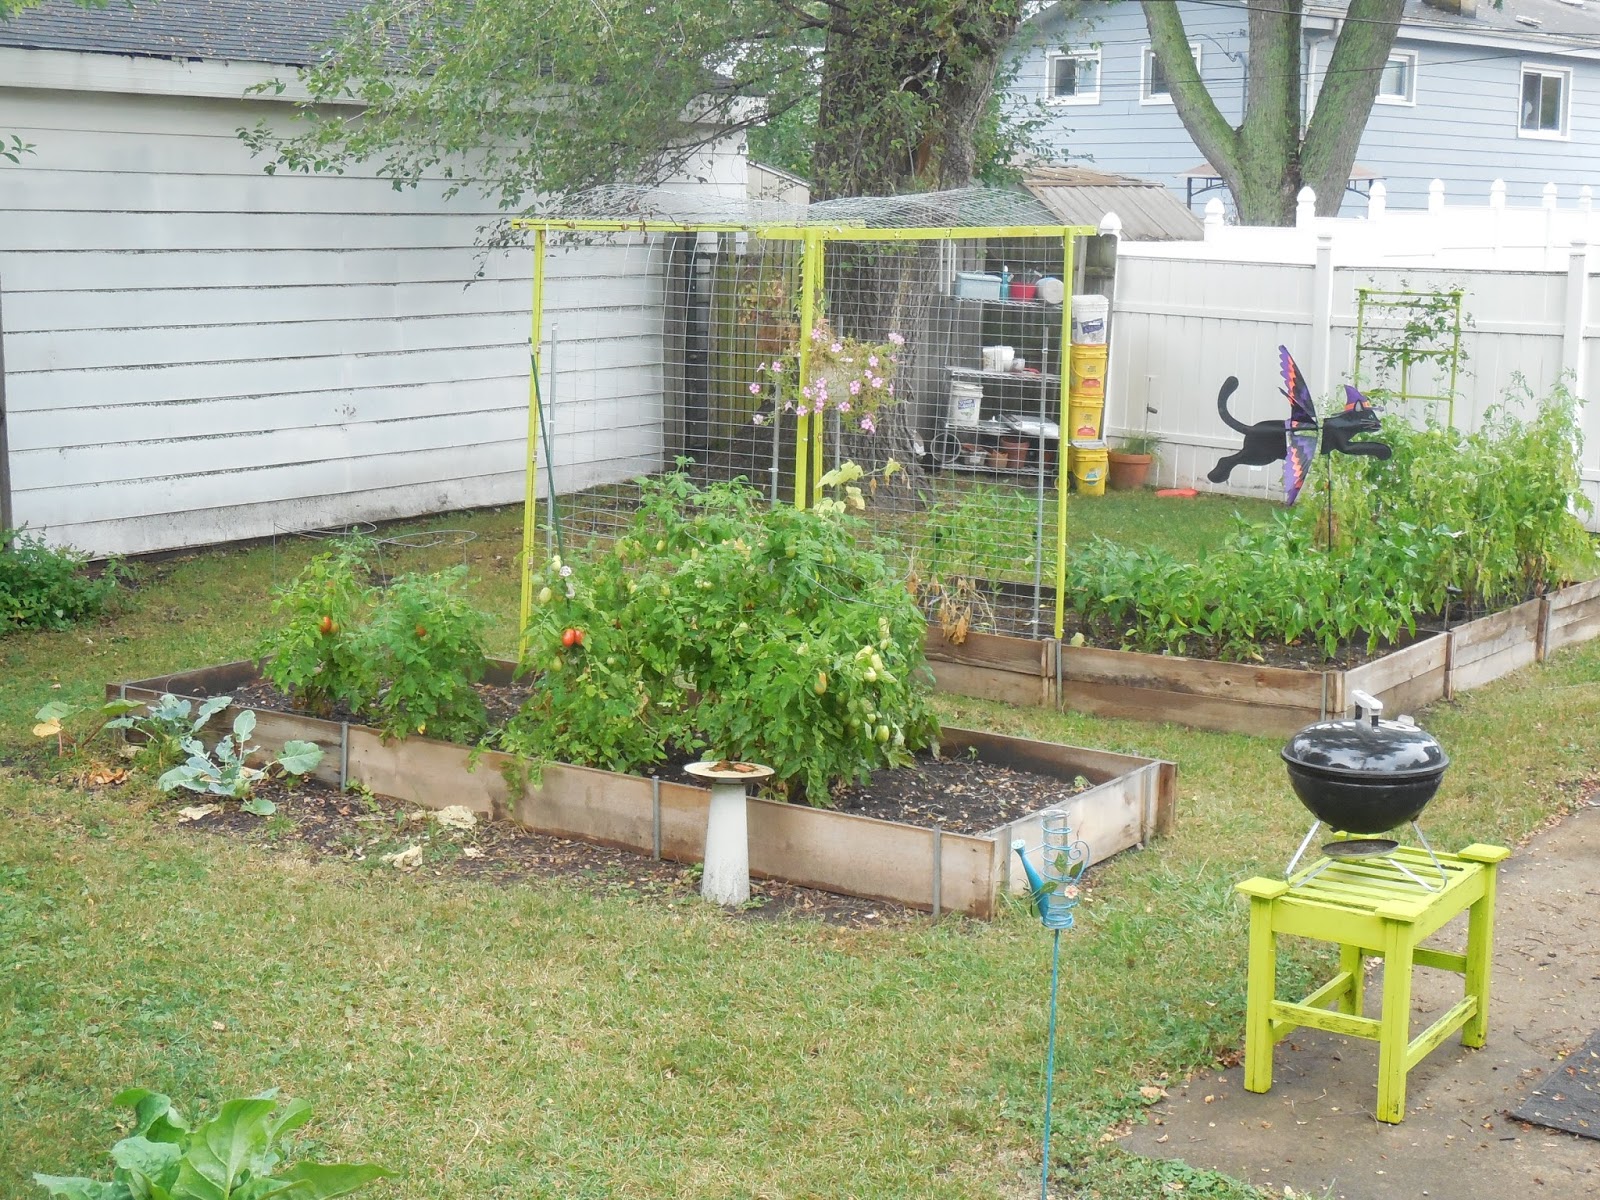
We decided to put hoops over one of our raised beds and try to expand the growing season.  More for starting plants in the spring rather than the fall, but then I realized Spinach and Parsley in addition to garlic can be planted in the fall for a harvest in the upcoming season.
The end of summer marks a new beginning for spinach and parsley, the easiest veggies to grow through winter.
Young plants that get their start in early fall are strong survivors, capable of making it through temperatures well below zero with proper protection.
You can pick a few leaves in fall, but the big payoff comes in spring, when your overwintered plants start to explode with sweet, crisp leaves weeks before other garden goodies are ready to pick.
Metal tube used to side the beds is covered with pvc bent to hoop over the bed and covered with plastic sheeting.

GROW SPINACH AND PARSLEY THROUGH WINTER:

1.      In areas with strong winds and heavy snow, build a cold frame or low tunnel enclosed by a row cover to provide good protection.
2.      Mix in a balanced organic fertilizer to the garden bed.
3.      Sow seeds or set out seedlings.
4.      Until seeds germinate, keep the soil moist.
5.      Install the frame or tunnel over the plants when the first frost comes, but keep the top or ends open for ventilation until temperatures drop into the teens. Growth will slow as days become shorter and colder, and then resume in February in response to longer days.

TIP:
To speed germination of spinach seeds, soak them overnight in water, and then let them dry at room temperature for up to five days. Parsley seeds will sprout faster if you place them in a strainer and pour one cup of very warm water over them. Allow the seeds to dry overnight on a paper towel, and then plant them.


Saturday, May 31, 2014

Harsh Winter - Hardy Plants!

This winter was harsh.  There was so much snow and so much cold and the only garden safety net we had was the covering of snow which settled in on December and did not melt away until April.  The covering of snow protected the plants when the weather turned bitter, going 25 degrees below zero at one point.  My favorite saying this winter was the ground is still white.  I was saying that in May when we had one last snow storm that covered the grass in white one last time making it impossible to plant even perennials until after May 18.

Good for the garden was the fact the snow fell in December and never melted.  This snow cover protected everything in the garden.  However anything not covered by the snow was wind damaged or killed outright.  The tops of some plants were dried out by raking winds.  Climbers, trees and shrubs have large amounts of winter kill.  My thyme bed is so disheartening that I could not take photos of it.  However, this year I have a special project-- a 20 x 20 foot community garden patch and in that patch is a 3 foot by 3 foot raised bed with thyme, so at least I have beautiful thyme plants to enjoy without memory of what once was!

The garden as first planted 5-18-14

These are a combination of French, German, English, Common Lemon and Doone Valley Thyme.  The Doone Valley I wintered over in the house, the others I purchased this spring from nurseries and plant sales.

The soil did not really warm up until between May 15 and 20.  I did no direct sowing in the garden until around Memorial day.  The winter sowing I did was slow too.  The plants finally germinated and sprouted in late April.

You can see the snow cover even in February

Here are the spouts on 4/27/14
They are large enough and have their first two real leaves, so I can plant them out in the garden now at the end of May.  For details and photos of that task, check out my Community Backyard Blog later this weekend.  Winter sowing was to give me a jump start on the seed season, but I think it is not going to be the coup I'd hoped it would be this year!

To my surprise the seed that fared worst was Nasturtiums.  These hard shell seeds usually are perfect for winter sowing, but the germination of the seed was 1 plant in the entire container.

Monday, April 7, 2014

Winter sowing update

Okay this winter was pretty brutal.  As a result I waited until well into January to try to grow plants by winter sowing.  And Now it is April, but to be honest it has not really been that warm yet.  I grabbed the camera to document the activity (or non-activity) of my winter sowing.

Here are the bottles that were out on the railing.  I moved them to the table when the wind threatened to remove them from my planters.

Upon closer inspection I see no green -- you?

Here is the milk carton style.  Green anyone?


I am not giving up hope.  If they are to germinate I think they still need more warmth and I expect the ones on the table to sprout first, so we are now holding vigil for green!  More updates to follow.

Monday, February 24, 2014

Winter Sowing Herbs

A friend of mine who lives in zone 7 recommended this.  She said instead of sitting back with your seed catalogs and dreaming of that gorgeous garden you are going to grow next summer, take action now and get a head start on spring.  But I kept thinking, I live in zone 5 and trays of seeds will just freeze out there and die.  This winter I decided to give it a shot. (Why this winter I can only guess is because it has been so much winter that I am dying to get into something like gardening.)  This is what I know about it.

Winter sowing refers to planting seeds in flats or trays during the winter months and setting them outside to allow seeds to germinate and seedlings to emerge naturally when the weather warms. Not only does this give flowers and vegetables a head start in the spring it allows you to start seeds in the midst of winter while the landscape is frozen.  Once temperatures rise and the soil thaws, seeds germinate and sprout naturally at the ideal time for growing.

The best source on the internet for winter sowing tips and guidelines is www.wintersown.org by Trudi Davidoff.  On that site you can identify what can be winter sown or if you should just save the seed and direct sow it in the garden.  Not all flower and vegetable seeds are suitable for winter planting, but many are. Tender annuals or tropical flowers and herbs are not likely to do well if planted in winter as their seeds do not require cold stratification and may not survive the exposure to cold temperature. Look for seeds from plants that self-seed. This includes many wild flowers and native plants. If you have noticed seedlings emerging in early spring near flowers and herbs, they are a good candidate for winter sowing. Most perennials thrive with winter sowing.

The materials you need to winter sow are pretty simple:

Seed starting soil (you can make or buy)
seeds
containers with lids
waterproof markers
water
assorted tools

You can also look in seed catalogs for plants with notations for "fall planting", "early spring planting", "hardy seeds", "self seeds" or "will colonize". Some may note the seed requires cold stratification. These are all perfect to use for winter sowing. I like Park's Seed catalog, it has a great germination table right in the middle of the catalog. They have a numbered guide indicating the best germination requirements for seeds. I took a yellow highlighter and went down that numbered list and highlighted all the numbers that would be appropriate for Winter Sowing, then I carefully went through their list of seeds and highlighted the varieties that corresponded to the correct numbers. This is how I chose which varieties I would Winter Sow. A lot of catalogs, not just Parks, will have a germination table, or some information about germination, look at them, study them, and learn. Additionally you get sowing information on the back of seed packets as well.

Nice to have dirt under the fingernails in February

Milk jugs and soda bottles seem to be the best choice for me in Zone 5 to use for winter sowing.  They create mini greenhouses for seeds. You can also use traditional seed starting trays, but this is not necessary. One person I know lines toilet paper tubes up on a cardboard box, fills them with soil and seed and covers it with a clear plastic bag.  Each tube is a different seed.


Wash and dry the containers with hot soapy water to remove food residue and to prevent the spread of bacteria or disease causing organisms. Poke holes in the bottom of the container. 


Add the moist seed starter to the jugs.  It does not need to be very deep about 1 ½ to 2 inches at most.  You can make your own seed starter by mixing equal parts potting soil, peat moss and vermiculite or perlite. Mix in large bowl or bucket and moisten with tepid water. The starter should be damp, but not soggy.


Plant seeds to the recommended depth and cover with soil. Firm down with your hands to remove air pockets. Since I did not cut these containers I used the handle of a wooden spoon to firm the soil. Replace the plastic cover or cover with plastic. You need to have 2 inches above the soil to allow space for seedlings to grow. 

Label the container. Even though you think you will remember, chances are you will not. A label makes your life easier.
 

Place trays outside. Many prefer to place trays on a picnic table or an elevated structure where they can be reached easily. Although you want to expose the seeds to elements, placing them in a sheltered location prevents them from being blown over when the winter winds howl. Seeds can be placed on the deck or porch and moved to a sunnier location once snow begins to melt and spring approaches.  I placed mine on the shelter of window boxes.  I tied ribbon on them so they looked like a decoration to those passing by.
 
Allow trays to freeze and thaw naturally. When spring arrives, the soil will thaw and seeds will germinate at the proper time. Remove the plastic once seedlings emerge and danger of freezing has passed.
 
As many people know my garden is rented and I live in an apartment, so the place where I am winter sowingis on my apartment patio.  I placed a window box on the ground near the windows so the containers did notssit on the concrete.  I have several hanging window boxes that I decorate with greens for the holiday that 
were frozen to the railing by January, so I tied bows on pop bottles and nestled the bottles down in the old 
soil and started a few there as well.  My patio faces north to northeast so those near the window are rather 
sheltered the ones in the hanging boxes are exposed to more elements.


 Winter sowing is relatively maintenance free and produces young seedlings just in time for spring planting. There is no need for constant monitoring of the seeds as you allow nature to take its course to produce vigorous young seedlings that do not require hardening off and don't take up precious space in your home. So, get out those seeds and satisfy that gardening bug by starting your seeds now with winter planting.
 
We will see what happens and follow up with you about it as winter progresses.

Herb seeds I recommend for winter sowing:

Calendula
Viola
Flax
Basil
Mint
Oregano
Parsley
Sage
Thyme
Dill
Hyssop
Marjoram
Chamomile
Chives
Yarrow

Wednesday, June 26, 2013

Herb of the Week - Clary Sage

My husband and I were going through some photos and I was amused at how many I had of Clary Sage.  Turns out this attractive plant, of all my medicinal plants, was one my husband loved to see grow.  As a result we have many photos. 


So in honor of all the pictures I chose
                                  Clary Sage as the herb of the week.

Clary Sage (Salvia sclarea) is a biennial, meaning it blooms every other year. The name clary comes from the latin clarus meaning clear.  A decoction of the seed is mucilaginous and was traditionally used as an eye wash (to clear the eyes.)  In the 16th century the seed was infused with elder flowers and the liquid was added to Rhine wine which turned them to muscatel making the wine more potent.


To Grow

The seeds of Clary Sage must be scarified in order to germinate.  It is a great herb to winter sow.  But if you don't have the time, freeze the seeds for 3 to 5 days in a zip lock bag before planting.  They need total darkness to germinate so sow the seed at least 1/2 inch deep in dark soil.  If you want to direct sow, do so once the soil has reached 55 to 60 degrees.

This plant thrives only in full sun and a well-drained sandy soil.  It struggled the first year I grew it because my soil was too dense, but once I worked in sand it was very happy.  Do not use any fertilizer high in nitrogen, so a simple compost feeding will do if needed.  And allow the soil to dry out between waterings.  Space the plants 9 to 12 inches apart.  My clary sage is blooming now, but it is not as happy as it could be because of the constant rain we seem to be having.

This is a zone 6 and higher plant, but I have been able to keep it through winters here in zone 5 with these winter preparations.  Cut the tops after the first fall frost.  It must be protected from harsh winter conditions, so a layer of hay or evergreens placed over it once the ground has frozen will protect it from harsh drying winds.


To Use

Clary Sage tastes much like garden sage with a pungent fragrance holding a hint of camphor.  Unlike garden sage, however, it can easily over power foods and become bitter if used in large amounts.  The large leaves  (as big as 2 inches across and 6 to 9 inches long) grow off a central stalk that bends with the weight of the flowers. It grows to a height of 3 feet with a width of 1 foot. The flowers are lilac or pale blue, pink or white, in whorls on top of the stems. The leaves are broad oval or heart-shaped, in pairs, covered with fine silver-white hairs. It blooms from June to July.

For culinary purposes you can use the fresh and dried leaves in the same ways as garden sage.  It is a great addition to breads and stuffing.  The flowers are edible and can be used as garnish.  A strong fragrance resembling a balsom makes it a great addition to sachets or potpourris.  The essential oil is also used as a fixative in perfumes and as a scent for lotions and detergents.


Clary sometimes replaced hops in beer to produce an enhanced state of intoxication and exhilaration, although this reportedly was often followed by a severe headache. It was considered a 12th century aphrodisiac.


An astringent the steeped leaves can be gargled, douched and poured over skin wounds. An infusion of the leaves dried or fresh makes a stimulating bath additive.  Taken internally it is combined with other herbs for kidney problems. The clary seeds form a thick mucilage when soaked for a few minutes and placed in the eye, helps to removed, small irritating particles. A tea of the leaves is also used as an eyewash. Clary can be used to reduce muscle spasms. It is used today mainly to treat digestive problems such as gas and indigestion. It is also regarded as a tonic, calming herb that helps relieve premenstrual problems. Because of its estrogen-stimulating action, clary sage is most effective when levels of this hormone are low. The plant can therefore be a valuable remedy for complaints associated with menopause, particularly hot flashes.

The professionally extracted essential oil of Clary Sage is used in many medicinal situations, especially those to improve circulation and respiration, as well as relieve the effects of grief.  According to Susun Weed, "this is the essential oil chosen for treating nervousness, weakness, fear, paranoia, and depression. Clary feeds the soul and helps one get through rough times. It is recommended when pressures and stress come from outside." Wonderful for people in mid-life crisis, Clary also encourages vivid dreams or at least enhances dream recall.

NOTE: rather than update or change this post we decided to answer several questions and provide a few new recipes for Clary sage with a new Mini Herb of the week post.


Sources: WebMD; Susun Weed (articles and books); Rodale's Encyclopedia of Herbs; The Encyclopedia of Herbs: A Comprehensive Reference to Herbs of Flavor and Fragrance by Thomas DiBaggio and Arthur O Tucker as well as 20 years of personal experience with the plant

Clary Sage Pork Roast


2 1/2 to 3 pound pork roast or tenderloin
1/2 tsp. dried thyme
1/2 tsp. dried clary sage
1 1/2 tsp. dried rosemary
1 bay leaf
2 fresh leaves of basil
1 apple, cored and cut into quarters
Salt and pepper


Place roast in crock-pot.  Cover just to top with water.  Add thyme, sage, rosemary, bay leaf, basil and apple.  Add salt and pepper to taste.  Cover and cook on medium for 5 to 6 hours.  (Add potatoes to your crock pot with roast in the last 2 hours for delicious boiled potatoes!)


Susun Weed's Clary Love Potion
Equal parts of dried lavender, bachelor’s buttons and clary sage
a pinch of valerian
 a sassafras leaf

Blend together and place in a small sachet and wear inside the clothing to attract a man.

Anti-Sorrow Aromotherpy Blend
4 oz sweet almond oil
10 drops marjoram essential oil
5 drops clary sage essential oil
5 drops rosemary essential oil
1 drop lemon balm essential oil

Combine ingredients the ingredients and shake well.  Place the oil on an evaporator and use on a cotton ball.

Monday, March 12, 2012

Winter Sowing


I am attending the Chicago Flower and Garden Show this weekend and next week will be sharing gardening ideas I picked up or improved learning there.  To get you in the mood, I thought I would share an idea I have been toying with and finally decided to accomplish.  If there are no pictures with this post, please bear with me, I am having some trouble with the computer recognizing the .jpgs  I will post photos as soone as it allows me too!

Winter sowing is an easy germination method that allows you to start hardy seedlings for pennies.  Winter sowing is done outdoors during winter using mini-greenhouses made out of recyclables.  There is no heating devices, no energy using grow lights and nothing very expensive at all to start your seeds.

The best source on the internet for winter sowing tips and guidelines is www.wintersown.org by Trudi Davidoff.  On that site you can identify what can be winter sown or if you should just save the seed and direct sow it in the garden.

This is a great green project for recycling old milk jugs and toilet paper rolls, yet you can get a bit of dirt under your finger nails when it is hard to do that outside in Illinois just yet.

What you need:

Sharp scissors or a knife
Milk cartons, gallon size or paper towel tubes and a card board box
Seed packets
Waterproof marker
Water
A roll of duct tape
Potting soil
Outdoor location to place your planted seeds

Steps:

Place the tubes in a small cardboard box spaced so they touch each other and do not fall over.

Or poke holes in the bottom of a one gallon milk carton.  Then using sharp scissors cut the carton all the way around by the handle, leaving the handle intact.  This will leave a hinge for opening the milk jug.

Add the potting soil to the milk jugs or paper towel rolls.  It does not need to be very deep about 1 ½ to 2 inches at most.  Label the milk jug or writ on the inside edge of the towel rolls the name of the seed you will be planting.  You can put a label on the bottom of your milk jug too in case the other falls off.

Give the soil a good watering before placing your seeds.  This will keep them from floating away when watered after.  I watered the milk jug before I planted and the towel rolls after I planted them. 

Remember to plant the seeds at the depth specified on the seed packet.  Pat the soil down or add a layer of soil on top of the seed instead of pressing them in.

You need to have 2 inches above the soil to allow space for seedlings to grow.

Secure the sides of your cut milk jug with duct tape and place it in the snow outside or on a picnic table, sidewalk ledge or balcony.

I put plastic wrap, double thickness over the top of the cardboard box.  To give the greenhouse effect I need to get the seeds to start.

Herb seeds I recommend for winter sowing:
Calendula
Viola
Flax
Basil
Mint
Oregano
Parsley
Sage
Thyme
Dill
Hyssop
Marjoram
Chamomile
Chives
Yarrow


UPDATE: we actually planted a variety of herbs in winter sowing containers in 2014.  Here is a step by step
Related Posts Plugin for WordPress, Blogger...