Showing posts with label seed starting. Show all posts

Tuesday, March 26, 2024

How Tuesday - make newspaper seed balls for Easter or Spring planting

I started getting seed catalogs before Christmas, I am thinking they were hoping you would get them as a Christmas gift, or that you would want to escape your family for a few minutes and start reading and choosing your seeds, either way it got me thinking about seed a bit sooner than I usually do.

As a result I started planning what to do with all the seed I collected from the yard and the flower garden this year.  One of the great things to do is make your own seed balls.  If you and the kids are bored and getting some cabin fever, you can make these as a project too.


There are recipes available that use compost, seeds and clay.  I like those and have done them for programs as a giveaway, but this version using newspaper is easier and can be done in smaller batches.

Why we’re OK with this method: In an anaerobic landfill, newspaper takes a long, long time to break down. Not ideal. But in a garden, yard, or otherwise open area in need of fortifying (i.e., an environment with plenty of oxygen), newspaper should degrade just fine. Plus, it’s craft-project-friendly. In other words, less messy. Slightly.

I’ve heard reports that newspaper seedballs do better when planted rather than thrown. 

Newspaper Seed Balls (yield 20 balls)

10 Sheets of newspaper

Paper shredder

Water

An immersion blender (or a food processor that you’re prepared to commit to the seedball cause)

about 1/8 cup seeds, especially wildflowers and herbs


Directions:

1. Shred the newspaper using a paper shredder. Or if you are really bored, tear the paper by hand or cut with shredding scissors like I did.


2. Soak the shredded newspaper in a bowl of water for a bit—a useful step but not crucial.


3. Transfer the whole soggy mess to a food processor or to a stainless-steel bowl in which you can safely use an immersion blender. CAUTION! Newspaper ink can stain plastics, including your food processor, so if you’re going that route, you might pick up a cheap second-hand model. In some ways, an immersion blender is ideal because the only bits that touch the newspaper are stainless steel and easy to clean.


4. Blend. You might need to add extra water but don’t go overboard. You’re aiming for chunky pulp not watery goo.


5. If you’re using a food processor, transfer the pulp to a bowl. Whichever method you’re using, relocate to an area where you can catch the messy drippings. Grab handfuls of the pulp and squuuuuueeeeeeeeze the water out. Dispose of the water or reuse it for future batches. Dump each squeezed handful of pulp back in a bowl.


6. Add your seeds to the pulp. I used about 1/8 cup for ten sheets of newspaper, which was plenty. Knead well.


7. From here, you can press your seedball pulp into mini cupcake molds or use cookie cutters and press the pulp into them to make fun shapes. Both of these versions are kid- and gift-friendly. Or you can simply pinch off heaping tablespoons and roll them into balls between your palms: quick and dirty. 


8. Let dry. A windowsill in the kitchen did the trick but an outdoor spot in partial shade should work, too. It will take a couple days. I recommend giving them a week before placing them in a container.


9. Toss into an abandoned roadside. Pot them to grow. Give them to a friend. Or store for future use. Newspaper seedballs will keep for months so you can make them and gift them and then plant them in spring.


Tuesday, February 21, 2023

How Tos-day Making Seeded Herbal Paper Bookmarks

Seeded paper bookmarks are not only lovely looking – you can reuse them by planting them into the ground and watching them grow into a plant or flower! This is a really fun project and makes a marvelous gift. One batch can make many bookmarks, so save a few for yourself!

What you'll need

  • 8 jumbo craft sticks
  • 12"x12" piece of window screen or cheesecloth
  • White craft glue
  • Black electrical tape
  • Plain white copy paper or art paper
  • Water
  • Blender
  • 13" x 9" baking pan
  • Flower and herb seeds
  • Dried herbs to match seeds
  • Ground cinnamon
  • Two old kitchen towels
  • Hemp cord
  • Spoon
  • Sponge
  • Scissors
  • Hole punch

Helpful Tip:

Copy paper, construction paper, and even newspaper are all safe, compost materials. Avoid glossy papers such as magazines. Flower seeds, herb seeds, dried herbs, and even flower petals will look wonderful in your seeded paper. These bookmarks can be planted! Just tear into a few pieces and plant the whole thing right into the ground. Hemp is also a natural material, so it's not necessary to remove it. If you have extra seeded paper, tear it into a few pieces, wet a piece of paper towel, and put the paper towel and the seeded paper into a zipper sandwich bag until the seeds sprout!

How to make it


To make the frame for the screen you will need, glue together the corners of 4 jumbo craft sticks, and then lay the screen or cheesecloth over the frame, completely covering it. (See photo.)
 

Glue a second layer of craft sticks to two opposite sides of the frame -- securing the cheesecloth between the bottom and top layers. Trim the ends off of the two remaining craft sticks and glue those along the remaining sides of the frame. Be sure to pull the cheesecloth tight as you glue the sticks in place. Let dry. (See photo.)  


Trim the edges, leaving a bit of cheesecloth hanging over the ends. Using black electrical tape, cover the craft stick frame, tucking the overlapping cheesecloth under the tape. Do not skip this step as it will help protect the craft sticks from the water. (See photo.)  


Tear pieces of paper into squares about 1-2" wide. Place squares into blender and cover with warm water. Turn the blender on and process until a thin paste is formed.  


Fill a 13x9 baking pan halfway with warm water. Pour the paper paste from the blender into the warm water in the pan. Stir gently. For flower bookmarks, add flower seeds, small bits of cut up hemp cord and sprinkle with ground cinnamon. For herb bookmarks, use some colored art or construction paper, herbs seeds, like basil, calendula, dill, lemon basil, greek oregano, or chamomile and sprinkle with a bit of dried herb too. Stir. (See photo.)  

Place a clean kitchen towel on a nearby counter and have a sponge and another towel waiting as well.  

Dip your screen frame into the mixture, going underneath the layer of paper and seeds. As if panning for gold, gently bring the frame to the surface and move back and forth to get a fairly even layer of pulp on your screen. Lift straight up out of the water and allow excess water to drip off. 

Carefully carry your screen to the towel on the counter and set the screen down on top of it. Place the second kitchen towel on top of the screen and flip everything upside down and place it back on the counter. Remove the towel that is now on the top.  

Use a kitchen sponge to press firmly down on top of the screen getting as much excess water out as you can.

Lift the frame up and gently loosen your seeded paper. You may need to clean off the edges of the frame and gently coax a corner loose, but the rest should fall out easily. Then repeat until all the pulp is used.


P
lace your sheets of seeded paper onto a wire rack to dry.  If it is humid, place under a light to speed up the process.

This method can cause the paper to curl. Once they begin to curl, fold a dry kitchen towel around the paper sheets and place several heavy books on top to help flatten your paper. Leave like this for a couple of hours. 

Cut each sheet into 3 pieces. You can cut them for a straight finished edge or place a ruler on the paper and make a damp line and then gently tear the paper.  This will leave an unfinished edge that looks very natural.


Use a hole punch to make a hole about ¾" from the top. Thread a string of hemp cord, ribbon or even raffia through the hole. Tie the cord in a knot and trim the ends.

To Use Bookmarks 

These bookmarks can be planted! Just tear into a few pieces and plant the whole thing right into the ground. Hemp is also a natural material, so it's not necessary to remove it. If you have extra seeded paper, tear it into a few pieces, wet a piece of paper towel, and put the paper towel and the seeded paper into a zipper sandwich bag until the seeds sprout!

 All info and images courtesy of FunFamilyCrafts 

Tuesday, February 16, 2021

How Tuesday - Making Seed Tape

Okay, do you have extra rolls of toilet paper in your house too?

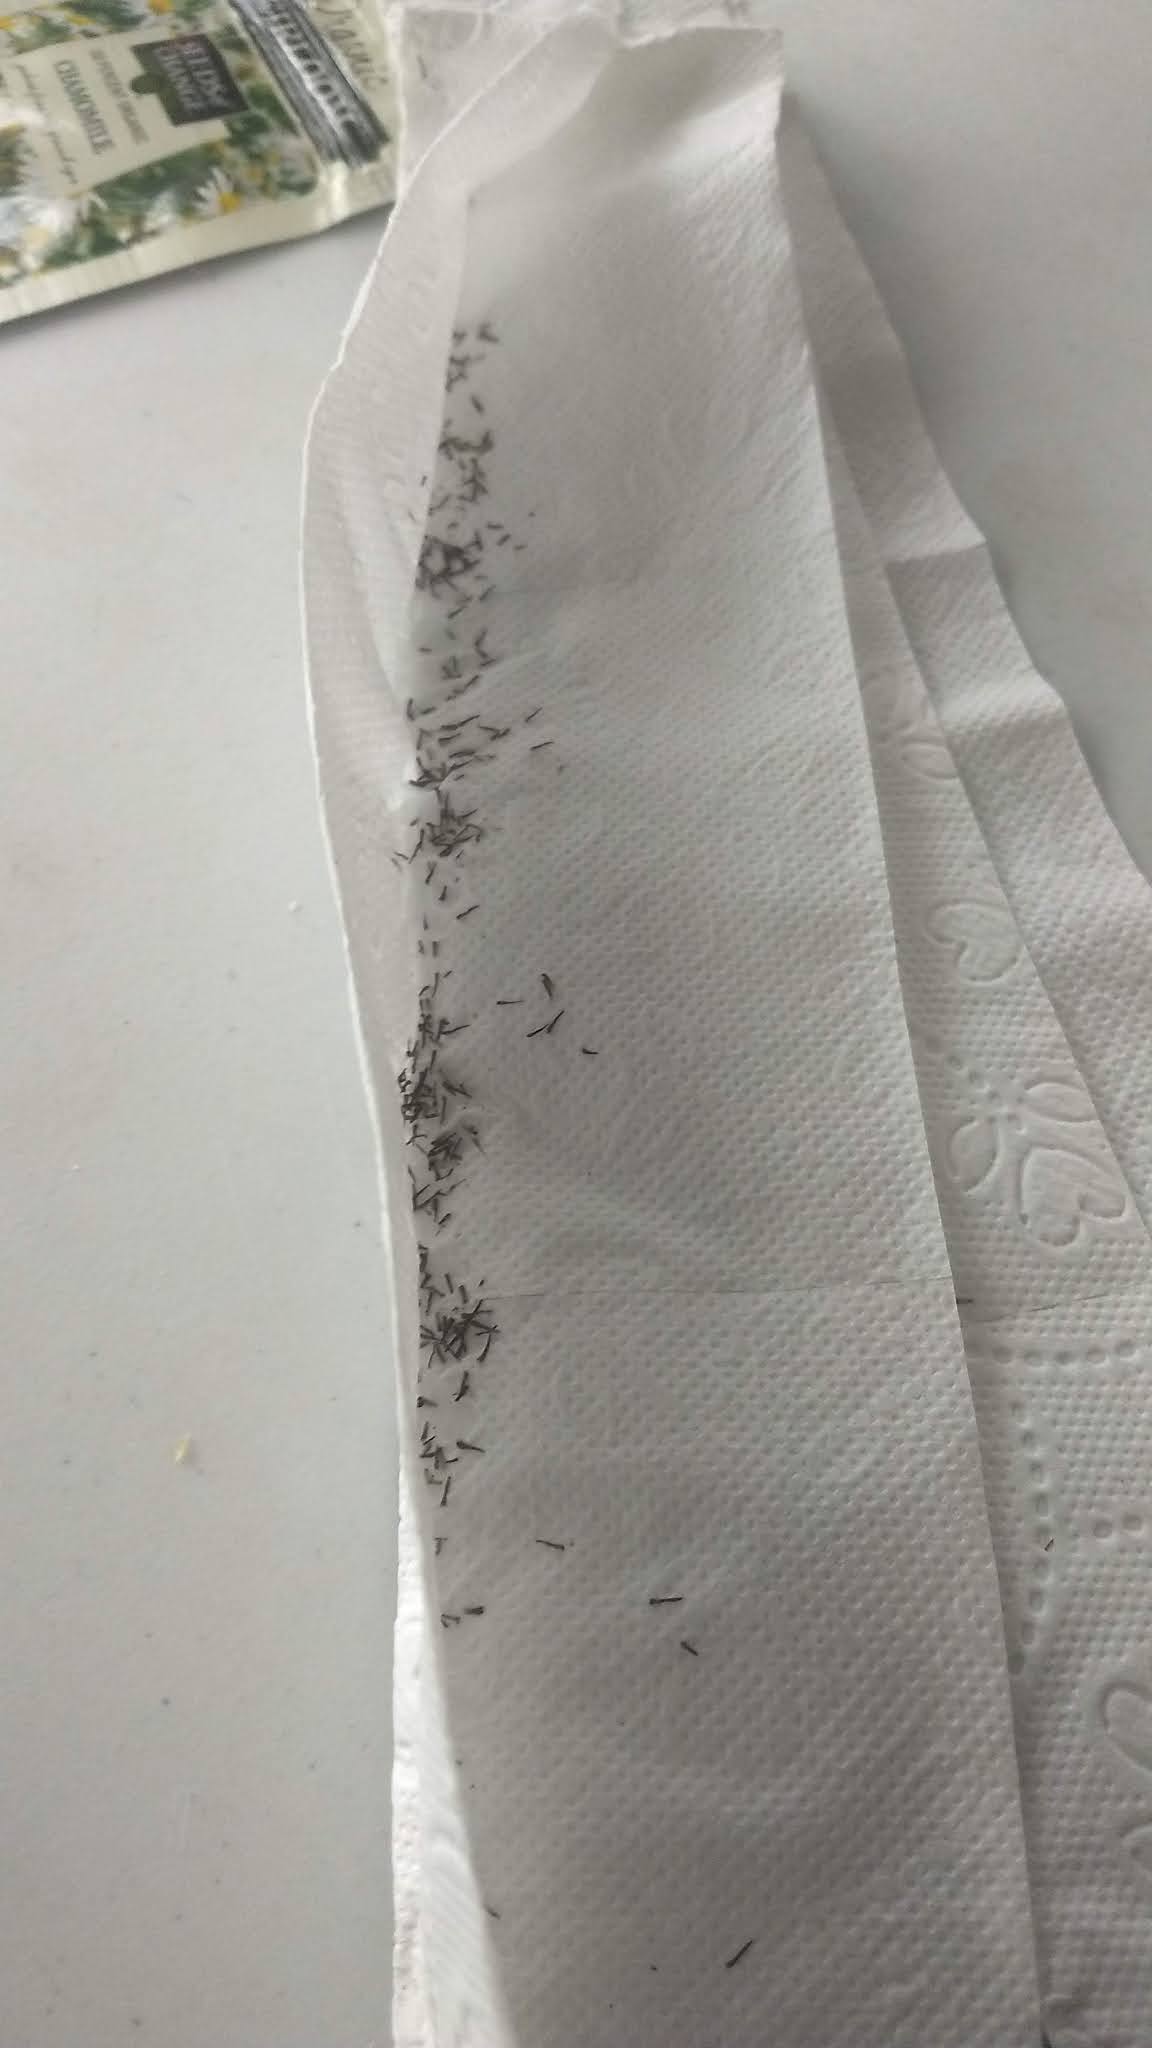
We did not even hoard, we just bought a package if they had any at the store when we were shopping and as a result, we have a few extra rolls.  I had always heard that you could make seed tapes with TP, so I figured now was a great year to try it with all this surplus.

There are several ways to make seed tape, I found instructions on Hometalk Make Your Own Seed Tape | Hometalk , Mistress of Dirt How to Make Seed Tapes for Easier Sowing | Empress of Dirt and Garden Betty Make Your Own Seed Tape - Garden Betty

Seed tape is basically a strip of paper with seeds embedded for precision planting. If you have trouble with spacing, or if you like me think more seeds are better, or you have trouble telling seedlings from weeds, seed tapes are a great way to plant.  Seed companies make seed tape, but rarely is it made in every variety so a homemade tape with your perfect seeds is the way to go.


All you need is toilet paper and glue and a couple other items to make the job easier.

Because they’re on a tape (or length of toilet paper, really), you can also control how far apart they are planted. The entire thing is placed in the garden. The toilet paper will disintegrate, and the seeds will sprout right where you planted them.

How is this different from simply going outside and dropping a seed into the ground? Why take the extra step of making seed tape?

Seed tape is good for:

+ tiny, hard to manage seed.

+ Seed you don’t want to plant too much of just to have to thin out later.

+ increasing germination rates.

+ less seed waste

+ Giving you a winter garden activity when you are dying to garden outside (even though it is -11 today!)

+ keeping seeds in place when there is a hard rain.


Making Seed Tape:

  •   Toilet paper or paper towel
  •  Seeds
  •  Paint brush, pencil or tweezers
  •  Glue / paste made from 1 teaspoon baking flour and a bit of water; or Elmer’s glue mixed with a bit of water; or straight up dots of water soluble glue
  •  Measuring tape / ruler


Steps to creating seed tapes:

1     1. Make your own paste by combining flour and water. The glue should be thick enough to sit on the end of your brush or pencil without dripping. You need only about a teaspoon of flour to glue several tapes.


2,  Decide on the length of your tapes.  For a raised bed or in ground flower bed 2 foot lengths work well.  For container gardening, make tapes about 12 inches long.


    3. Tear off the length of toilet paper you want and write the name of the seed type on it. Do this first or you might forget.


     4. Use your seed packets to help you decide how close together you want to place the seeds.  Make them slightly tighter together to make allowance for germination issues.


     5. Pour the number of seeds you’ll be using on a clean plate and spread them apart so they’re easy to pick up one at a time.
   6.  Place a dab of glue and add a seed.


        OR You can add the glue to the TP and then drop in a seed to each drop.
   

     OR put the glue on a pencil tip and poke it into seed and place on TP
  

     OR dab a paint brush in glue and draw a line and then sprinkle seed onto the wet glue.


  7.  Fold the TP over the seeds before the glue is dry to protect them from falling off.  This is especially good to do with tiny seed    Once dry, the seeds will stay in place.

Extra tips:

·      When those little glue dots have hardened, roll up your seed tape and stash it in an envelope or zip-top bag until you’re ready to use.


·        For some plantings you can get more per square foot by planting diagonally rather than in a straight line.  You can create tapes and off set them or use a zigzag pattern down the length of paper.


·        Using tweezers to drop a seed onto each dot of glue, can make the process easier than using fingers or a paint brush.


·        Since tiny seeds barely need to be covered, the paper makes it simple to see how much soil you’re adding on top.


·        Once you’ve glued on all your seeds, allow ample time for the glue to dry and make sure the seed tape is not sticking to your surface.


      I roll the seed taps up and store in a ziplocked bag until ready to plant.


When planting your seed tapes:
 
At planting time, simply water your soil and smooth the surface. Unroll your seed tape, set it on top of the soil, and lightly cover with more soil. It’s okay if the toilet paper shows through a bit; it will quickly disintegrate and decompose in the ground.

As with seeds sown, either by seed tape or the traditional way, gently mist or spray the soil until the seeds have sprouted and established firm roots; you don’t want a strong blast of water to displace your meticulous work. Within a week you should see perfectly spaced rows of little seedlings coming up!


Tuesday, May 29, 2018

Mistakes New Herb Gardeners Make


So you're thinking of herb gardening, or maybe you tried it last year and it was an utter disaster? Have no fear. There are a few simple mistakes that many herb newbies make (and I know, because I made most myself). Master these simple and practical tips for herb gardening and you'll be using your own fresh herbs in no time.

Fresh herbs are one of the greatest ways to increase the taste of your food healthfully. I often toss whatever leafy herbs are at hand liberally into a salad to add unexpected variations in flavor (basil, oregano and dill are all great choices). Fresh herbs can add punch to sauces or create intensely flavorful crusts for roasted meats. While fresh herbs are now regularly available at grocery stores year-round, growing your own herbs is a great way to master flavors you like and control the origins of your food. Growing herbs at home can be easy whether you live in a house in the suburbs or an apartment in the city.

Let it be known that one of the reasons I started to grow herbs was because they are much more resistant to diseases and infestations, but that still means you need to avoid a few mistakes to be able to enjoy them to the fullest. 
Don’t worry I am not going into soil pH, chemical make up of the soil or any of that.  Those discussions are for those who want to increase a harvest, not enjoy a few herbs in the backyard.  I have only tested my soil once or twice and once was because I was afraid it may have changed after a horrendous flood.


Mistake 1: Growing from seed. Many herbs are perennials rather than annuals (dill, cilantro and basil being exceptions) which means they take forever to mature and impatience can set in.  When you first start out trying to grow fresh herbs, I recommend you begin by trying to grow from seedlings rather than planting your own seeds. You can even grab a small plant at the grocery store to get you started.  Seeds grow slowly; some take weeks to germinate; others need precise conditions to sprout and grow.  All of these can be a headache for a new herb gardener, so skip it dive right in with plants.

Mistake 2: Starting with the wrong varieties. Choose herbs you enjoy eating, those that enjoy the weather where you live.  Don’t try something that says it likes cool weather if you, like me, live in Chicago.  Those hot days in late June will kill it.  Some plants can help you grow others.  Basil wilts if it does not get enough water, you can use it to gauge if you are watering all your plants enough.  Or choose scented geraniums, which love dry soil and will endure being forgotten rather well.
scented geranium
Mistake 3: Watering potted herbs like houseplants. It is better to water herbs daily only a moderate amount than to water once a week like a houseplant and let them dry out.  Houseplants love this, herbs require moderate and regular watering. This is particularly true during hot summer months. Make sure the soil drains well and that your containers have a drainage holes and it will be difficult to water herbs too much.


Mistake 4: Not cutting early and often. As a novice gardener, it may seem like your puny little plant just isn't ready for a trip to the barber, but then you will find yourself sitting there wishing for leaves without much success. Basil is a great herb to practice pruning. Basil, like many herbs, if you don’t trim aggressively it will continue to grow straight up, and become too tall and top-heavy. Clipping or pruning makes herbs bushy and causes them to produce more leaves.  It also keeps them from flowering.  You rarely, if ever, want your herbs to flower.  Flowering herbs lose flavor in the leaf when they produce flowers, giving you even more reasons to prune your herbs.

To prune you cut the herb just above a set of growing leaves. With basil, when you cut the plant that way, the originally trimmed stem will no longer grow. However, two new stems will grow around the original cutting, creating a “V” shape. 

Making your first trim approximately 3-4” above the soil produces a nice sturdy plant. Of course you want to be sure you are always leaving a few good sturdy leaves on the plant.

As it continues to grow, continue to prune it approximately every 3-4" for a nice solid plant. Your clippings make great bits of herb to experiment and cook with and result in more leaves to use later.

Mistake 5: Taking the leaves from the wrong place. When you are just starting out it seems to make so much sense to pick off a few big leaves around the bottom of the plant, and let those tender little guys at the top keep growing. Wrong. Leave those large tough old guys at the bottom alone. They are the solar panels that power your herb's growth. Once your plant is big enough to sustain a decent harvest, keep on taking from the top, as you have been when pruning. That way you get all those tender new herbs that are so tasty, and your plant gets to keep its well-developed solar power system in place. Plus, if you pluck from the base and leave the top intact, you get a tall skinny plant that will flop over from its own weight. (See rule above!)
Mistake 6: Growing the wrong variety. When choosing herbs, read the label carefully. For example, there are two main varieties of oregano: Mediterranean and Mexican. Mediterranean oregano is the more common variety, and what you likely own if you have conventional dried oregano in your cupboard. I have Mexican oregano growing in my personal garden. I love Mexican oregano in spicy dishes, for making beans from scratch, and often use it in tomato dishes where I don't want the flavor to seem too much like marinara. Similarly, there are several types of tarragon, French Tarragon and Russian Tarragon are the most common, however if you want a culinary tarragon then you want French which cannot be grown from seed and must be cultivated from root.  The first year it grows slowly then after that it springs from the root and gets more than 3 feet tall (see next rule).  The Russian variety is easy to propagate, drought tolerant and very often substituted for French, but the scent is not nearly as strong and the flavor for cooking is very limited.

Mistake 7: Being unaware of final size! If you are planting in soil instead of pots, take care that your cute little herb seedling doesn't become a giant plant that takes over your garden. A word of warning for oregano and mint: both can be voracious growers. If you are planting outside in a garden, rather than in pots, you may want to consider potting these herbs and then burying the pots in the ground. This will add a measure of control to the root systems of these herbs, which can otherwise take over a garden and strangle nearby neighbors. 
spreading spearmint
Mistake 8: Give yourself Rewards. There is an element to passion about herb gardening. To want to continue you need to feel rewarded. With herbs, finding uses and experimenting with new herbs and new uses can be that reward.  So don't stick too long with one or two herbs just because they work. Branch out to a few other basic herbs that you will use regularly in your kitchen. There are few things more rewarding than being able to pop out to garden to clip fresh herbs to use in my cooking. Once you have become comfortable with your first plant, I recommend moving on to try growing oregano, mint, rosemary and thyme. All are regularly useful herbs in the kitchen, and all are relatively easy to grow. 
Cuban oregano (with pansies)

A young woman in a Garden center near Burlington, WI introduced me to this year’s new herb. Cuban Oregano Plectranthus amboinicus, a semi-succulent perennial plant in the family Lamiaceae with a pungent oregano-like flavor and odor. It is native to Southern and Eastern Africa. It is widely cultivated and naturalized elsewhere in the tropics where it is used as a traditional medicine, spice, and ornamental plant. I love the scent and cannot wait to try cooking with it.


Basil Perpetuo

I was also at a garden center and found a variegated Basil that I have wanted to try since I first wrote about it, Basil Perpetuo a beautiful basil with a great flavor for Pesto that I have been looking to buy as a plant since 2014, because I hate growing basil from seed!  You can read about this and other Pesto Basil in this post from 2014

Monday, April 7, 2014

Winter sowing update

Okay this winter was pretty brutal.  As a result I waited until well into January to try to grow plants by winter sowing.  And Now it is April, but to be honest it has not really been that warm yet.  I grabbed the camera to document the activity (or non-activity) of my winter sowing.

Here are the bottles that were out on the railing.  I moved them to the table when the wind threatened to remove them from my planters.

Upon closer inspection I see no green -- you?

Here is the milk carton style.  Green anyone?


I am not giving up hope.  If they are to germinate I think they still need more warmth and I expect the ones on the table to sprout first, so we are now holding vigil for green!  More updates to follow.

Monday, February 24, 2014

Winter Sowing Herbs

A friend of mine who lives in zone 7 recommended this.  She said instead of sitting back with your seed catalogs and dreaming of that gorgeous garden you are going to grow next summer, take action now and get a head start on spring.  But I kept thinking, I live in zone 5 and trays of seeds will just freeze out there and die.  This winter I decided to give it a shot. (Why this winter I can only guess is because it has been so much winter that I am dying to get into something like gardening.)  This is what I know about it.

Winter sowing refers to planting seeds in flats or trays during the winter months and setting them outside to allow seeds to germinate and seedlings to emerge naturally when the weather warms. Not only does this give flowers and vegetables a head start in the spring it allows you to start seeds in the midst of winter while the landscape is frozen.  Once temperatures rise and the soil thaws, seeds germinate and sprout naturally at the ideal time for growing.

The best source on the internet for winter sowing tips and guidelines is www.wintersown.org by Trudi Davidoff.  On that site you can identify what can be winter sown or if you should just save the seed and direct sow it in the garden.  Not all flower and vegetable seeds are suitable for winter planting, but many are. Tender annuals or tropical flowers and herbs are not likely to do well if planted in winter as their seeds do not require cold stratification and may not survive the exposure to cold temperature. Look for seeds from plants that self-seed. This includes many wild flowers and native plants. If you have noticed seedlings emerging in early spring near flowers and herbs, they are a good candidate for winter sowing. Most perennials thrive with winter sowing.

The materials you need to winter sow are pretty simple:

Seed starting soil (you can make or buy)
seeds
containers with lids
waterproof markers
water
assorted tools

You can also look in seed catalogs for plants with notations for "fall planting", "early spring planting", "hardy seeds", "self seeds" or "will colonize". Some may note the seed requires cold stratification. These are all perfect to use for winter sowing. I like Park's Seed catalog, it has a great germination table right in the middle of the catalog. They have a numbered guide indicating the best germination requirements for seeds. I took a yellow highlighter and went down that numbered list and highlighted all the numbers that would be appropriate for Winter Sowing, then I carefully went through their list of seeds and highlighted the varieties that corresponded to the correct numbers. This is how I chose which varieties I would Winter Sow. A lot of catalogs, not just Parks, will have a germination table, or some information about germination, look at them, study them, and learn. Additionally you get sowing information on the back of seed packets as well.

Nice to have dirt under the fingernails in February

Milk jugs and soda bottles seem to be the best choice for me in Zone 5 to use for winter sowing.  They create mini greenhouses for seeds. You can also use traditional seed starting trays, but this is not necessary. One person I know lines toilet paper tubes up on a cardboard box, fills them with soil and seed and covers it with a clear plastic bag.  Each tube is a different seed.


Wash and dry the containers with hot soapy water to remove food residue and to prevent the spread of bacteria or disease causing organisms. Poke holes in the bottom of the container. 


Add the moist seed starter to the jugs.  It does not need to be very deep about 1 ½ to 2 inches at most.  You can make your own seed starter by mixing equal parts potting soil, peat moss and vermiculite or perlite. Mix in large bowl or bucket and moisten with tepid water. The starter should be damp, but not soggy.


Plant seeds to the recommended depth and cover with soil. Firm down with your hands to remove air pockets. Since I did not cut these containers I used the handle of a wooden spoon to firm the soil. Replace the plastic cover or cover with plastic. You need to have 2 inches above the soil to allow space for seedlings to grow. 

Label the container. Even though you think you will remember, chances are you will not. A label makes your life easier.
 

Place trays outside. Many prefer to place trays on a picnic table or an elevated structure where they can be reached easily. Although you want to expose the seeds to elements, placing them in a sheltered location prevents them from being blown over when the winter winds howl. Seeds can be placed on the deck or porch and moved to a sunnier location once snow begins to melt and spring approaches.  I placed mine on the shelter of window boxes.  I tied ribbon on them so they looked like a decoration to those passing by.
 
Allow trays to freeze and thaw naturally. When spring arrives, the soil will thaw and seeds will germinate at the proper time. Remove the plastic once seedlings emerge and danger of freezing has passed.
 
As many people know my garden is rented and I live in an apartment, so the place where I am winter sowingis on my apartment patio.  I placed a window box on the ground near the windows so the containers did notssit on the concrete.  I have several hanging window boxes that I decorate with greens for the holiday that 
were frozen to the railing by January, so I tied bows on pop bottles and nestled the bottles down in the old 
soil and started a few there as well.  My patio faces north to northeast so those near the window are rather 
sheltered the ones in the hanging boxes are exposed to more elements.


 Winter sowing is relatively maintenance free and produces young seedlings just in time for spring planting. There is no need for constant monitoring of the seeds as you allow nature to take its course to produce vigorous young seedlings that do not require hardening off and don't take up precious space in your home. So, get out those seeds and satisfy that gardening bug by starting your seeds now with winter planting.
 
We will see what happens and follow up with you about it as winter progresses.

Herb seeds I recommend for winter sowing:

Calendula
Viola
Flax
Basil
Mint
Oregano
Parsley
Sage
Thyme
Dill
Hyssop
Marjoram
Chamomile
Chives
Yarrow


Related Posts Plugin for WordPress, Blogger...