Showing posts with label dried herbs. Show all posts

Tuesday, September 12, 2017

6 Unique Ways to Preserve an Herb Harvest

There are many ways to preserve the herbs from your harvest.  Here are a few quick and easy ones to get you started.

Freeze leaves in water

Quick and easy, you just grab an ice tray fill the square halfway with water and add the herb leaves.  You can leave the leaf whole or chopped them fine.  Pop them into the freezer.  Once the cubes are frozen fill the tray the rest of the way with water and freeze again.  This two-step method makes sure the leaves stay covered by the water and ice so they keep their green color.

Once finally frozen you can pop put the cubes and place them in a zip lock bag for long term storage.  This will give you herbs for casseroles, soups, stews and long cook dishes all winter.  Discard the cubes once the spring harvesting begins.

Make a Bouquet Garni Bundle 

Bouquet garni is a bundle of herbs (thyme, bay, parsley, rosemary, savory) used in long cook soups and stews.  It is great in the crock pot where you can hang the bundle from the side and let the flavor infuse the dish, then remove the bundle when cooking is over.  You do not have to worry about leaves in the dish or picking out bay leaf.

You can use a bouquet garni fresh, or you can make fresh bundles and hang them to dry.  Once dry, you can wrap a cello bag around them and give them as a gift along with a soup recipe, or save their wonderful goodness all for yourself.

I have previously posted recipes to use with bouquet garni too!

Dry in a paper bag

Savory, Thyme and rosemary are all great candidates for bag drying.  The leaves have a small size and very little moisture, so you toss the cut stems in a bag, hang it on the wall and let the herbs dry.  Sometimes depending on humidity, I will give the bags a shake every few days. No other special treatment is needed and the herbs will be try enough to be stripped from the stems for storage in about a week.


Honey or Vinegar Infusion


Make an infusion of herbs transferring the flavor into another medium.  You can create a vinegar or honey.  See these posts for detailed instructions.

How Tuesday on making vinegar

Recipes using Herbed Vinegar


Make a compound butter
A compound butter is any plain unsalted butter to which you add herbs. You can create a single herb flavor or blend the herbs tighter to create a variety of flavors.  The general rule is 1/8 to 1/4 cup herbs into 1 stick unsalted butter.

Here is one of my favorite versions:
1 tsp parsley, finely chopped
1 tsp thyme leaves
1 tsp chopped chives or garlic chives
1 tsp tarragon

Blend the herbs into 1 stick of room temperature unsalted butter with a fork to get the herbs evenly distributed.  Then roll the soft butter into a sausage in plastic wrap and place in the refrigerator to eat in a week or in the freezer for up to 3 months.  You can use the butter on fresh steamed vegetables, steaks, baked or roasted potatoes, rice, egg noodles are on your morning toast of muffins.

I have more recipes for making compound butter (also called Herb Butter) all over the blog, but here is one of my first. 

Make a salt

There are several ways to make herb salt.  My two favorites are just to layer the whole herb leaf in salt and allow the salt to absorb the flavor from the leaf then later remove the leaf and you have white salt infused with flavor.  Another way is to run the salt and herbs in a coffee grinder.  I start with a larger salt so that I get a fine salt with fine flakes of herbs in it. 


You can also make an herb salt with chopped fresh leaves that you stir into salt, then spread on a baking sheet and allow to dry in the open air for 2 to 3 days to a week depending on humidity.  This is a great way to infuse the salt with a mixture of herbs, like a blend of chives, thyme, parsley and sage.  You use about 1 teaspoon of chopped fresh herbs to ¼ cup of salt (I like kosher.)  Once the herbs and salt have dried, you can place the mixture in a jar where it will keep its herbal taste for at least a year.

We will be posting more ways to make herbed salt and flavored sugar later this fall.

Thursday, December 1, 2016

Shipping Deadlines 2016

SHIPPING DEADLINES
The last first class retail shipping day is December 15.
The last first class shipping day is December 20 and
The last Priority mail shipping day is December 21. 
To help you not procrastinate I have pulled together 12 days of Herbal Gifting.  Each day I will place an item on sale in my shops and post it as the deal-of-the-day at the top of the blog.  The blog may then be other ideas and information but the top will give you your herbal gift.  The sale item will expire at midnight CDT.  These herb-inspired items make great holiday gifts for yourself and others.
Shop that item and we will make sure it arrives to you or your recipient in plenty of time for Christmas.

Barley Vegetable Soup - makes a great gift!


Find this mix on Etsy right here!

This quick and easy soup mix is salt-free and tasty in cold weather! And the packaging is so cute for gift giving you might want to give it to all your friends and office mates!


Tuesday, January 19, 2016

National Popcorn Day

Today is National Popcorn Day!  


Never allowing a proper holiday to go to waste, here is my opportunity to celebrate popcorn which is one of the four major food groups in my family.  A bit of butter and salt is all good popcorn needs, however, if you eat it as often as we do, you need to acknowledge that butter and salt every night is not a good thing.  I crafted some herbal popcorn sprinkles that one can use instead of salt or with salt in moderation.

These may have sprung from research I just did on theme gardens. Maybe I should make a popcorn seasoning garden. That might be fun!


Italian Sprinkle
1 Tbls. Basil
1 Tbls. Marjoram
1 Tbls. Oregano
½ Tbls. Garlic granules
1 tsp. rosemary
2 Tbls. Parmesan Cheese or to taste

Blend together and place in a shaker.  Sprinkle over warm popcorn just out of the popper.


Greek Sprinkle
1 Tbls. lavender
1 Tbls. rosemary
1 Tbls. Greek Oregano
1 Tbls. Garlic, granulated
1 Tbls. Lemon peel or Lemon pepper


These Mediterranean or Greek herbs make a great addition to popcorn with a unique flavor.  Keep in a shaker for quick use.


Mexican Sprinkle
1 Tbls. Chili Powder
1 Tbls. Cumin powder
1 Tbls. Garlic flakes
1 Tbls. Onion granulated
½ Tbls. Parsley
½ Tbls. Thyme
½ Tbls. Oregano
½ Tbls. coriander, ground


Combine and keep in a shaker.  If you like things hot, celebrate the year of capsaisin and add some cayenne or red pepper flakes.

If you enjoy popcorn sprinkles but don't want to craft your own, we have several popcorn shakers available from the Backyard Patch and they make a great gift for the popcorn lover in your family.

Tuesday, January 5, 2016

Craft Fun with Herbs, series #1

My friend Tina Sams of The Essential Herbal Magazine started posting a craft a day in November 2015.  It was stopped when she got sick, but even the few posts that she did made me long to do some crafts in the winter time.

So I am picking up (sort of) where Tina left off with craft ideas in the month of January and February.  Get your fingers into the scents and feel of herbs and put aside the winter blahs.  And thank Tina by subscribing to one of the only remaining print herb magazines left!

I will also be launching my Herb of the year posts Wednesday, January 6, with my first post on the herb of the year, Capsasin genus (that is hot peppers) and I will do 12 posts this year as I choose my favorite hot peppers, from mild to hurtful.

Here is my first craft idea, first shared in my advent blog several years ago.  It is perfect to make in the winter because they dry more easily with the lowered humidity in the house while the heat is on.

Scented Stones

1 ½ cups white flour
 ¼ cup salt
 ¼ tsp cornstarch
 2/3 cup distilled water, brought to a boil
1 Tbls essential oil or or Fragrance oil
2 Tbls dried herbs, if desired
Directions:

The main thing to remember with these is they must be very well dried before using and not made too large or they could develop molds. In humid weather I add potassium sorbate as a preservative.

Combine the materials to create a dough much like play-dough.  Roll the dough the size of large marbles but flatten them so they dry more easily.  Adding the dried herbs will give the dough a more "rock-like" coloring. 


Once dry place them in a pretty dish along with colorful complimentary herbs, buds or petals.

Here is another recipe, slightly easier and more colorful, but without herbs.

Air Freshening Stones
 
1/2 cup salt
1/2 cup flour
1/4 teaspoon Essential oil
2/3 cup boiling water
Food coloring

Directions:
Combine salt and flour, then add water, essential oil and food coloring.  Mix together then shape into little balls and leave to dry. As the rocks dry out they will remain soft in the center, this will not affect the scent or life of the rocks.

Thursday, September 25, 2014

The Scent of Herbs

This year I had a community garden where it became obvious that I am really good at growing herbs, but perhaps not so great at vegetables.  I put a small edging of herbs along the front of the 20’ x 20’ garden which prospered in this odd season of no hot weather and too much rain.


At my regular herb garden I have a special shed with a black roof to speed drying.  But I was not going to transport the herbs from the garden in Elmhurst to the herb garden 7 miles to the north, so I filled the gathering basket and took the herbs to the apartment.  I had forgotten in the years we lived in this apartment what it smelled like to have fresh herbs drying inside. 


I have bundled the herbs, and hung them on hangers, spread them on paper towel lined plates on my riser and spread them on cooking sheets. It has kinda taken over the dining room, but since we never eat in the dining room this was not much of a big deal.  

And the smell it is really wonderous.  The mixture of lemon and mint and thyme and basil and oregano is a heady combination.  Sometimes it makes me hungry.  Other times it just makes me relax.

They say that the scent of herbs is very healing. 


Mint and lemon balm are laid out on paper towel on my cookie baking sheets.  You can see the paper bags which hold the thyme.  This is the best way to dry thyme.  It takes only a couple of days and you can then strip it into the bag and pour into a jar.  It sure beats trying to bundle those tiny stems.  I have always tossed cut thyme into a bag, in the shed I binder clip the bags to the edges of the building interior.


The mint, lemon balm, fennel, dill, oregano and basil all hang from the hangers.  In a couple of days I can pull of the crisp dry bundles and toss them into a storage bag.

The healing power of the scents could account for the fact that Hubby’s fall allergies (and accompanying snoring) have been almost non-existent.  And my insomnia is easily cured by sleeping on the couch, which is right next to the dining room.

So if you have herbs that have flourished this year, cut them and hang them in your home, not only will you enjoy the healing power of the scents, you will be carrying on an ages old tradition of wise herb growing women for the last thousand years who know that herbs are good for us!


Saturday, February 22, 2014

Weekend Recipe - Italian Herb Bread

Beer Bread with Italian Herbs & Cheese

I have always had trouble baking bread using yeast.  I buy too much and it gets stale and then my bread never rises like it should.  I found this recipe for an herb bread that eliminates the need for dry yeast by using beer instead.  And the flavor makes it a great bread to eat with tomatoes dishes, and winter bean soups.


Normally I do not post recipes that only use my seasonings, but I have made this bread and BYP Italian Seasoning makes it the best.  If you comment and want a substitute I will reply with one.

3 cups self-rising flour*
3 tablespoons granulated sugar
1/2 cup Parmesan cheese
1 tablespoon of Backyard Patch Italian Seasoning
1 (12-ounce) can of beer

Combine all ingredients in bowl, mix well.  Add beer and again, mix well.  Preheat oven to 375°F.  Lightly grease or spray a 9 x 5 x 3-inch loaf pan with nonstick cooking spray.  Pour into prepared loaf pan and bake for 1 hour.   Makes 1 loaf.


*If you don’t have self rising flour just use this mixture. 3 cups all purpose flour, 3 teaspoons baking powder and 1 1/2 teaspoons salt. 

Monday, June 24, 2013

Tips for Making Marinades


      Marinades are particularly well suited to beef and game, but can be used to liven up the mild flavor of chicken and all its relatives.  Marinades are created using a blend of oil, vinegar and seasonings that is then used as a soak for the item before it is cooked.  The ratio is generally 2/3 cup oil to 1/4 cup vinegar (or lemon juice) and herbs to taste; usually around 2 tablespoons of dry herbs, more if you are using fresh.
       The high acid content of a marinade (from vinegar) helps tenderize meat as well as impart wonderful flavors.  You can use an herbal vinegar to craft your marinades for an even more special depth of flavor.  See our post on herbal vinegar making for more details.
mustard marinade (see recipe below)

            Always prepare your marinade in a shallow non-reactive dish or pan just large enough to hold the meat comfortably.  Be sure to turn the meat so the flavor will permeate all surfaces evenly.  Very thin cuts of meat can be marinated an hour or so at room temperature, but roasts and larger cuts should stand longer, even up to two days in the refrigerator.  Just remember to turn the meat every few hours and let it return to room temperature before cooking.

Marinade on vegetables does not need as much acid as meats and can be made with just oil.  With vegetables, one can soak them in the marinade or brush it on during grilling.

Herb flavor groups for using in marinades:
  • Citrus zest: grapefruit, lemon, lime, orange zest
  • Robust Herbs:  basil, cilantro, rosemary, or sage
  • Sweet or Floral Herbs: lavender, lemon balm, lemon verbena, rose, dill or mint
  • Savory Herbs: marjoram, oregano, parsley, savory, tarragon, thyme; or whole bay leaf
  • Herb seeds: whole caraway, celery, coriander, cumin, fennel, poppy, or sesame
I have a whole list of blends for marinades that I created for the Backyard Patch because I love the quick easy way you can toss any meat, cheap cuts and all, into a marinade and craft a quick easy dinner.  In fact all of my salad dressings can double as a marinade as well!


Here are a few Marinade recipes you can craft on your own to enjoy:


Wine Marinade for Beef
1 glove garlic
10 peppercorns
8 whole allspice
1 tsp. salt
1 cup red wine
3 pounds rump roast, cubed

In a deep bowl, combine clove garlic, crushed peppercorns, allspice, salt, and wine. Stir to dissolve salt. Add beef cubes, pressing cubes down into marinade to immerse as much as possible. Cover and marinate in the refrigerator for at least 1 hour.

Herbed Marinade for Vegetables

¼ cup low-sodium soy sauce
¼ cup balsamic vinegar
¼ cup olive oil
¼ cup water
2 Tablespoons honey
2 cloves of garlic, minced
4 teaspoons fresh chopped herb mix
      (rosemary, thyme, basil and oregano OR chives, dill, lemon thyme and lemon basil)

Combine ingredients together in a glass jar with a tight lid and shake to combine.  Pour the mixture over cubed vegetables in a non-reactive container and refrigerate for 2 hours.  This recipe is enough for 2 pounds of vegetables.

Mustard Marinade for Chicken

1/3 c. lemon vinegar (made with any combo of Lemon herbs)
¼ c. Dijon mustard
2 T. vegetable oil
2-3 tsp. dried basil
1 clove garlic, crushed

Whisk items together in small bowl.  Use as a marinade for chicken, pork, or seafood.


Monday, June 17, 2013

What is an Herbal Meat Rub?

What really makes a rub a rub is how it is applied. I suppose that you could say sprinkling salt and pepper over a steak was like adding a rub, but this really isn't what we mean when we talk about rubs, particularly a traditional barbecue rub. A rub should coat the surface of the meat. You should work a rub evenly into the meat to get the flavor inside as much as possible.     
Rubs come in two varieties, wet rubs and dry rubs. A dry rub is made of herbs and spices and can be either sprinkled over meat or actually rubbed in. A wet rub contains a liquid ingredient, usually oil and is coated over the surface of the meat. Beyond this, practically anything goes.

What you want in your rub is really a matter of personal taste. You want a good rub to add flavor and color but you don't want it to overpower the flavor of the meats you are rubbing.   

 Most dry rubs contain such things as paprika, chili powder, granulated garlic, cayenne, etc. To get these dry ingredients to stay on requires the natural moisture of the meat.  You want to enhance the flavor of the meat without overpowering it, so a good rub will be a mixing of strong spices with mild, complimentary ones to create an even distribution. If you're going for a hot spice combination, chose a blend with chili powder, cayenne or paprika. It will give the meat a good color and add the level of heat you want without making the meat too hot to eat.
The advantage of a wet rub (or paste) is that it sticks to the meat better. This is particularly important if you are cooking poultry with the skin on or some other smooth surfaced meats or meats that tend to be naturally dry. The other advantage of a wet rub is that it can help keep meat from drying out. This is especially true when using an oil based rub. The oil acts as a moisture barrier, keeping the natural juices inside the meat. Oils in rubs can also keep meats from sticking to the grill. Remember that a wet rub should have the consistency of a paste, thick.

Lemon peel and tarragon were used in oilive oil
 
As I said, a rub should be worked into meats completely. If you are applying a rub to poultry try and get it in under the skin. Skin blocks flavors so putting a rub on the surface of skin won't do much for the meat. If is also good to apply your rub well before you plan to grill or smoke. A good hour will be enough in most cases, but large roasts, whole poultry, or briskets should be rubbed down the night before or at least several hours before hand. This allows the seasonings to mingle with the natural juices of the meat and sink in. Dusting a pork chop with a rub seconds before it hits the grill will result in a well flavored set of burners and a good supply of smoke from burning spices. It won't add a lot of flavor to the chops.

4 Spice Meat Rub from the Backyard Patch used on a pork tenderloin

I have a whole list of meat rubs for all marinades and rubs that I created for the Backyard Patch because I love the quick easy way you can rub a plain meat in herbs and spices and conjure tastes of far away yet still have a meal in my own back yard. I put together a special set of 5 grilling mixes that has free shipping too!

If you want to try your hand at making your own rubs, check out this post I first did over at the Supporting Artists Blog but have posted on my own blog here: Grilling Rubs for Father's Day.  You can find several rub recipes to get your started.

Monday, May 20, 2013

Pinch your Herbs!

Pinching back your herbs is the most important activity of the early season.

Understanding that herbs, like other plants, are trying to reproduce is important to understanding why we should pinch them off.  Plants intent on reproduction are striving to get a long stem intent on blooming.  That means you have an upright plant with few sideways branches that is reaching toward the sun the target to produce a flower head.  Okay for the plant but not a useful for you as the herb grower.  Pinching the plant changes the signals it is sending up that stem creating a bushier plant.


pinching basil

When a single stem reaches maturity and is ready to flower it sends signals down the stem to tell secondary buds to stop growing letting the single stem have all the energy. When you pinch off the growing tips of the plant it changes the signal and the plant begins to produce more branches to create more flowers, thus creating a larger bushier plant, that will eventually be much stronger.  This works on your flowering plants too!


How much should we pinch off?  There is no hard and fast rule. If a plant is badly in need of bulking up, you can take one or two larger pieces around 4 inches and several smaller tips about 2 inches.  If the plant has produced blossoms pinch off every single one of them.  Blossoms will pull energy from other parts of the plant weakening the flavor of the herbs.

In the early part of the season you can pinch your herb stems between a nail and a finger.  Later in the year a pair of sharp scissors will keep you from damaging the stems by twisting or pulling.

Lemon Basil before being pinched

Lemon Basil after pinching, see the two new branches...

 
Once you recognize that pinching is a kindness to your plants, you will not be afraid to do it.  For Basils the shape and leaf production is improved with frequent pinching.  Every branch pinched at a leaf node will produce two more stems.  The same is true of scented geraniums which can grow very long hard stems if not pinched back.  Thyme, mints, and oregano can be pinched more casually as you need the herbs for cooking or drying since they are log spreading growers anyway.  I generally trim these with scissors taking off an inch or two depending on the plant size.  With rosemary and bay or any other slow-growing semi-woody herbs, pinch out stems here and there to sculpt plants.

hard geranium stems

As I pinch my plants I lay the branches on a paper towel on a plate.  Everything I do not need to cook with is left to dry and in a day or two I can pop them into a jar. 


So pinch your herbs and enjoy!

Sunday, January 20, 2013

Northshore Church Program - Cooking with Herbs

Saturday I had the most thoroughly enjoyable experience with the women's fellowship group of the Northshore Unitarian Church.

I was asked to present my Cooking with Herbs lecture and to give it a breakfast theme.  I even gave a few recipes for them to try out and present that morning and some members did use a few.  I was very flattered by that.  For a few other recipes from the program, check out the Program Recipes page of this blog.

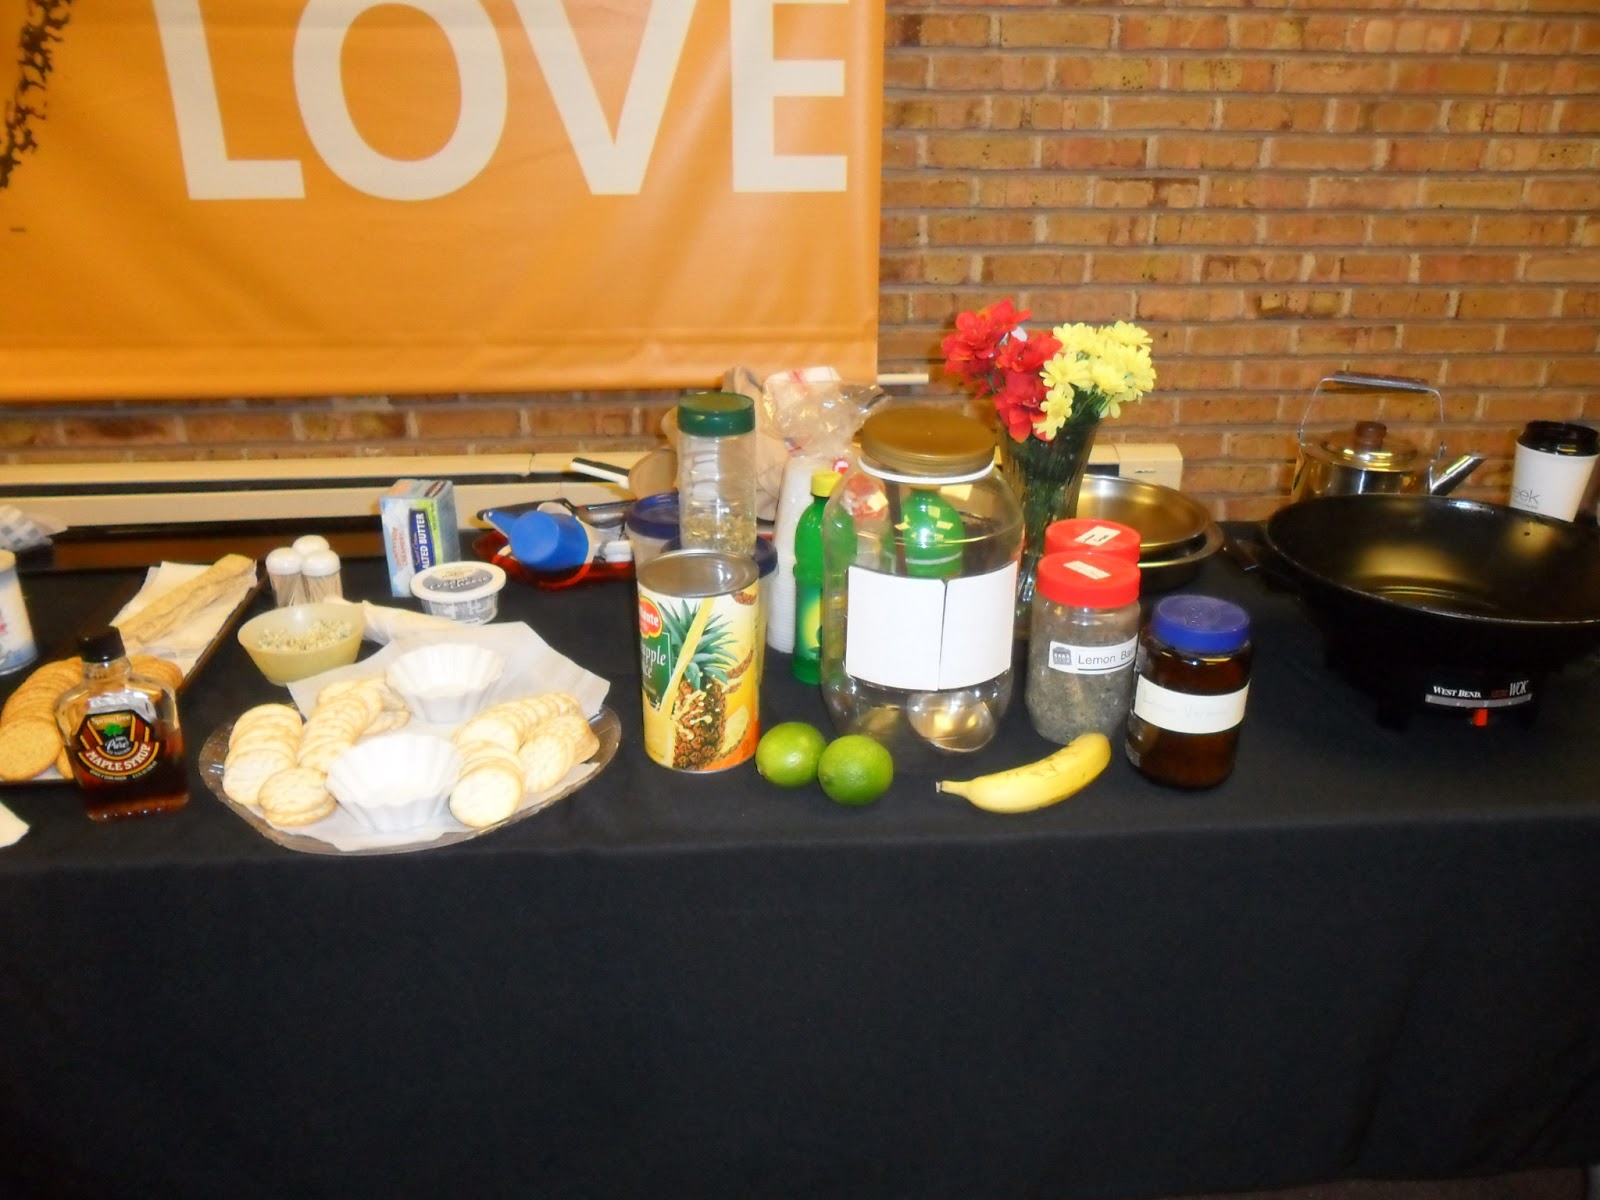
Here was my set up before the program with herbs and ingredients laid out.


The participants mingled, chatted and drank tea from special collection of tea cups that are pulled out just of this event!  I thought it was a grand idea!  Aren't they lovely?


The Orange Juice was served in Ikea ceramic cups that look like terra cotta pots! And the members brought a smorgasbord of detectible treats as you can see.


The company was very delightful and we talked about movies and herbs and Downton Abbey and a number of other things.


After a great introduction I was able to share about making butters, vinegars, and cooking with fresh vs. dry herbs.  We sampled everything and I was able to impart a few jewels of wisdom.

herbal butters fresh on the left, dried herbs used on the right
Lemon Fruit Dip


Lemon Herb Yogurt Sauce for fruit

1 Tablespoon frozen orange juice or lemonade concentrate, thawed
1/2 Tablespoon of lemon herbs like lemon thyme, lemon balm, lemon verbena or lemon grass
1 tsp. lemon peel
1 container (8 ounces) vanilla yogurt

Whisk the juice concentrate and the herbs and lemon peel into the yogurt.  Serve chilled over fruit or as a fruit dip.   You can then use a fresh or frozen fruit salad and have this on the side or tossed in.


Seasoned pork with sage, parsley and maple syrup.
We tasted fresh herbs used to season pork and in savory breakfast muffins.

We ended by giving away from Fun Herb items and discussing medicinal herbs like Golden Seal and comfrey and wild crafting.


Savory muffins with parsley, dill and thyme.


I want to add a special thanks to Sallee, Fran, Sandy, Andrea and the others who made this such a special morning of fun and sharing!


If you want to see a list of all the program I can provide you your group, please see my Program Listings (located on the website.)
Related Posts Plugin for WordPress, Blogger...