Showing posts sorted by relevance for query butter cookie. Sort by date Show all posts

Monday, December 8, 2014

Advent How to - Herb Holiday Cookies

For 2014 we have decided a two-fold Advent Calendar.  On the Backyard Patch Facebook Page we are posting a recipe a day beginning November 30 and continuing through Christmas Day.  Each week will be a different theme.  This week it is appetizers.  Stop over there around 6 pm everyday for the new recipe.

On the Blog we have decided to share a weekly HOW TO.  Each we will have a recipe, gift or decorating item to enhance your holiday and give you a moment to reflect. 

To celebrate National Cookie Day (which was back on Dec. 4th), I decided to do a how to with cookies.  (To see the scented pine cones from last week - click here.)


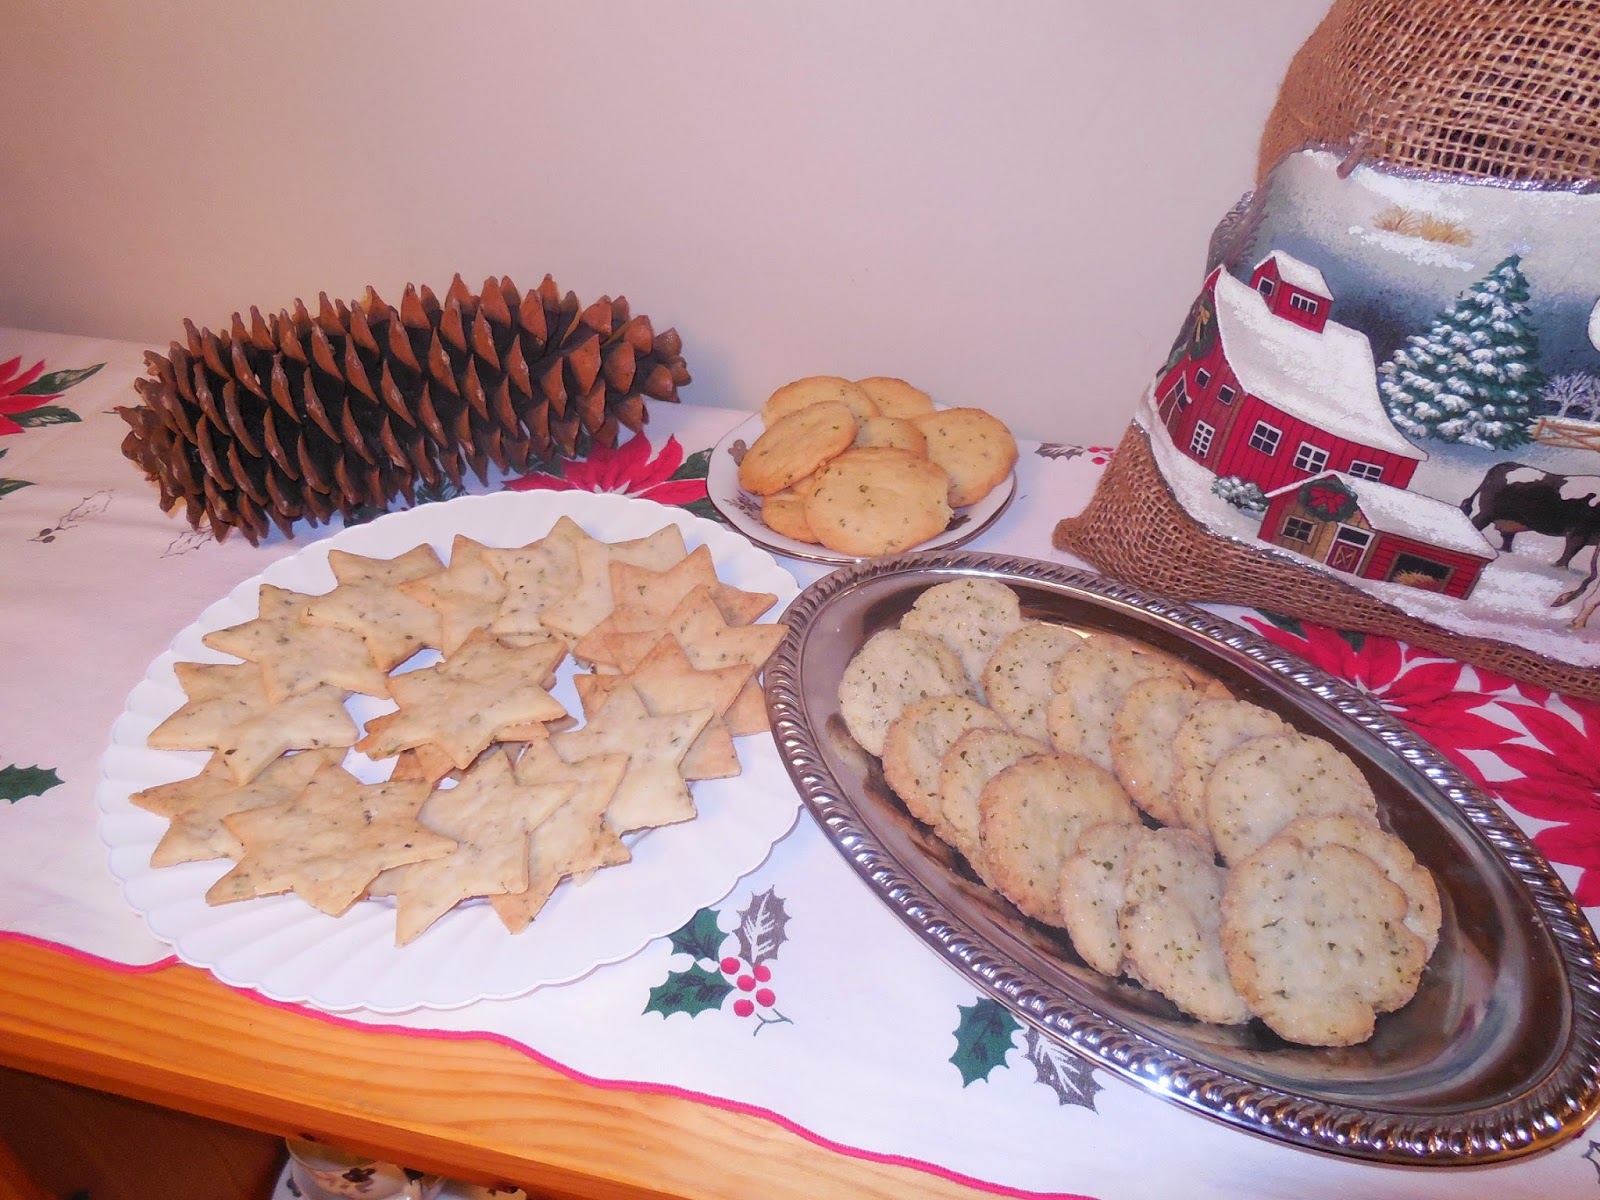
I like to make holiday cookies that are quick, easy and fun.  Most of the time I make shortbread cookies or butter cookies.  No frosting and minimal cookie cutters makes it easier and quicker but they are still tasty and of course, herby.

For this weeks’s Advent How To I have three techniques for making cookies I will share:
1.       Rolled out flat and cut with cookie cutters
2.      Rolled into balls and flattened before baking
3.      Rolled into a tube shape and sliced into rounds and baked.

If you like herbal cookie recipes here are some others you can enjoy too.  They can be found on my website in the Recipe archive.  I  put up two of my favorites.

The Steps

The steps for making cookies in this case all start out the same.  You cream the butter and sugar together.  Creaming butter and sugar is part of the leavening process making the cookies crisp and flaky and giving them some lift.

STEP ONE - You can cream the butter and sugar with an electric mixer or by hand with a spoon or whisk.  For me it depends on the time of day and speed at which I want to get to the next steps.

STEP TWO - Add the egg, if used, would be next.

STEP THREE - Then add the herbs, extracts, salt, baking soda or baking powder as needed.

STEP FOUR - And finally add the flour gradually, making sure it is all incorporated and there are no flour lumps in the batter.

STEP FIVE – Chill the Dough. In these herb butter recipes you chill the dough before the next step.  Sometimes as much as 4 hours, others as short as 30 minute.  This firms the dough up and keeps it from sticking when you make the cookies.

Now the recipes diverge and each is completed differently.  So here are the recipes and the finishing steps included below each recipe.


Herb Butter Cookies
You can make this recipe unique and special by using herbed butters and or herbs sugars and matching the recipe herbs to those.  This cookie can be different every single time by changing the herbs contained in it.  This dough you freeze for 4 hours so we are starting after the "Chill" step with these.

1/2 cup butter
1 cup sugar
1 egg
1 1/2 cups flour, all-purpose
1 teaspoon baking powder
1/4 teaspoon salt
fresh or dried herbs: lavender, tarragon, lemon verbena, mint, thyme, and/or herb seeds
    Use 1 Tbls dried 2 Tbls fresh and add to dough while mixing
    Use another 2 to 4 Tbls fresh or dried for decoration

Directions:
In a medium bowl, beat butter with an electric mixer on medium to high speed for 30 seconds. Add sugar; beat until combined. Add egg; beat until combined. Beat in flour, baking powder, and salt. Divide dough in half.  Shape each half of the dough into a 12-inch-long rope. Wrap and freeze about 4 hours or until firm.  Preheat oven to 325°F. Unwrap dough; carefully slice the frozen dough into 1/2-inch-thick slices. Place the slices, cut sides up, on an ungreased cookie sheet. Top with desired herb or seeds; press in gently, if necessary.  Bake for 12 to 15 minutes or until edges are golden brown. Allow to cool for a minute then remove from cookie sheets; cool on a wire rack.

STEP SIX - Divide the resulting dough in half and shape into a 12 inch rope.

STEP SEVEN - Wrap each rope in Wax or Parchment paper and freeze for 4 hours.
Rolled dough in the freezer

STEP EIGHT - Once the ropes are frozen, slice them into 1/2 inch thick slices and bake on an ungreased cookie sheet for 12 to 14 minutes or until edges are golden in a 325 degree oven.

cut roll
Note that they are not so round after cutting, but when they cook they rounded into a circle nicely.

I generally make this recipe first on cookie baking night, then when the other cookies are completed this will be ready to slice and bake.

Lemon Thyme Cookies
Fortunately, certain intrepid herbs can be snipped all year round, even under the snow. Thyme is one of those.  I leave a plant in a pot by the back door until we have consistent below zero temps.  Then I bring it inside.  It usually fares better outside than in and having it by the door means I do not have to run outside in the cold to harvest a bit for a recipe like this.

1/2 cup butter
1/4 cup sugar
1 1/3 cups flour
2 tablespoons freshly snipped lemon thyme

Directions:
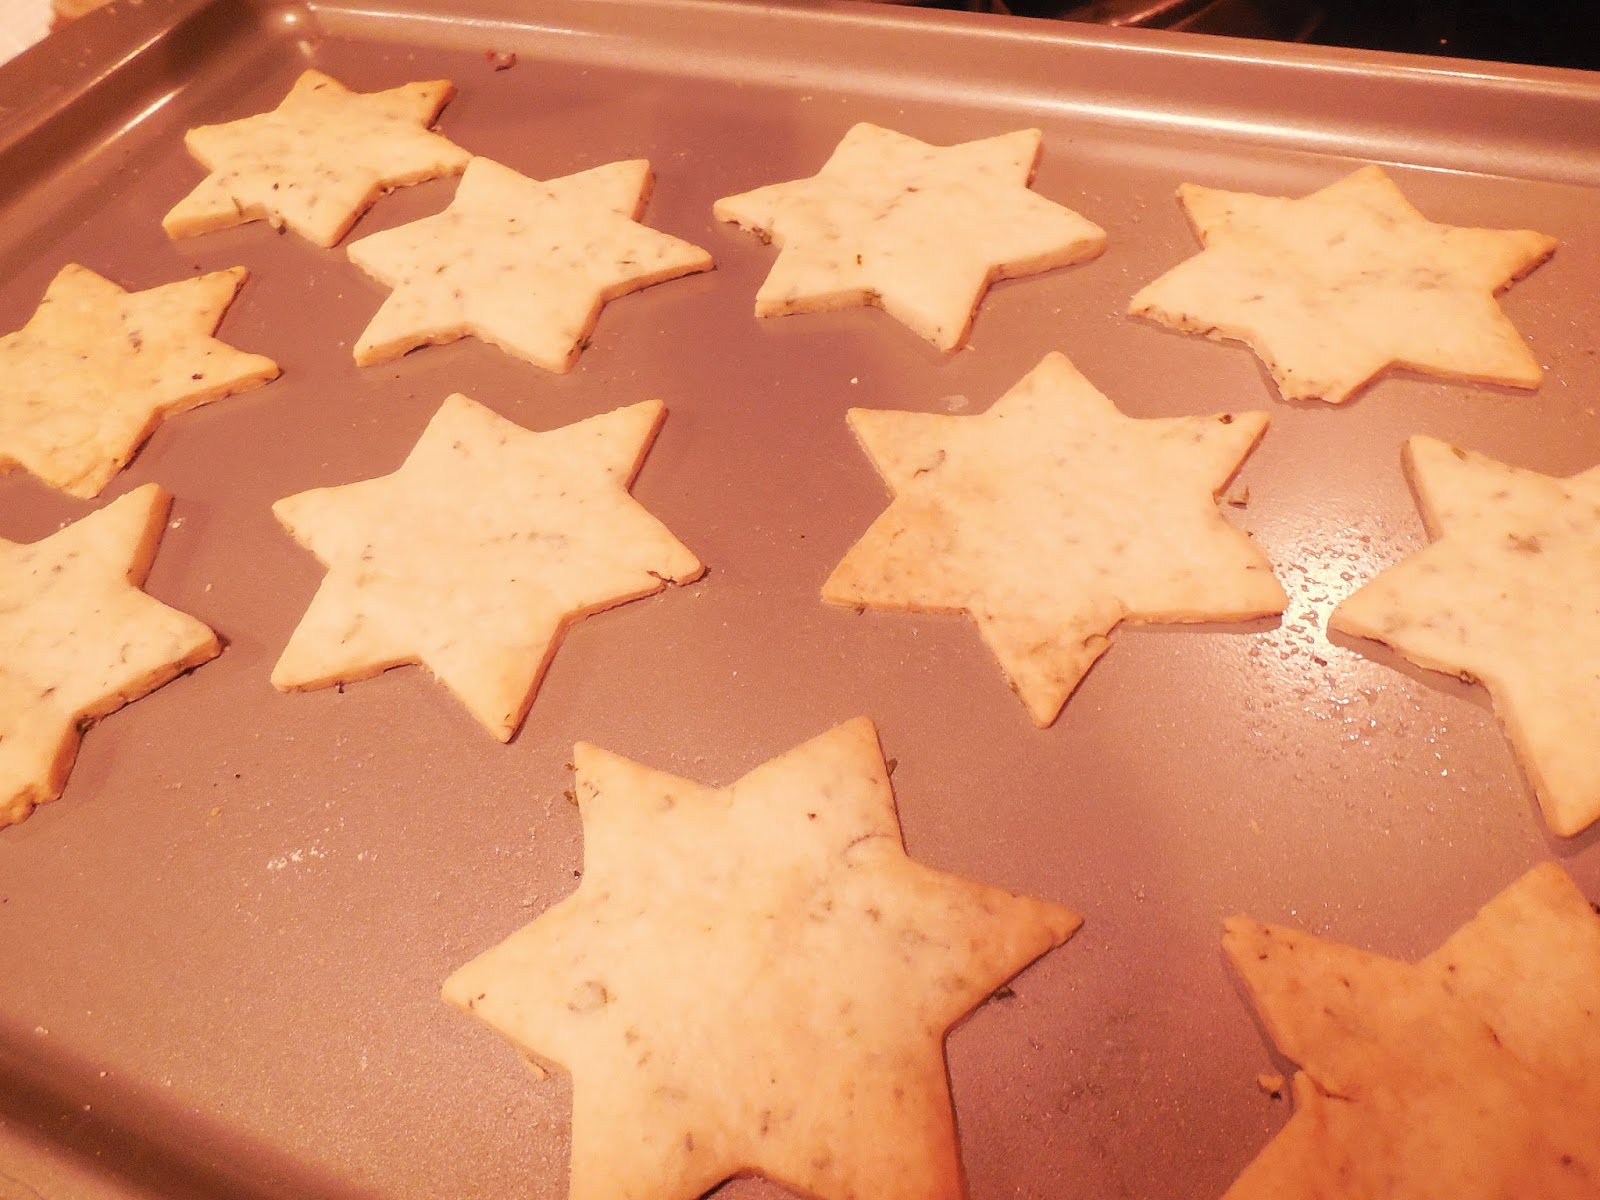
Preheat the oven to 350 degrees. Beat the ­butter with the sugar until fluffy, then add the flour and thyme. Chill the dough for about 30 minutes to firm it up, but not too long or it is tough to roll.  Roll the dough 1/4 inch thick and cut out shapes (we like stars). Place the cookies on ungreased baking sheets and bake 10 minutes. Cool on racks.

STEP SIX - Place the bowl of dough in the refrigerator to chill for 30 minutes.  Do not over chill this or it will be hard to roll out.

STEP SEVEN - Roll the dough on a lightly floured surface to about 1/4 inch thickness.  


STEP EIGHT - Use cookie cutters, any style will do to cut the dough into shapes.  Bake the cookies on an ungreased cookie sheet for 10 minutes in a 350 degree oven.  Cool on racks to keep the shapes uniform.


Mint Butter Cookies
Can a winter holiday be complete without peppermint?  This is an easy cookie to make and a crowd pleaser.

1 cup butter (or 1/2 cup butter and 1/2 cup shortening – I use butter flavor shortening)
1/2 cup sugar
1/4 teaspoon salt
1 teaspoon peppermint extract
2 tablespoons crushed dried peppermint leaves
2 cups flour
Sugar

Directions:
Cream the butter and sugar. Add the salt, extract, mint leaves, and flour. Mix thoroughly. Chill the dough for 1 hour, or until it is firm enough to handle.  When ready to bake, preheat the oven to 350 degrees. Form the dough into 1-inch balls and roll them in sugar. Press each ball with your thumb. Place them on ungreased baking sheets and bake 12 to 15 minutes. Cool on racks.

STEP SIX - Chill the dough in the bowl in the refrigerator for 60 minutes or so, until firm and not sticky to the touch.

STEP SEVEN - Roll the dough into 1 inch balls. Roll the balls in sugar. I actually rolled them in mint sugar which gave them a great texture and enhanced the mint flavor.


STEP EIGHT - Place the Balls on an ungreased cookie sheet or parchment and press each ball with your thumb.  You can make them flat or create an indentation.  Bake them in a 350 degree oven for 12 to 14 minutes.


Saturday, December 11, 2010

Celebrate with Herb Cookies

December 4th was National Cookie Day.  My sister-in-law would say it is much too late to have this day in December.  "If you haven't gotten half done by Thanksgiving, you will never make it," she cries when I tell her I am planning on making mine this weekend.  However, I have never made butter cream frosting for a cookie in my life.  Therefore, once baked (and sometimes iced) there is no extra decorating needed in my house.  That is probably why I don’t need as much time. 
But I am no slouch with cookies.  I have about 100 different herbal cookie recipes.  I was about to try to share them all, when I realized you are probably not as crazy as I am and a selection of the best would probably be better.  So these few recipes I am sharing today are those that I have been asked to make again, so they must be among the best.
If you want a few more than represented here, check out the Recipe Archive on my website where I put my two favorite Holiday Herb Cookies.
Recipes to try at your home!
Mint Cookies
Makes 2 doz.
Can a winter holiday be complete without peppermint?  This is an easy cookie to make and a crowd pleaser.
• 1 cup butter (or 1/2 cup butter and 1/2 cup shortening – I use butter flavor shortening)
• 1/2 cup sugar
• 1/4 teaspoon salt
• 1 teaspoon peppermint extract
• 2 tablespoons crushed dried peppermint leaves
• 2 cups flour
• Sugar
Cream the butter and sugar. Add the salt, extract, mint leaves, and flour. Mix thoroughly. Chill the dough for 1 hour, or until it is firm enough to handle. When ready to bake, preheat the oven to 350 degrees. Form the dough into 1-inch balls and roll them in sugar. Press each ball with your thumb. Place them on ungreased baking sheets and bake 12 to 15 minutes. Cool on racks.
Variations:  Add chocolate chips or nuts, roll the balls of dough in mint sugar, or glaze the baked cookies with pale green icing or melted milk-chocolate candy.
Substitutions: Substitute orange extract for the peppermint extract and fresh or dried calendula flowers for the mint leaves. Frost with an orange glaze and sprinkle calendula petals on top.

Lemon Thyme Cookies
Makes 3 to 4 doz
Fortunately, some intrepid herbs can be snipped all year round, even under the snow. Thyme is one of those.  I leave a plant in a pot by the back door until we have consistent below zero temps.  Then I bring it inside.  It usually fares better outside than in and having it by the door means I do not have to run outside in the cold to harvest a bit for a recipe like this.
• 1/2 cup butter
• 1/4 cup sugar
• 1 1/3 cups flour
• 2 tablespoons freshly snipped lemon thyme
1. Preheat the oven to 350 degrees.
2. Beat the ­butter with the sugar until fluffy, then add the flour and thyme. Roll the dough 1/4 inch thick and cut out shapes (we like stars).
3. Place the cookies on ungreased baking sheets and bake 10 minutes. Cool on racks.

Rose Geranium Frosted Cookies
Makes 3 doz.
This recipe which I adapted from Maggie Oster’s book Recipes from an American Herb Garden (Macmillan, 1993), has been adapted by others who recommend lavender as the main herb.  I choose to make mine with scented geraniums, as I have them on hand in the house for winter so fresh leaves are always available.
•      1/2 cup unsalted butter at room temperature
•      1 cup granulated sugar
•      1 large egg
•      1 teaspoon pure vanilla extract
•      1 1/2 tablespoon finely minced fresh lemon, rose or combination of both scented geranium leaves
•      1/2 cup buttermilk, plus extra for the glaze
•      1/2 teaspoon baking soda
•      2 cups unbleached all-purpose or whole-wheat pastry flour
•      1 teaspoon baking powder
•      1/4 teaspoon salt
•      1/2 cup confectioner’s sugar
•      Whole fresh rose geranium leaves
•      Additional buttermilk, for icing

Preheat the oven to 350 degrees. In a large bowl, cream the butter. Add the sugar, beating until light and fluffy. Add the egg, vanilla and herbs and beat thoroughly. In a separate bowl, stir the baking soda into the buttermilk. In another bowl, mix the flour, baking powder and salt together. In three batches, alternately add the buttermilk and flour mixtures to the creamed mixture, blending well after each addition. Cover and chill for 30 minutes. Roll the dough onto a lightly floured board to about 1/8- to 1/4-inch thick. Cut into shapes with cookie cutters and put the cookies on greased or parchment-covered baking sheets. Bake until lightly browned, about 8 to 10 minutes. Remove and cool on wire racks. Just before completely cool press a fresh leaf into the surface of the cookie.  Then when complete cool, combine the confectioner’s sugar with enough buttermilk to make an icing; spread the icing on the cooled cookies, over the leaves. Store in an airtight container.

Shortbread cookies do not rise much, but have a gentle not-so-sweet flavor that is perfect after dinner or serving with other finger foods.  They are especially good for the tea drinker in your life.

Anise Shortbread Cookies
Makes 2 dozen cookies 
These not-too-sweet anise shortbreads are just right with an after-dinner demitasse. Dipping them in ice water and rolling them in sugar before baking gives them an attractive crystalline finish.
• 2 sticks unsalted butter, softened
• 2/3 cup granulated sugar plus more for rolling
• 2 cups unbleached flour
• 1/3 cup confectioners’ sugar
• 1/4 teaspoon salt
• 1 tablespoon vanilla
• ½ to 1 tsp fennel seed or anise seed, lightly bruised with a mortar & pestle
Cream together the butter and sugar. Stir in the vanilla and anise oil. Gradually stir in the flour, confectioners’ sugar, and salt. Pinch off pieces of dough and roll them into balls.  Dip the balls in ice water and roll them in granulated sugar.  Place the balls on an ungreased cookie sheet, flattening them slightly.  Bake at 350 degrees for 12 to 15 minutes or until they just begin to color. Cool the cookies on a rack.

Rosemary Shortbread Cookies
Makes 3 to 4 doz.
• 1 cup butter
• 1 cup very fine granulated sugar
• 3 cups flour
• 3 to 4 heaping tablespoons fresh rosemary, finely chopped
Preheat the oven to 275 degrees. Thoroughly cream the butter and sugar. Add 2 1/2 cups flour and mix. Turn out on a board floured with the remaining 1/2 cup flour. Knead in the rosemary along with the flour until the dough cracks on the surface and doesn’t stick to the board. Roll it 1/4 inch thick, then cut into shapes. Bake on an ungreased cookie sheet 50 minutes, or until lightly browned. Cool on racks.

Tuesday, August 16, 2011

How Tuesday - Compound Herb Butters - Summer's Special Gift

Today's How To-sday is about making Herb Butter, sometimes called Compound butters

Herb butters are the best way I know to dazzle a dinner guest. Besides being less hazardous than letting your husband start the charcoal, they are embarrassingly easy to make and you'll rake in the compliments. As I say when I lecture, even some small part of you wants to seem like Martha Stewart, so why not take the easy road.  Herbal Butters are a terrific way to show off all the work you've put into your herb garden and relax while doing it!   

Nothing beats the savory flavor of herb butter with a warm loaf of bread, but don't limit yourself--use them when grilling steaks, broiling or sautéing fish; scrambling, poaching and frying eggs; basting chicken, dotting on carrots, squash, zucchini or roasting new potatoes. Herbs pack the butter with more punch, so you use less, saving fat and calories.

You can use either butter or margarine, but the flavors are different--especially when cooked. Butter develops a remarkable nutty flavor--incredible with most vegetables, but margarine is better for high-temperature cooking because it doesn't scorch as easily.

To prepare the herb butters, start by softening the butter or margarine. (All these recipes call for 1 pound -4 sticks, but you can halve them). Using an electric or stand mixer, beat until light and fluffy, scraping the sides often.  Blending will take anywhere from 3-5 minutes, depending on how powerful your mixer is and how bored you get.  The longer you blend the lighter and more spreadable the butter.  If in a hurry or if you want a less fluffy butter, you can use the faster method of skipping the beating and just using a fork to blend the herbs into softened butter.   To lower the fat, beat in a small amount of skim milk (no more than 1/3 cup per pound of butter).  

Once the butter is well mixed and fluffy, add the minced fresh or dry herbs and beat until well combined. When using dry herbs soak them for about 10 minutes in a tsp. of lemon juice before mixing into butter.  The basic instructions are the same for all the recipes listed here.

Herb butters are best made ahead so the flavors can blend--chill them at least 3 hours and serve slightly softened. They'll keep in the refrigerator for a month and can be frozen for up to 3 months.  

Marjoram - Thyme
1 tablespoon chopped fresh sweet marjoram, or 1 1/2 teaspoons dried (soaked in white wine or water)
1 1/2 tablespoon minced chives
1 tablespoon minced thyme
1 tablespoon minced parsley
Mix as instructed above.  Delightful with fresh bread, fish or vegetables--brush on new potatoes, cover and bake for 45 minutes.

Lemon
1 small clove garlic, minced or pressed
1 tablespoon lemon rind
1 tablespoon orange rind
1 tablespoon mixed lemon herbs like lemon thyme, lemon basil lemon balm or lemon verbena
A perfect accent for baked or broiled chicken, fish or duck.   

Rosemary
2 tablespoons minced rosemary (only 1/2 Tbls. dried)
2 tablespoons minced chives
Robust flavor is excellent with chicken, game hens or a hearty bread.


Jalapeno
6 jalapeno peppers (more if you're brave), seeded and well-chopped
1-1/2 teaspoons ground cumin
Try this with corn on the cob, chicken or potatoes.

Consider these recipes a springboard: other herbs good for butters include lemon thyme, basil, tarragon, sage and dill--and don't forget seeds, too. As a general rule, use 1 tablespoon fresh herbs per 1/4 pound butter.

TO SERVE --
  •  To eat with a crusty bread, pack it in crocks. For a more dainty look use a Madeleine pan, ramekin or small molds. (You can remove the butter more easily from a mold if you set it in a pan of hot water for a few seconds.)   
  • You can use a butter curler to make short or long curls or a melon baller for balls. Add texture to balls if you like with the back of a fork (peanut-butter-cookie style).
  • For individual portions, form the herb butter into a log, roll in minced herbs and slice into rounds. (This version freezes very well.) 
  • In a hurry? Shape into a mound on a plate using a rubber spatula (or your hands, I won't tell) and surround with the fresh herb of your choice.  If that's too messy for you, shape it on wax paper instead of a plate and chill for a few hours--the cold butter will be easy to transfer to a clean plate.
  • Or you can pat the butter onto a waxed-paper-lined shallow pan, chill and cut out shapes with cookie cutters, smoothing the edges with a finger dipped in hot water and garnishing with fresh herb sprigs.  
Use your inner Martha Stewart and create even more delightful butter designs.

If fresh herbs are not something you have access to, we recommend our specially blended herbs for butters and cream cheese, like Herbal Spread, Butter N Cheese and Cilantro Spread.  We have a Cream Cheese sampler with all three or you can buy a set of our 5 best butter blends here.

Thursday, October 17, 2013

Spiced Cider Time

This month for the Featured Product on the website, I chose my Print Cookbooks which will soon be going digital, instead of my favorites for October – Spiced Cider Blends or Cinnful Dessert Blend. 

However, that did not stop me from thinking about what to do with these great blends, so I decided to send my musings out in a blog post.

Spiced Cider or Mulled Spice Blends


Spice Tea Latte

Do you enjoy Chai or spiced tea drinks in the fall?  Try this – Place about 1 Tbls. of Spiced Cider blend in a tea ball infuser and place it in 2 cups steamed milk for about 5 minutes. Add this spiced milk to cups of freshly brewed hot black or green tea for a quick chai-like seasonal flair.  To add decadence top with whipped cream and a drizzle of caramel sauce.

You can also make this for a group by placing a Mulled Cider Spice bag into 4 to 6 cups of milk and warm gently on the stove for 5 to 10 minutes.  Remove the bag and use the milk in coffee or tea.

Cinnful Dessert Blend


Grand Pumpkin Cookies

A Butter cookie is quick and easy to begin with.  Make it even more special with seasonal panache with Cinnful Dessert Blend.  Make a Cinnful  Spiced Sugar by combining ½ cup of confectioners’ sugar with 1 teaspoon of Cinnful Dessert Blend. Next, make your favorite butter cookie or sugar cookie recipe and lightly dust the top of the cookies with Cinnful Spiced Sugar before or after baking.

Butter Cookies
1/2 cup(s) butter
1 cup(s) sugar
1 egg(s)
1 1/2 cup(s) flour, all-purpose
1 teaspoon baking powder
1/4 teaspoon salt

In a medium bowl, beat butter with an electric mixer on medium to high speed for 30 seconds. Add sugar; beat until combined. Add egg; beat until combined. Beat in flour, baking powder, and salt. Divide dough in half.  Shape each half of the dough into a 12-inch-long rope. Wrap and freeze about 4 hours or until firm.  Preheat oven to 325°F. Unwrap dough; carefully slice the frozen dough into 1/2-inch-thick slices. Place the slices, cut sides up, on an ungreased cookie sheet. Use your Cinnful Spiced Sugar sprinkle here.  Bake for 12 to 15 minutes or until edges are golden brown. Remove from cookie sheets; cool on a wire rack.


Pumpkin Pie French Toast or Pancakes

My husband is always looking to make breakfast a treat and when I showed him this idea we have been enjoying a bit of pumpkin-y goodness in the morning.  Stir ½ teaspoon of Cinnful Dessertblend into every 2 cups of French toast custard (egg-milk mixture) or 2 cups of pancake batter before cooking.  For great pumpkin taste add 2 Tbls of pumpkin puree to the batters as well. (You can also dust these with the Cinnful Spiced Sugar!)


Spiced Sweet Potatoes

Now candied Sweet Potatoes are a Thanksgiving staple, but this is faster and can make a perfect dinner addition.  Bake sweet potatoes until they’re nearly done; then slice halfway through each and add a sprinkling of Cinnful DessertBlend and a drizzle of honey or caramel sauce. Continue baking until the potatoes are done.


Tuesday, November 3, 2020

Bubble Bath Cookies - Bath Blend of the Month

 As we get into the holiday cookie baking season I thought I would share a cookie you can use in the bath instead of to increase your calorie intake.  They also make great gifts if you package a bunch of cookies in a box or clear bag.  Just make sure you label them "not for human consumption," because no one wants their mouth washed out with soap!

Bubble Bath Cookie

1 cup Baking Soda

1/2 cup citric acid

1 Tablespoon lavender buds or crushed peppermint candies

2 oz. liquid castile soap

1 oz cocoa butter, melted

1 oz shea butter, melted

few drops of essential oil

Directions: 

Melt your Cocoa Butter and Shea Butter over water in a sauce pan or double boiler.  Once they are melted, remove from heat and add the castile soap.  Stir to keep everything liquid. Combine all of your dry ingredients together in a large mixing bowl. Pour your Cocoa Butter and Shea Butter into your dry mixture, if you want this scented you can add a few drops of essential oil in any scent you desire. Mix until well combined. You want your mixture to hold its shape when pressed into a ball about 1 inch in diameter. Press the balls into a rounded flat cookie shape on wax paper or press into a silicone mold as tightly as you can. Allow to set overnight. Remove from molds and continue to dry for another 24 hours.  Decorate with lavender flowers, rose petals and sugar. Wrap for later use.

TO USE: Place one cookie in bath and allow to dissolve.  Enjoy a nice relaxing fizzing bubble bath.

Wednesday, May 22, 2013

Stevia - Herb of the Week

Stevia is an herb you hear quite a bit about in the press these days.  This is an herb I never grew much of when I first learned of it because it does have an odd taste that not everyone likes. 

However, with so much information out there, not all of it accurate, I decided that I should focus on this for the Herb of the Week - Stevia (Stevia rebaudiana)

Stevia is a genus of about 240 species of herbs and shrubs in the sunflower family (Asteraceae), native to subtropical and tropical regions from western North America to South America. The species Stevia rebaudiana, commonly known as sweetleaf, candyleaf, sugarleaf, or simply stevia, is widely grown for its sweet leaves. The leaves of the stevia plant have 30–45 times the sweetness of ordinary table sugar. The leaves can be eaten fresh, or put in teas and foods. As a sweetener and sugar substitute, stevia's taste has a slower onset and longer duration than that of sugar, although some of its extracts may have a bitter or licorice-like aftertaste at high concentrations.
With its steviol glycoside extracts having up to 300 times the sweetness of sugar, stevia has attracted attention with the rise in demand for low-carbohydrate, low-sugar sweeteners. Because stevia has a negligible effect on blood glucose it is attractive to people on carbohydrate-controlled diets.
The availability of stevia varies from country to country. In a few countries, it has been available as a sweetener for decades or centuries; for example, it has been widely used for decades as a sweetener in Japan. In some countries health concerns and political controversies have limited its availability; for example, the United States banned stevia in the early 1990s unless labeled as a dietary supplement, but in 2008 it approved rebaudioside A extract (from the S. rebaudiana) as a food additive.
Stevia genus were first researched by Spanish botanist and physician Petrus Jacobus Stevus (Pedro Jaime Esteve 1500–1556), from whose surname originates the Latinized word stevia. Human use of the sweet species S. rebaudiana originated in South America.  The plant was used extensively by the Guarani people for more than 1,500 years, and the plant has a long history of medicinal use in Paraguay and Brazil where the leaves have been traditionally used to sweeten local teas, medicines and as a "sweet treat".
In 1899 Swiss botanist Moisés Santiago Bertoni, while researching in eastern Paraguay, first described the plant and the sweet taste in detail. Only limited research was conducted on the topic until, in 1931, two French chemists isolated the glycosides that give stevia its sweet taste. These compounds, stevioside and rebaudioside, are 250–300 times as sweet as sucrose, heat-stable, pH-stable, and not fermentable.
In the early 1970s, sweeteners such as cyclamate and saccharin were suspected of being carcinogens resulting in further cultivation of steviua as an alternative, beginning in Japan. The plant's leaves, the aqueous extract of the leaves, and purified steviosides were developed as sweeteners. Japan currently consumes more stevia than any other country, with stevia accounting for 40% of the sweetener market.
Stevia species are found in the wild in semiarid habitats ranging from grassland to mountain terrain. They do produce seeds, but only a small percentage of them germinate.  Cultivation from cuttings or root division are more effective.

To Grow
If you enjoy gardening, Stevia can be a rewarding herb to grow. While it's not feasible for most of us to grow sugarcane or sorghum in our backyard, several Stevia plants will fit nicely into a small garden. Recipes utilizing Green Stevia Powder are now available, and the whole leaves add to the flavor of herbal teas.
Stevia rebaudiana seeds are rarely available because of production problems and poor germination, so plants are generally used instead. Plants are available from several mail order sources. Be sure you are getting Stevia rebaudiana since this is the only sweet variety. Stevia stems are brittle, but nurseries have developed packing methods to protect them in transit. Arrange for plants to arrive soon after your last frost date.  High temperatures may stress transplants. Transfer plants to the garden as soon as possible after arrival, making sure they don't dry out in the meantime.  Stevia stem cuttings root easily without hormones, but only under long day conditions.
Stevia rebaudiana is a tender perennial, native to semi-humid subtropical regions of Paraguay and Brazil. Wild plants occur on acid soils that are constantly moist, but not inundated, often near the edge of marshes or streams where the soil is sandy. In the garden, too, Stevia doesn't like to dry out, but standing water will encourage rot and disease. Stevia can be a successful garden plant in most climates with the use of a few simple techniques. Raised beds or hills prevent "wet feet," while an organic mulch and frequent watering ensure a constant supply of moisture.
In North America, Stevia survives winters only in the warmest areas such as southern California, Florida, and Mexico. Research in Japan indicates a critical winter soil temperature below 32 F to 35 F will result in the plant’s death . Stevia is a weak perennial, so plants grown as perennials should be replaced every few years. In colder areas, like ours here in Illinois, Stevia is planted after the last frost and treated as an annual. Longer summer days found at higher latitudes favor leaf yield and Stevioside content, since we are not much above sea level here in the Midwest, I have never been able to test this theory.
While tolerant of most soil types, Stevia prefers a sandy loam or loam. Any well-drained soil that produces a good crop of vegetables should work fine. Stevia occurs naturally on soils of pH 4 to 5, but thrives with soil pH as high as 7.5. However, Stevia does not tolerate saline soils. Unless your soil is very sandy, raised beds are ideal for Stevia. A raised growing surface prevents standing water and reduces compaction. Beds should be 3 to 4 feet wide and 4 to 6 inches high.
In garden beds, space plants 10 to 12 inches apart in the row, with two rows per bed. Stagger rows so that plants end up in a zigzag pattern. Use a trowel to dig a hole, then pour in some water and set the plants a bit deeper than they were in the pot, so the root ball is covered by a thin layer of garden soil. After back-filling around the roots, water again to settle the soil. If the weather is hot and sunny at planting time, it's a good idea to place a thin mulch around the plants to reduce moisture loss. Cool night temperatures will halt plant growth. For early plantings or areas with cool summers, hotcaps or row covers will allow faster growth and offer protection from late frosts. Don't let the plants overheat on hot days, however.
While a good compost usually satisfies nutrient requirements, soil testing or plant symptoms may alert you to deficiencies. Mark Langan of Mulberry Creek Herb Farm recommends low nitrogen or organic fertilizers. Excess nitrogen promotes rank growth with poor flavor.  When I found out that Stevia prefers the “hill” method I use in my production garden, I was off and running to grow some, especially when I had to replace a number of perennials this year die to the flood damage.  To grow in hills, set plants in low mound of dirt spaced 12 to 18 inches apart. Periodically during the growing season, pull more soil up around the plants with a hoe. This tends to smother weeds and drain away surface water which in turn discourages disease.

In general, Stevia should be treated as a vegetable crop. Where summers are extremely hot, stevia benefits from slight afternoon shade. Elsewhere, grow stevia in full sun.  When hot weather sets in, usually a month after planting, beds should be mulched 3 to 6 inches deep with organic residue such as grass clippings, chopped leaves, straw, hay, or compost. This will protect the shallow feeder roots and hold in moisture. Plant growth is slow at first, accelerating by mid summer. Stevia stems are prone to breakage during high winds. Left unpruned, stevia will grow into a lanky, upright plant that produces tiny white flowers in late summer. To maximize leaf production, you must trim back the plants several times to induce branching, first when plants are about 8 inches tall, and again in early summer. So pinching tips out every 3 to 4 weeks for the first month to encourage side branching will give you a bushier plant less prone to damage. (see my post on pinching for more details) 

Grow in a protected area if possible. Supporting the plants with a "corral" made from strings tied to stakes is another strategy.  I am considering making a willow fence to place along the top of the hill they growing for added protection.

Willow windbreak
williwIf you live in Zone 8 or warmer, stevia is often winter-hardy and grows as a short-lived perennial with a protective winter mulch. In colder climates, prepare two healthy parent plants for overwintering indoors. Choose 1-year-old plants grown from seeds or cuttings. Cut them back to about 6 inches, and prune roots as necessary to settle them into 6-inch containers with a light-textured potting mix. Move your stevia plants to a warm, sunny location indoors, or to a heated greenhouse. In spring, when new growth appears, cut most of the new stems and root them in moist seed-starting mix.

To Use
For centuries the Guaraní peoples of Paraguay used stevia, which they called ka'a he'ê ("sweet herb"), as a sweetener in yerba mate and other foods, and medicinally as a cardiac stimulant, for obesity, hypertension and heartburn, and to help lower uric acid levels. Current research has evaluated its effects on obesity  and hypertension. Stevia has a negligible effect on blood glucose, and may even enhance glucose tolerance; it may be useful as a natural sweetener for diabetics.
Use fresh leaves for tea or eat a few right off the plant. They taste great with mint leaves. Sweetness is greatest just before flowering, which is triggered by short day lengths. The onset of blossoming ranges from mid summer to late fall. Plants should be harvested before the first frost or as soon as blossoming begins, whichever comes first. Cut entire plants just above ground level. When growing Stevia as a perennial or for early harvests, clip the plants 6 inches from the ground so they will survive and re-grow. Most herbs should be harvested in the morning, after dew has evaporated, but it is even more important with Stevia as the flavor is at its peak in the morning.
In most areas, you can harvest stevia in midsummer by cutting back the plants by half their size, and again in early fall when new growth slows to a standstill. Stevia can be dried in bunches like other herbs. Plants are easily dried by hanging upside down in a dry, warm, drafty location. Bunch a few plants together and bind at the stem end with a rubber band. Store dried stevia leaves in an airtight container in a cool, dark place. Wait until you’re ready to use stevia leaves to crush them. They keep well for years. Stems are less sweet, so toss them on the compost pile. An alternative method is to strip fresh leaves from stems and spread on elevated screens in the sunshine, on a day with low relative humidity (less than 60%). If drying takes 8 hours or less, very little Stevioside will be lost. A food dehydrator on low heat (100 F to 110 F) will do an excellent job as well. Leaves are crisp, crumbly, and bright green when fully dry.
While whole leaves are great for making tea, it's easy to turn them into Green Stevia Powder with a kitchen blender, food processor, or coffee grinder with metal blades. With the blender bowl half full, process dry leaves at high speed for a few seconds. Collect the fine powder for use in recipes calling for Green Stevia Powder. Use a clean glass jar for long-term storage.
You can use the leaves of this healthy sugar substitute fresh or dried, but many people find the flavor improves if the sweet compounds have first been extracted in water or alcohol. With stevia, slightly under-sweetening drinks or fruit desserts tends to taste better than using too much. Too much stevia may impart a bitter or medicinal flavor.

Why Grow it if you can buy it?


Many commercial drink mixes and packaged sugar substitutes are sweetened with a derivative of stevia. This sweetening compound is called Rebaudioside A and is listed on labels as either Reb A or Rebiana. These are highly processed products developed by large food corporations. Most of the raw stevia used to produce these products is grown in China. These “natural sweeteners” have been stripped of many of the plant’s healthful properties. Teas, extracts and tinctures made from high-quality, whole-leaf stevia that you grow yourself or obtain from a farmer’s market, on the other hand, contain up to seven sweet compounds (glycosides) and an array of antioxidants.


RECIPES

When first starting to use stevia as a healthy sugar substitute, start with a little and increase the amount gradually and only in small increments. Take care not to overheat stevia teas or extracts. Such batches may be bitter.

Barbara Pleasant created a Stevia-to-Sugar Equivalent Chart for the February/March 2013 issue of Mother Earth Living that is worth checking out.

Making Sweetners –

Stevia Green Powder. Using a food processor or blender with metal blades, fill the blender bowl half full with crisp green dry leaves.  Process dry leaves at high speed for a few seconds until you get a powder that resembles rubbed sage. Use this in any recipe that called for powdered stevia or stevia liquid.

Stevia Tea. Fill a metal tea ball with 1 rounded tablespoon of dried, lightly crushed stevia leaves. Place in a clean pint canning jar, and cover with almost-boiling water. Steep 10 minutes before removing the stevia. Screw on the lid and keep in the refrigerator for up to 5 days. Yield: 2 cups (16 ounces), sweetness equivalent to about 2 cups sugar.   I like to use this because the sweetness equivalent is the same as sugar in a recipe making it easy to substitute.

Stevia Extract. Bring 1 cup water to almost-boiling, add one-half cup lightly crushed stevia leaves. Remove from heat, cover with lid, and steep 40 minutes. Strain through a coffee filter, and pour into a dark-colored container. Store in the refrigerator 1 to 2 weeks. Yield: 3/4 cup (6 ounces), equivalent to 3 cups sugar.  This is concentrated so use 1/3 what a recipe would call for in regular sugar.

Stevia Tincture. Place one-half cup dried, lightly crushed stevia leaves in a clean glass jar. Add 3/4 cup 100-proof vodka or rum. Screw on the lid and shake. Place in a cool, dark place for two days, shaking the jar twice a day. Strain through cheesecloth or a jelly bag, and place the liquid in a small saucepan. Heat on low until steam rises, and maintain that temperature for 20 to 30 minutes, (do not boil). This creates a more concentrated tincture while removing most of the alcohol’s taste and smell. Pour the cooled tincture into a dark-colored container. Store in the refrigerator up to 3 months. Yield: About 1/4 cup (2 ounces), equivalent to 6 cups sugar.   This is heavily concentrated so a teaspoon would equal a ½ cup of sugar.  If you use in a recipe you must replace the missing bulk of the ½ cup of volume.  You may just want ot use this for small sweetening jobs.  Store stevia tincture in a medicine bottle with a dropper to add it to drinks or prepared dishes by the drop.

Crisscross Peanut Butter Cookies
1/4 cup butter or margarine, softened
2/3 cup natural peanut butter
1/4 teaspoon powdered or clear liquid stevia extract 

2 tablespoons date sugar (optional)
1/2 teaspoon maple flavoring
1/4 cup apple butter
1 large egg
3/4 cup whole wheat pastry flour
1/2 teaspoon baking soda
1/2 teaspoon cinnamon
1/8 teaspoon salt

Preheat the oven to 350°F. Oil a cookie sheet. Soften and cream the butter or margarine in a mixing bowl. Cream the peanut butter into the butter. Mix in the stevia extract, date sugar, maple flavoring, and apple butter. Beat in the egg until thick and smooth.  Stir the flour, baking soda, cinnamon, and salt together in a bowl. Add the flour mixture to the peanut butter mixture.  Place large balls of batter on the cookie sheet using two spoons. Flatten each cookie with a floured fork, making a crisscross pattern.  Bake at 350 degrees for 12 minutes. Makes 16 large cookies or 24 smaller cookies.

Vegan Peanut Butter Cookies
1/4 cup oil
2/3 cup peanut butter
1/3 cup apple butter
2 ounces tofu (mix the tofu with the apple butter in a blender first)
1/2 teaspoon stevia extract 

2 tablespoons date sugar (optional)
1/2 teaspoon maple flavoring
3/4 cup whole wheat pastry flour
1/2 teaspoon baking soda
1/2 teaspoon cinnamon
1/8 teaspoon salt

Preheat the oven to 350°F. Oil a cookie sheet. Soften and cream the oil, apple and peanut butters and tofu together in a mixing bowl.  Mix in the stevia extract, date sugar, maple flavoring until thick and smooth.  Stir the flour, baking soda, cinnamon, and salt together in a bowl. Add the flour mixture to the peanut butter mixture.  Place large balls of batter on the cookie sheet using two spoons. Flatten each cookie with a floured fork, making a crisscross pattern.  Bake at 350 degrees for 12 minutes. Makes 16 large cookies or 24 smaller cookies.

Apple Crisp Recipe


Filling: 
7 to 8 cups chopped apples (peeling is optional)
3 tablespoons lemon juice or apple cider vinegar
1 teaspoon vanilla
1 to 1 1/2 teaspoons powdered stevia leaf or 1/2 teaspoon powdered or clear liquid stevia extract 

2 tablespoons whole wheat flour
3 tablespoons natural peanut butter (optional)
1 teaspoon cinnamon
1/4 teaspoon salt
2/3 cup apple juice or blend


Topping:  
1 cup rolled oats
2/3 cup chopped nuts and seeds
1/4 teaspoon powdered or clear liquid stevia extract (See “How to Make Stevia Extract” toward the end of this article.)
3/4 teaspoon stevia concentrate 
2 tablespoons oil


Preheat the oven to 350°F. Butter a large, 9 x 13-inch baking dish. Place the apples in a large mixing bowl. Stir in the lemon juice. Mix the vanilla, stevia leaf or stevia extract, flour, peanut butter, cinnamon, and salt into the apples. Pour the fruit juice into the bottom of the dish. Spoon in the apple mixture.  Mix the oats, chopped nuts and seeds, stevia extract, and stevia concentrate together in a bowl. Sprinkle and stir in the oil. Spread the topping over the apples so it is evenly distributed.  Bake for 50 minutes to l hour. If the topping gets done before the apples, cover pan with foil the last 15 minutes of baking.  Serves 8.
Option: Use about 1 1/2 cups granola for the topping. Mix 1/2 cup of the granola into the apples, and spread the rest on the top. No need to add the stevia extract, stevia concentrate, and oil from topping recipe above—granola already has sweetener and oil.
Related Posts Plugin for WordPress, Blogger...